Monday, January 30, 2012

Tuesday's Giveaway Linkup
Welcome to Tuesday's Giveaway Link Up with your hosts Aimee @ Classified: Mom & Karen @ Tots and Me & Alicia @ McCrenshaw's Newest Thoughts!


This link up will be posted Monday at 7 PM est. and run all week long! Make sure you stop in as often as you can to list your latest giveaways.


Here is how to use the Giveaway Link Up


1. Post your reviews and/or giveaways, as many as you have, be sure to add the end date (family friendly please)


2. Help spread the word about the giveaway link up by grabbing our button, Tweeting or posting on Facebook. (Not mandatory- but it helps get more exposure to your giveaways as well!)


3. Take a moment to enter any giveaway that strikes an interest to you!


If you would  like to follow the three hostesses, we will gladly follow you back! Simply leave us a message to do so.


Thank you for linking up with  Aimee @ Classified: Mom & Karen @ Tots and Me & Alicia @  McCrenshaw's Newest Thoughts! 


One SCARY Guy! {Mouth Man Hoodie #Giveaway (2/9) US}

This is what I get when I ask him to say "Cheese!"
If you aren't familiar with Mouth Man Hoodies, you're missing out! I was sent the Kids' Skeleton Hoodie Shirt for Little Guy and it has quickly become his favorite thing to wear. The graphics are beyond amazing - sharp and detailed - and printed with eco-friendly inks. And the hoodies are made of 100% Polyester Sport Fabric (recycled!) This isn't a heavy-weight material and is made to breathe, so it's perfect for year-round wear. Right now, it's cold out around here, so Little Guy has been wearing a long-sleeved tee under his hoodie. But, as the weather warms up, this will be perfect to wear outside in the spring or fall, and a great cover-up to carry around all summer for cool nights or windy days at the beach.

VERY cool graphics.
Now, I don't know how old each of my readers is but, according to my stats, it looks as if most of you grew up in the 70's and 80's - like me. So you'll be pretty familiar with the band Journey.  Guess who came up with the idea of Mouth Man Hoodies... The bass player, Ross Valory. AND, some of the graphics have been designed for Mouth Man by another (former) band member, drummer Prairie Prince. (((I can't get "Don't Stop Believin'" out of my head!)))You can read more about the creation of these fabulous hoodies and their designs HERE.

And check out those graphics. I think that the hood is my favorite part. The photos on the site don't show the hood, so I was really surprised and impressed when Little Guy pulled it over his head. And these aren't just cool graphics - we were able to even get a little learning about bones in over the past week. Now, whenever he bumps his head, I hear him say, "Mommy! I hurt my cranium!"

Here's the best part of the hoodies, and the reason they're named "Mouth Man" - when you cross your arms in front of you, the graphics on the elbow-area of the shirts create a head with a mouth! Once I put Little Guy in front of a mirror and showed him how he could cross his arms and then make the skeleton's mouth open and close, he was running around "YOMP-ing" Daddy, Brubber, and the poor, confused cat!
Don't you just love it when red-eye actually works in your photos?
Mouth Man has many more designs and is available in sizes from Kids 2T all the way up to Adults XXL. 

Enter To Win!
Mouth Man would like to give one reader their very own hoodie shirt! Just fill out the Rafflecopter form below.


Monday, January 23, 2012

Tuesday's Giveaway Linkup {1/24}

Tuesday's Giveaway Linkup
Welcome to Tuesday's Giveaway Link Up with your hosts Aimee @ Classified: Mom & Karen @ Tots and Me & Alicia @ McCrenshaw's Newest Thoughts!


This link up will be posted Monday at 7 PM est. and run all week long! Make sure you stop in as often as you can to list your latest giveaways.


Here is how to use the Giveaway Link Up


1. Post your reviews and/or giveaways, as many as you have, be sure to add the end date (family friendly please)


2. Help spread the word about the giveaway link up by grabbing our button, Tweeting or posting on Facebook. (Not mandatory- but it helps get more exposure to your giveaways as well!)


3. Take a moment to enter any giveaway that strikes an interest to you!


If you would  like to follow the three hostesses, we will gladly follow you back! Simply leave us a message to do so.


Thank you for linking up with  Aimee @ Classified: Mom & Karen @ Tots and Me & Alicia @  McCrenshaw's Newest Thoughts! 


Don't Throw Out The Baby with the Bathwater!

When I was a kid, my brother, sister, and I had "bath night". One night a week. It was usually on Wednesday because that's when The Dukes of Hazzard was on TV. My dad (he raised us) would fill the tub, set my little brother up with a snack in front of the TV - where he'd be glued until the last "YEE-HAW! - and my sister and I would go first. By the time he wrangled us into the tub, scrubbed us, and managed to wash and rinse both of our heads of hair (Against our "EEEK! Don't get it in my eyes!!!" protests), the TV show would be over. He didn't drain the water and re-fill the tub for my brother. He'd just add a little hot water to warm it up and it would be his turn yell about soap in his eyes. I was able to watch my sister while my brother, who absolutely hated baths, screamed like a banshee the entire time he was in the tub. No wonder we only got one bath a week!

I've been thinking about this lately because my kids have always had 2 - 3 baths a week until recently - my oldest MUST take a shower daily and Little Guy has been cut back to once a week. I think the new schedule for my oldest is pretty much self-explanatory to anyone who has had a teen boy in their home for more than a week! As for Little Guy, there were a couple of reasons for my changing things up.

First, we're cutting down on our water usage and baths take a lot of water. Next, he really doesn't get that dirty. I mean, he is covered by clothes most of the time, it's cold out so he's not sweating like crazy, and the dirtiest parts of him get washed many times a day - hands and face. In the summertime, he tends to get dirtier, but with his regular rinse-offs in the wading pool and sprinkler, a quick towel-off at the end of the day usually does the trick. If he happens to get extra-dirty one day, he can take a quick shower with me.

Finally, it's just easier. In my experience, many children have some fear of baths when they are around 18 months to 2 years old. Little Guy passed this stage with absolutely no problems. In fact, he used to smell his armpits and declare, "Ooo! I'm stinky and dirty! I sure need a bath." in hopes that we'd fill the tub. Sometimes he'd do this multiple times a day. But, recently, he's become afraid. I blame my husband for both of his fears: 1) The monster who lives in the drain, and 2) Getting shampoo in his eyes. Yep. He did it - he told Little Guy that there is a monster in the drain. He only had to say it out loud one time, during a very trying bath time where Little Guy kept jamming his entire hand down the drain. He was so afraid that his hand would get stuck and had tried everything else. It was one of those stupid things you say as a last resort and regret it even as the words are coming out of your mouth. I cannot get Little Guy to believe that Daddy was joking - he's scared!
Before the fears set in...

As for the shampoo... Little Guy used to love having water poured over his head. This made washing his hair the funnest part of giving him a bath. Then, one day, my husband couldn't find Little Guy's shampoo and decided to use the cold-process soap (yeah, the stuff that's made with lye) on his hair. The soap got into his eyes and burned and burned. Now, getting his hair washed is a nightmare. He kicks and screams and splashes. I had to go back to using tear-free shampoos because he squirms around so much that it's impossible to keep his eyes shampoo-free. Our city's use of chlorine in the water isn't helping matters - the water stings my eyes when I shower! His hair gets washed only when it loses its curl and starts looking dirty - I cannot see why I should wrestle him down once a week to clean mostly-clean hair.

So, due to Little Guy's bath strike and my oldest's need to take more showers, I've just been thinking a lot about bathing. Especially bathing throughout history. I remember reading that, in the western US, when pioneers were just beginning to settle, people took very few baths. Water was pretty scarce in most places. Ma would fill up a half-barrel with hot water and the entire family would wash in it every couple of weeks - sometimes just once a month! You know that saying, "Don't throw the baby out with the bathwater"? That comes from this little tidbit: Families would bathe in order from oldest to youngest, leaving the baby last. By the time the infant made it into the tub of luke-warm water, it'd be filthy. (I just cannot get that out of my head! I imagine that this is probably a big reason for so many disease-related infant deaths.) So that saying really hold much more meaning when you think of bathwater that is so dirty you wouldn't notice the baby in there!

I guess I'm done with my pointless rambling. The subject's just been on my mind.

How often do you bathe your children? Do you think it's too much, just right, or not enough?

Sunday, January 22, 2012

OH, What a Day It's Been!

Yesterday was a blissful day filled with peace. When Little Guy awoke, he sat up, stretched, and said, "A new day!" Made me smile to hear him say that because when I wake up, I usually say it to myself, in my mind. He must have made up his mind then and there to try his hardest to be "nice" to everyone. (We use "nice", "mean", "happy", etc. to describe how we're feeling and acting around here - I avoid "good" and "bad" as much a possible.) He was nice! He didn't whine or cry a split second after he realized we weren't going to do things his way. Instead, he would say, "Stop, stop, stop! I have to talk now. I want ____ because ___." And, we listened. Sometimes, he ended up getting what he wanted, other times we were able to explain calmly and rationally why he couldn't have what he wanted. He'd be sad or angry for a minute or two (and he told us this), so we'd try to help him cope with those feelings. Then, we'd move on.

There was no yelling, throwing toys, hitting, or deliberately doing the exact opposite of what we asked or what he knew to be one of our steadfast rules.All of those are things that usually occur on a daily, and sometimes hourly, basis around here. When I suggested that he might like to lay down to rest, he hopped into bed. At dinnertime, he told me how yummy the bread was. He kept his toys cleaned up without me even asking him. When he laid down in bed that night - ON HIS OWN - to go to sleep, I started to wonder what happened to my kid. Did he switch personalities with some other kid? Were there parents somewhere wondering why their normally easy-going and docile child had acted like a little nut all day?
Then today happened and I know that he didn't have a major shift in personalities. I woke up when he jabbed my closed eyes with his fingers. Before I could even sit up, he was jumping on the bed and demanding that I make him some tea, "NOW, MAMA!" Well, at least I knew better than to count on yesterday's behavior coming back again today, right?
But, you see, today has been quite awful and has put me to the test. I think that all of the orneriness that he didn't release yesterday built up and just popped a cork. It came pouring out today. Now, usually he drinks his tea and I drink my coffee first thing in the morning while we talk about our plans for the day. I'll make a list of what needs to be done and he'll come up with the fun ideas. My stuff consists of cleaning and cooking, his has things like "Do a project with paint" and "Go to the library". Well, today's list was a little different. His plans went like this:
  • I not goin' to listen to anybody
  • I goin' to make a mess
  • I not clean my toys
  • I throw cars
  • I goin' to be loud
  • I throw my food on floor and smash it
  • I goin' to head-bup [head-butt] and bite Brubber
It goes on and on - he pretty much listed everything that he could possibly think of that we do not like him doing.I diligently wrote his list out for him and then we went over it and I asked him why he wanted to do each thing. We really couldn't come up with answers. I thought maybe he'd had a bad dream and woke up angry or upset, but his dreams sounded like good ones to me.

Now, one of the things about our lists is we get to cross things off as we do them. And I really didn't know what to do with this list he had made. We weren't going to keep it! I asked him if maybe we could make a new list of fun things to do and he agreed. So we got rid of the old one and made a more normal list. Well, I might have thrown out the written list, but he had it in his head and crossed out every one of his plans before lunch. He's finally taking a nap and I am hoping he'll wake up in a much better mood. I don't know if I can stand an entire evening with this mess. Evenings are usually his worst behavioral times anyway, so I'm pretty creeped out by the thoughts of his determination to be a monster boy added to an already nasty time of the day...

I can't help but wonder if he's conducting an experiment. Maybe he's planned it all out: One day be nice, the next day be mean. Maybe he'll be an amazingly happy kid tomorrow? I can't see it happening in a child so young, but he's never been typical in his thinking. Only time will tell...

And, when he wakes from his nap, I'm filling him up with some chamomile and peppermint tea. It's worth a try to get him relaxed right away!

Week 3: January 15 - 21, 2010 {#Mamatography}

Mamatography 2012

It was so hard to choose photos for this week's Mamatography post. It seemed like I had the camera out all of the time. And we did so much! I had the kids help me choose which picture to include and this is what we decided on:
Day 15 (1/15/12)
"I push this button!"
Little Guy was just thrilled when "Brubber" invited him to play computer games on his laptop with him. Usually, we try to keep him away from our computers because he gets over-excited AND had that "I know what I'm doing and I'm going to do it myself" attitude going. The two of those, together, usually equal a computer that is completely frozen up within minutes and hours of trying to figure out how to fix it. But, my oldest patiently kept little guy in check and found a game that would allow him to use the mouse pad easily. He had the BEST time!


Day 16 (1/16/12)
Warm Winter's Catnap
Number 1 has been in heaven lately. He comes into the house after spending a few hours in the freezing cold, gets a bite to eat, then lays down somewhere for a nap - purring the entire time. I can't help but wonder if he ran into a stray who told him he should be grateful for a warm home and food in his belly. He's been showing his appreciation in many ways, too. He knows how much I like a kitty sitting on my lap, but he never really cared for it himself. Not recently! He's been bringing up "presents" to the door (and sometimes tries to sneak them into the house) in the form of field mice. My oldest usually is the recipient of these gifts, since he's often the first one to leave the house in the morning! And, he has even been hanging out with Little Guy, who has just recently made the differentiation between stuffed animal and real animal.

Day 17 (1/17/12)


Goofball
If you're my friend on Facebook, you already know about this picture. My oldest borrowed my camera for a school project he had to do (how cool is it that he can email his homework to his teachers?!) And, while he had the camera, he had to screw around a little, right? I found about 20 goofy pictures of him and his friend on my camera after he returned it to me. I jokingly told him that he should always delete photos after uploading, or they could make their way into the wrong hands. Then I mentioned putting one of the pictures on Facebook and tagging him in it. The kid actually DARED me to do it. Well, being the mom that I am, that's exactly what I did. I started feeling bad a few minutes later, so I removed the tag (the picture is still there.) I just don't know if one of his classmates might get a hold of his goofy picture and turn it into some kind of nasty joke. So, it's on my wall and he can tag himself in it if he wants. And I'll be having prints made of these photos because they are just too fun to forget about!

Day 18 (1/18/12)
You Could Have Put Your Eye Out!
You know how you're always warning kids to be careful with scissors? Yeah... While Little Guy and I were making our Craft Idea Book, I put the scissors down for a split second. That was long enough for him to come charging across the room at full-speed to grab them. Only I was faster and snatched them up. And, as you can see by the picture, I didn't do so safely. I stabbed myself in the hand - and it was a bloody one. Little Guy's eyes were like saucers when he saw what had happened. I think that he truly did not believe me all of those times I told him that scissors are dangerous. He probably thought I was just saying it to keep him from having all of the cutting-up-paper-fun. Ever since this occurrence, though, he hasn't tried to get my scissors. And I'm on the look-out for a good pair of child safety scissors for him. It is fun to cut paper and why should I be the only one to enjoy it?


Day 19 (1/19/12)
My Very Cold Friend
It was so cold! The wind was blowing like mad and the temperature, without taking windchill into account, was 9F. We have a pair of Blue Jays that have decided to winter in the woods behind our house and I couldn't help but see this bright blue guy all puffed up and trying to stay warm when I passed the window. I tossed a handful of seeds out for him and he quickly swooped down from his perch to fill his stomach.


Day 20 (1/20/12)
The Sick Blanket
Another chilly day. Rather than heading outside, Little Guy and I had an all-day indoor camping trip. This picture was taken early on in our day. We ended up making a campfire out of paper towel tubes and tissue paper. We made beds and Little Guy took a nap in his tent. We had snacks. We even went fishing, using sticks, yarn and paper clips for hooks. We didn't catch anything and concluded that fish do not like gummy worms, so we ate the worms for "dinner", instead!

See that striped, crocheted blanket? My great-grandmother made that before I was born (I think it may even be older than my mom.) It is known as "The Sick Blanket" because that is the blanket that we used whenever we were ill and laid on the couch in the living room all day, while our mom or dad nursed us back to health. It is used for the same purpose for my kids and, hopefully, one of them will become as attached as I have to it and their kids will get to know The Sick Blanket, as well. And when we were well, that blanket made the BEST tents... Still does!


Day 21 (1/21/12)
Wintertime
This is the picture of winter in my mind. Sled and squirrel tracks in the snow. Kids' footprints, big and small. The sunshine creating those cool blue shadows that you can only see in the wintertime across the snow...


So, what did your week look like? If you'd like to join me in this endeavor, just click on the Mamatography button at the top of this post to learn more. I'll be linking this post at Diary of a First Child's Week 3 Mamatography Linky when it's posted on Wednesday (1/25), so if you'd like to see more photos you should head over!

Saturday, January 21, 2012

See's Candies Brings Back Wonderful Memories {Review}

When we lived in Los Angeles, there was one store we'd always make a point to go into whenever we had a chance: See's Candies. They had the BEST chocolate I had ever eaten, and whenever you passed through the doors, a friendly See's worker would hold out a piece of candy and ask, "Would you like to try our <insert name of one of their 100+ varieties of chocolates>  today?" FREE CHOCOLATE! I learned that my favorites are Dark Bordeaux, Scotch Kiss, and Walnut Square. My oldest, who was just a little guy at the time, knew that he could always walk out of there with a Vanilla or Butterscotch Lollipop stuck in his mouth.

When we moved back east, I knew that See's Candies would be one of the things I'd miss most about L.A. Real candy stores are few and far between around here and, if you happen to find one, you're not going to get a free sample every time you walk into the store! Imagine how thrilled I was to find that See's Candies can be ordered online and even via catalog.

I received my first catalog in the mail about a year ago. I leafed through it over and over, reliving memories and drooling over some of my favorites. Things got busy, as they always do, and I set the catalog on the counter to take care of Little Guy. When my oldest arrived home from school, he saw that catalog and suddenly remembered all of the great times he'd had at See's Candy with me and his dad. He did the same thing I did with the catalog, often asking me if he ever tried this or that variety and whether he liked it. Seeing how thrilled he was about that catalog, I was able to save up a little extra money and ordered him a big box of chocolates for his birthday. He still has the box, which he keeps all of his important little mementos of L.A. in.

Do you have any candy stores in your area like See's Candies? 
Or, maybe memories of great candy stores from your youth? 
I'd love to hear them!

*** Disclosure: This post was written as part of my participation with Blogvertise.com. I will receive compensation for this post. All opinions are mine.

Storee Wryter Gets A Dog {Children's Book}

I was so happy to have the opportunity to review Storee Wryter Gets a Dog by Barbara Simpson Carducci. When I read the synopsis on the book's Web page, I just knew it would be a great book for my oldest to read to Little Guy. They've made it a habit to read books together when my oldest gets home from school every day. Here's what the page says about the story:
"Do you like to write? Are you always scribbling away in a journal or diary? Are you looking for inspiration for your next big story? If so, Storee Wryter Gets a Dog by Barbara Simpson Carducci is just for you! Storee Wryter is a young girl who loves to read and loves to write. Just like you, she hopes to see her stories get published someday.
Storee’s ideas for her writing often come from her many adventures. And when her friend, Kyria, talks her into getting a new puppy, Storee gets some great ideas for her next book while she and her cat, Critique, have fun watching her puppy learn to become a trained therapy dog.
                Join Storee as she learns to train her puppy to be helpful and soothing. Watch as Storee visits a classroom of special needs children, using her dog to reach out. And have fun with Storee as she gains new experiences certain to help her create her next bestseller! But most important of all, find inspiration for your next masterpiece as you read Storee Wryter Gets a Dog."

This book has so many different components that appeal to a wide range of young readers. Little Guy's favorite character was Critique, Storee's cat. This cat has such a large personality and is always entertaining. My oldest, who has always wanted a dog, said that he learned quite a few good way to train his puppy, "... if I ever get one." <Insert sad face here.>

For children with intense imaginations, I think this book will be a blessing. It will show them how their stories don't have to stay in their heads - they can be written down and possibly even published one day! I know that, as a kid, I had one of those imaginations. I never knew that my stories were worth anything - I thought they were just silly daydreams that only caused me to get in trouble for not paying attention in school. Had anyone shown me how to write my ideas down, I think I may have been a much happier and confident child. Storee Wryter is constantly on the lookout for writing ideas and, when she gets one, readers aren't just told that she writes it down. They learn the actual process of writing, just by reading the book. And, I ask you, what better way to learn than by simply enjoying a good book?

At the end of the book, there are two writing prompts so readers can give their writing abilities a try. These aren't the typical prompts that I see all too often and leave children struggling. I'm sure you've come across these, too: "Imagine you're a tree. What would you do?" GEEZ! How many of you could come up with a paragraph, or even a sentence, on the fly? No, these prompts are wonderful. They ask many questions and spark ideas. They give many paths for the writer to choose from and encourage the children with, "Use your imagination and start writing!"

And, if your child wants more prompts, you can head to Storee Wryter - A Blog For Young Writers every Thursday for a new prompt every week! I've already started using these prompts with both of my kids. Little Guy is too young to write, so my oldest gets paper and a pencil and he and Little Guy come up with a story together, based on the week's prompt. I absolutely LOVE hearing them working together. Often, I'll hear my oldest say something like, "You can't just decide the snake can fly!" And Little Guy will inevitably respond with, "Uh-huh! Mommy say stories are head pictures ["pictures in my head"]. My head sees snake fly!" How can you argue with that??? After dinner, my oldest will often draw a picture for little Guy to color in while I wash the dishes, then they'll read the story to me. And Little Guy almost always adds new parts to the story, driving my oldest nuts.

I am so happy that the kids are working together on such a great venture. And, I think that Barbara Simpson Carducci, the book's author, would be happy to know that her prompts have had such an impact on my family. I'm pretty sure she would because in addition to being an author, she is also the Executive Director for the Young Voices Foundation. This is a 501 (c) 3 Educational nonprofit that holds contests for young writers. From what I understand, the Foundation runs writing contests for children in kindergarten through 12th grade, where the writers can win cash prizes for their stories, poetry, and other pieces. Right now, my oldest (a wonderful verbal storyteller who hates school writing assignments) is working on his own story for their Young Voices of America Write Now! contest. He's got the incentive and motivation to put his story onto paper.

So , if you are looking for a book that is both appealing and will encourage your child to write more, this is it! This book would also make a great addition to an elementary school or classroom library. You can purchase an autographed copy of Storee Wryter Gets a Dog directly from the publisher. You can find unsigned copies from Amazon.com and Barnes & Noble. AND, you can also purchase this book for both Kindle and Nook!

***Disclosure: I received a paperback copy of Storee Wryter Gets a Dog for the purpose of this review. I will receive no other form of compensation. All opinions are my own.

Friday, January 20, 2012

Just Want to Let You Know...

I will be working with a couple of advertising companies in the future. I don't really like just writing ad posts, but we really need the money, you know? I have the option to accept or decline which things I post about, so I will make sure to only post about those items that I have looked into. I will always post something along the lines of, "This was a sponsored post..." at the bottom so you know which ones I have been (or will be) compensated for writing.

I do not plan to switch over to a sponsored-post all of the time, original posts sometimes blog. I am planning to post these, review posts, and giveaway posts on Saturdays only. That way, those who read for content only can skip on by on that day. And, those who like to enter giveaways and learn about new products can make a point to head over to see what I have to say about these products on Saturday.

SO, please don't get the wrong idea. I just have a good opportunity to make a few bucks to pay some bills and I'm taking it. I will not be taken over by these posts and I will not accept every paying offer that comes my way - only the ones that I have looked at and I feel are on the up-and-up and fall into the same categories that I blog about.

Thursday, January 19, 2012

Reuse Last Year's Planners and Calendars!

What do you do with your old planners, schedule books, and calendars? I have one wall calendar, hanging by my desk, where I write down all of our plans and milestones. I save that one in a file box. It's kind of like a record of all of the things we did that year. I also have a planner that I use to keep track of blog posts and gardening (like when I planted the peas and when I picked the first tomato.) My husband has a day planner that he keeps all of his scheduled doctor's appointments in. And my oldest, of course, has a student planner that he is supposed to use to keep all of his assignments straight in - he doesn't use it very often... We also receive a few free promo planners in the mail that I usually give to Little Guy to write his "lists" of things to do in - just like Mommy, Daddy, and Brubber do.

At the end of the year, we find that we have these planners and calenders just sitting here. We don't want to throw them out, but what good are they? I'll tell you! You can use them as idea books.
As I was cleaning out my very messy corner of craft supplies, I found the stack of magazines and catalogs that I've been hoarding. Each one had at least one great idea that I wanted to use - a kids' craft, recipe, or DIY project. I really didn't have anywhere to put all of these magazines and, heck, I didn't even know which idea I was saving each book for just by looking at the cover. So, Little Guy and I went through each one and cut out all of the good ideas that we wanted to make someday.
Most of the time, I could just cut out a photo from the magazine or catalog and that would be enough. I don't really like following step-by-step instructions for things that are creative. Instructions make me feel as if I'm doing it wrong if I veer from the "rules" that have been set down. Plus, I tend to read the "Supplies Needed" list and, if I don't have one, I'll skip the project until I do have everything. By just having a photo of what I want to make, I can use my own imagination to figure out how to go about creating the item and which supplies we can use.

So, we spent a couple of afternoons just flipping through those magazines and catalogs, cutting out pictures of things that looked like fun. Now we had a pile of clippings. How was I going to keep them in some kind of order without losing them? As I pondered, hubby came through with his old planner and asked if he could throw it away (See how I have him asking about throwing things out? He's learned not to toss anything into the trash can before asking if I need it for something. Even banana peels are saved here - they add LOTS of potassium to the garden soil!) His asking me at that particular time was perfect - I could use the planner for the clippings!

I arranged the clippings into piles for each month - snowy/winter crafts for January, hearts and lovey crafts for February, etc. When he awoke, we got working on our books. His job was to put a tiny dot of glue onto each cut-out and place it on the planner page for the corresponding month. My job was to hand him the clippings, suggest a good place to glue the clipping (overlap can happen in an instant with an excited little guy!), and help turn the pages of the planner. Now we have our "Idea Book" to look at whenever we're feeling crafty. We can just open it up to the current month and choose from the pictures.


I also used planners for recipes and DIY projects. The recipe book was made from a planner that had an entire page for each day. There are many more pages in that book so I could clip the entire recipe (no, I can't just look at a picture of food and figure it out! LOL) and have room for more. Stew, soups, and other hearty, stick-to-your ribs recipes are glued into the winter months' pages. Quick, warm dinner ideas are in the November and December pages for those days when we're busy with holiday-related activities and there just isn't time for big, complicated dinners. And, of course, I have light, cool dishes in August; and I've got picnic-type recipes stuck to the June and July pages. Birthday cake ideas are now easy to find by turning to the months for everyone's birthdays.

My DIY book is separated by the seasons, rather than months. I simply took a marker and drew a border around each page for each season - blue for winter, green for spring, red for summer (hey, it's hot out!), and orange for fall. The times of year that each project would best be done is where I glued those clippings. So, I have a really neat indoor seed starter idea pasted on a green page. And there is a pretty wind chime made with dried leaves in the orange section. See what I mean?

I have more ideas for making other books:
  • I'm going to start looking for homeschooling ideas next, since Little Guy is getting to the right stage to start more learning activities. 
  • My oldest keep magazines for drawing ideas that he has seen in them - I think I could persuade him to cut the ideas out and recycle the magazines.
  • My husband takes a zillion different medications. He also collects old PDR's. I wonder if I could get him to cut the drug info and photos for each thing he takes and glue them into an old planner? It sure would take up less space than 6 old PDR's (have you seen how big they are?!). Plus, he'd have a little book to take to doctor's appointments, showing exactly what he takes. He could even pencil in the amounts and frequencies of each medication. I know that, if he ever keeled over, I'd have a list of meds to take to the ER with me for easy reference for the ER doctors.
I'd love to hear your ideas of books these used-up 
planners and calendars could be re-purposed into. 
What kind of clippings would YOU glue into an old planner???

Wednesday, January 18, 2012

Better Living with OATS! {4 Great #Recipes}

My family costs an arm and a leg when it comes to breakfast. No, I don't cook pancakes, bacon, sausage, and eggs every morning. I don't buy fancy pastries or anything like that, either. Breakfast around here consists of two choices: cold cereal or oatmeal.

I used to buy the "good" cereals. You know, the organic, whole-grain stuff? I stopped when the price went up to $4 for a small box. I moved on to the name brand healthy stuff in the regular cereal section. It still cost more, but I wanted cereal that was good for my family and with an ingredients list that didn't read like a chemistry book. Then, my oldest hit a growth spurt that hasn't slowed. In fact, it's gotten worse by the day. The kid was putting away a box of cereal and a gallon of milk a day! I resorted to the cereal that comes in bags and has names like "Fruity O's". It was the only way I could keep the kid full without starving the rest of us.

There had to be a better way to feed this kid. I mean, he's growing at an alarming rate. All of the food he puts into his body is being used to its fullest potential. I really didn't want the makeup of his body (for the rest of his life!) to be based on Fruity O's ingredients! I decided to go back to the fancy healthy cereals I was buying in the first place, only I wanted to make them myself. I knew that the proper ingredients for growing a man would be in the granola and it would fill him up much faster and for much longer and using a much smaller amount.

And then there was the oatmeal problem. Since he could feed himself with a spoon, Little Guy has been eating oatmeal for breakfast every day. At first, it was organic baby oatmeal. Then he moved up to Better Oats instant oatmeal. (The stuff is fantastic, by the way!) Now, I rely on instant oatmeal in the morning for him. I usually mix it with hot water for him, then set it on the counter to soak up the water and cool while I get that first pot of coffee brewing. By the time I pour my cup of coffee, his oatmeal is ready, and we quietly wake up at the table together - him with his oats and me with my cup of coffee.

Then my husband, who always had sworn off oats as "yucky" decided that he really liked Little Guy's Better Oats. He started eating two packages at once a couple of times a day for a snack. Do you have any idea how much those things cost?! And there are only 5 packets in a box! The last straw came when, for the third time in a week, I went to make Little Guy's breakfast and there weren't any packets left - just an empty box. ARGH!!! I started hiding Little Guy's breakfast in weird places so hubby wouldn't eat it all - at one point, I had four boxes of oatmeal in my underwear drawer. I was inspired by THIS POST to create my own instant oatmeal packets. This way, hubby can eat as much as he likes and I know that Little Guy's breakfast won't disappear!

So, here are some of the recipes I've come up with. At the very bottom of this post, I'm linking to the recipes that have inspired me or that helped me get the ingredient amounts and cooking processes figured out. I suggest that you check those link out because they may prove to be very helpful!

Instant Oatmeal Packets
  • 3c. whole rolled oats
  • instant baby oatmeal (if you like thicker oatmeal)
  • non-fat dried milk
  • flax seed
  • wheat germ
  • brown sugar
  • dried fruit, coconut, sunflower seeds, nuts, whatever you want
  1. Put the oats, 1 cup at a time, into the blender and process using the ice crush setting on pulse. If you don't have this, just turn the blender on and off. Pulse 5-7 times, until it looks as if the oats have all been cut at least once. Kind of hard to describe now that I'm trying! Empty the blender canister into a bowl after each session.
  2. Divide your oats into sandwich bags, 1/4 to 1/3 cup per bag. It just depends on how large a serving you or your kids will eat. Little Guy just moved up to 1/3 cup... must be growing again! Now, you don't have to use sandwich bags for this - small plastic containers or even glass jars would be great. I don't happen to have those. I reuse the plastic bags when I make more instant oatmeal, anyway. I just have my husband and son put the emptied bags into a re-purposed coffee can on the counter.
  3. Into each bag, measure: 1 Tbsp. baby oatmeal, 1 Tbsp. dried milk, 1 tsp. flax seeds, 1/2 Tbsp. wheat germ, 1 Tbsp. brown sugar. Add the goodies! I put about 2 Tbsp. dried fruit (freeze-dried fruit works well, too) and 1 tsp. sunflower seeds into Little Guy's because that's what he likes.
  4. Seal all of the baggies and then get the kids into the kitchen to help you. The ingredients in the bags need to be mixed up, particularly the brown sugar. If you don't mix that up, it'll end up becoming a rock of brown sugar that won't dissolve!
  5. To make oatmeal my way: Heat up 1/4 c. of water to boiling or near-boiling. Empty oatmeal packet into a bowl and pour hot water over it. Stir well and let sit for about 5 minutes (just long enough to get the coffee pot going!) Stir once more and add honey to taste.
  6. To make in the microwave: Cereal in bowl, 1/4 c. water mixed in, cook for 30 seconds to 1 minute. You may need to add some more water or a little milk because cooking it this way seems to result in a much thicker oatmeal.

Do you burn granola when you attempt to make it in the oven? Just a little too much heat or cooking time can ruin an entire batch of granola. The burnt flavor permeates every oat. And the ingredients in this stuff are too expensive to just toss when it burns. After my first experience of making (and burning) granola, I've been hesitant to try again. Until I learned you can make it in the crock pot. Now, using a crock pot to make granola doesn't mean you're exempt from burning! You still have to keep an eye on it and stir often. But, if you have different heat settings on your crock pot, you can relax a little.When I know I'll be busy and won't remember to stir, I turn the crock pot to "warm". When I'm in the kitchen cooking or cleaning and can be right on top of the granola, I set it to "high". And, when I'm on the computer or just hanging out with the kids, I put it on "low".

I have 1 7qt. crock pot. The amounts listed in the recipes fill it about 1/2 way. This gives me plenty of room for stirring without making a huge mess. If your crock pot is smaller, try cutting down on some of the ingredients. These recipes do not need to be followed exactly as written. If you don't like sunflower seeds, omit them. If you'd rather use coconut oil instead of butter, go for it. Just make sure the flavors of the things you add will meld together well. You don't want to use a strong-flavored olive oil, for instance. And don't add melty things (like chocolate chips) until after the granola is made and cooled. You'll just wind up with a huge mess if you add them before cooking!

Now, I made two batches of granola. My first batch failed the family taste test. First, I didn't add any salt. I didn't even think of adding it. When my husband and oldest said it was "missing something", it was the only thing I could think of. Salt brings out the flavor if the other ingredients, and you really don't need much of it for that boost. Second, it wasn't sweet enough for them. They tried adding sugar, honey, and brown sugar on top of the cereal, but it made it "taste funny". These guys are used to the colorful cereals in boxes on the store shelf, so I can see where it would be a problem for them. I used the first batch to make chewy granola bars (recipe below) and then changed some of the ingredients and amounts in the second batch (last recipe on this post), which they both love.

Crock Pot Granola #1 
(The not-so-sweet version)
  • 5 c. rolled oats (not instant or quick-cooking)
  • 2 Tbsp. flax seeds
  • 1/4 c. raw sunflower seeds, unsalted
  • 1/4 c. flaked coconut (I used sweetened, you don't have to)
  • 1/4 c. slivered almonds (get the ones that still have the brown husk - it's way healthier!)
  • 4 Tbsp. wheat germ
  • 1/4 c. EACH: finely chopped pecans and walnuts
  • 1/2 c. honey
  • 1/2 c. melted butter, unsalted
  1. Mix all of the dry ingredients in your crock pot.
  2. Melt butter and pour it and the honey over the granola mixture. Fold together with a large spoon until everything is coated well.
  3. Turn crock pot on LOW. You want to cover the crock pot to keep the heat in, but you also need to leave it vented so the moisture can escape. I just leave my wooden spoon in the crock pot. It sticks out enough to hold the lid off enough for venting. You could also use chopsticks or simply put the lid n askew to leave an opening. If you notice a lot of condensation inside the lid, you need to leave a larger opening. 
  4. Stir every 20 to 30 minutes. Make sure you are getting into the corners, sides, and bottom of the crock. Make sure to stir it thoroughly each time. The parts of the granola that are touching the crock will, obviously heat up faster and are more prone to burning. (If you have it set to high, stir every 5 or 10 minutes. Set to low? Stir 30 to 40 minutes.)
  5. Keep an eye on the color of your granola. It can take anywhere from 2 to 4 hours to cook, depending on your heat setting. You'll know it's done when it's a nice golden brown. Don't base doneness on how crisp the cereal is. Cooling time will make it crunchier.
  6. Pour granola onto a baking sheet (or two, depending on how quickly you want it to cool) and spread evenly. Let cool for 30 to 45 minutes. You want to make sure it's completely cool before putting it away.
  7. I keep my granola in gallon-sized food storage bags. Just like with the instant oatmeal, I reuse these bags over and over. You can use whatever you'd like to store your granola. Just make sure it's airtight. And, as I said above, make sure it's completely cool before packaging it. If it's still warm, it can still have moisture in it. Putting warm granola into an air-tight container will result in soggy granola and it will spoil quickly.
  8. To serve: Just pour into a bowl, add a little milk, and munch away! You can also heat it up a little in the microwave. I love eating slightly warmed granola. Add to yogurt, top muffins with it, whatever you like!

It took me a lot of searching to understand how to make a good chewy granola bar. There are millions of recipes for them, but I wanted a particular texture. I like the texture of the Quaker Chewy Granola Bars. Toothy, a little crunch, easy to pull apart, won't crumble into a bunch of little pieces that I have to vacuum up. There were a lot of chewy recipes that called for flour, eggs, baking soda... To cake-like for me. Then there were the ones that relied on corn syrup. I'm not going into the corn syrup debate here, just know that I like to keep away from the stuff. I finally found a handful of recipes that use sweetened condensed milk. I checked out the ingredients list on the can I had in the cupboard (for years!), and this is what it had to say: Milk, Sugar. That's it. I don't know what kind of sugar, I still have to look it up.Anyway, it passed my requirements - for now.

The recipe below was made using my Crock Pot Granola #1 recipe. If you don't want to go through all of that, you can just mix 4 cups of oats and 3 cups of dried fruits and other add-ins together for this. You're going to want to toast them until they're brown. You can just mix them together, put them on a baking sheet, and pop them into a 200 F oven (stirring very often) until they start to brown (about 15 minutes or so?)

Chewy Granola Bars
  • 7 c. Crock Pot Granola #1 (see the paragraph above if you don't have any)
  • 1/4 tsp. Kosher salt (optional, use less if you use table salt)
  • 1 can (oz.) sweetened condensed milk (make sure your can does NOT say: evaporated milk!!!)
  • 1 c. chocolate chips (Optional - I added them for the kids)
  1. Heat oven to 325 F. Line a jellyroll pan (baking sheet - 15"X10"X1") with parchment paper. You could also spray, butter, or oil the pan. However, I found that this can leave the bars somewhat greasy. Plus, using parchment allows you to lift the baked bars out of the pan and onto a flat surface for easier cutting.
  2. Mix all of the ingredients together very well. Fold and fold and fold until every bit is coated with the milk.
  3. Pour the mixture onto the pan and press it down firmly. This is important because if you don't have it all packed tightly, the bars will fall apart on you. Now, this part can be very sticky. I usually coat my hands in oil (avoid strong-flavored oils) to keep the stickiness down a little. I've also found that you can lay a sheet of waxed paper or parchment over the top of the granola and the use a rolling pin to press it all down. I just hate wasting the paper for that one job, you know?
  4. Bake for 15 to 20 minutes. Because my oven's heat is not evenly distributed, I rotate the pan halfway through cooking to even out the baking.
  5. Let cool for 5 to 10 minutes.
  6. Cut into bars. You must do this while it is still warm. You don't have to separate the bars just yet. But, if you don't cut them now, you will find it near impossible to cut them. I can get 24 bars that are approx. 2"X3.5" - the perfect size for my family's snacking needs.
  7. Let cool completely. Completely. This is going to take about 30-45 minutes, maybe more. As with the granola, you need to make sure these aren't holding any moisture before wrapping. 
  8. I wrap my bars individually using small pieces of plastic wrap. I do this because these bars are often grabbed by my oldest as he's on his way out the door. You can just put them into a food storage container, if you prefer. Just make sure the layers of bars are separated by waxed paper or something else because they will slowly meld together into a gigantic hunk of granola bar (trust me - I know this one!)

And, finally, here's my granola recipe that passed muster with my oldest and my husband. It is very sweet and crunchy. I've just copied and pasted the instructions from the Crock Pot Granola #1 recipe above, since the procedure is the same. Any changes I have made in the instructions below are in italics. I also added some pumpkin seeds to this one. I didn't have them when I made the first recipe. Oh, and I only had 4 cups of oats left, so that's what I used. I'd have put in five if I had them.

Crock Pot Granola #2 
(The sweet stuff)
  • 4 c. rolled oats (not instant or quick-cooking)
  • 1/4 tsp. Kosher salt (if you use table salt, use less!)
  • 1/2 c. slivered almonds
  • 1/2 c. raw sunflower seeds, unsalted
  • 1/2 c. pumpkin seeds, unsalted and shelled
  • 1/4 c. EACH: finely chopped pecans and walnuts
  • 2 Tb. flax seeds
  • 1/4 c. wheat germ
  • 1/2 c. flaked coconut
  • 1/2 c. dried cranberries
  • 3/4 c. honey
  • 1/2 c. melted butter
  • 1/4 c. dark brown sugar, packed
  1. Mix all of the dry ingredients in your crock pot.
  2. Melt butter and mix in the brown sugar. It won't completely dissolve the sugar, but it will make it easier to make sure that the sugar is evenly dispersed throughout the granola. Pour butter mixture and honey over granola mixture. Fold together with a large spoon until everything is coated well.
  3. Turn crock pot on LOW. You want to cover the crock pot to keep the heat in, but you also need to leave it vented so the moisture can escape. I just leave my wooden spoon in the crock pot. It sticks out enough to hold the lid off enough for venting. You could also use chopsticks or simply put the lid n askew to leave an opening. If you notice a lot of condensation inside the lid, you need to leave a larger opening. 
  4. Stir every 20 to 30 minutes. Make sure you are getting into the corners, sides, and bottom of the crock. Make sure to stir it thoroughly each time. The parts of the granola that are touching the crock will, obviously heat up faster and are more prone to burning. (If you have it set to high, stir every 5 or 10 minutes. Set to low? Stir 30 to 40 minutes.)
  5. Keep an eye on the color of your granola. It can take anywhere from 2 to 4 hours to cook, depending on your heat setting. You'll know it's done when it's a nice golden brown. Don't base doneness on how crisp the cereal is. Cooling time will make it crunchier.
  6. Pour granola onto a baking sheet (or two, depending on how quickly you want it to cool) and spread evenly. Let cool for 30 to 45 minutes. You want to make sure it's completely cool before putting it away.
  7. I keep my granola in gallon-sized food storage bags. Just like with the instant oatmeal, I reuse these bags over and over. You can use whatever you'd like to store your granola. Just make sure it's airtight. And, as I said above, make sure it's completely cool before packaging it. If it's still warm, it can still have moisture in it. Putting warm granola into an air-tight container will result in soggy granola and it will spoil quickly. The granola will be chunked together in this recipe after cooling. You can break it into whatever size pieces you prefer.
  8. To serve: Just pour into a bowl, add a little milk, and munch away! You can also heat it up a little in the microwave. I love eating slightly warmed granola. Add to yogurt, top muffins with it, whatever you like!
 Inspiration and how-to links:
Homemade Granola at Simplify, Life, Love
Granola at Crock Pot Recipe Exchange
Homemade Oatmeal Packets at The Frugal Girls
Homemade Chewy Granola Bars at Framed Cooks

Enjoy! 
I'd love to know what ingredients you like in your granola. Do you add anything to give it some UMPH, or to make it super healthy? Oh, and I would love any ideas you might have for wrapping the granola bars individually without making a heap of plastic wrap trash. It needs to be disposable because I'm not about to send my oldest out of the house with a $7 reusable snack bag that will inevitable get lost!

Little Guy's Favorite Activity {Wordless Wednesday}

Jumping on the bed with no pants on. Yep. Actually, his very favorite activity is Naked Bed Jumping. He'd win the Olympic Gold Medal in this sport. The shirt is only on because I insisted - it was cold in here!
(Psst! Want to place bets on how many disappointed weirdos check out my blog this week thanks to a Google search that went terribly wrong?)


"...And the Gold goes to..."
Hope the leaf is enough... I used Paint to draw a cute little pair of undies, but couldn't figure out how to put them on him. Ended up using Picnik to do the leaf. If anyone could share the link to a good, FREE photo editing site, I'd really appreciate it!
Here are the undies... Wouldn't they have looked cute on him?

Thanks for stopping by and checking out my Wordless Wednesday post. 
Leave me a link to your Wordless Wednesday post and
I'll stop by to check it out - 
Just so you know, it might take me a while.
But I WILL be there!

Monday, January 16, 2012

Get Rid of Those Winter Blues & WIN Something - Tuesday's Giveaway Linkup {1/17}

Tuesday's Giveaway Linkup
Welcome to Tuesday's Giveaway Link Up with your hosts Aimee @ Classified: Mom & Karen @ Tots and Me & Alicia @ McCrenshaw's Newest Thoughts!


This link up will be posted Monday at 7 PM est. and run all week long! Make sure you stop in as often as you can to list your latest giveaways.


Here is how to use the Giveaway Link Up


1. Post your reviews and/or giveaways, as many as you have, be sure to add the end date (family friendly please)


2. Help spread the word about the giveaway link up by grabbing our button, Tweeting or posting on Facebook. (Not mandatory- but it helps get more exposure to your giveaways as well!)


3. Take a moment to enter any giveaway that strikes an interest to you!


If you would  like to follow the three hostesses, we will gladly follow you back! Simply leave us a message to do so.


Thank you for linking up with  Aimee @ Classified: Mom & Karen @ Tots and Me & Alicia @  McCrenshaw's Newest Thoughts! 


Week 2 - January 8 - 14, 2012 {#Mamatography}

Well, I can't believe I've made it to the second week! I seem to always have good intentions when I start this type of thing. Unfortunately, when I miss a day or two, I seem to give up. I know there are other "take a picture a day for a year" memes out there, but I chose this one for a couple of reasons: 1) I love reading Diary of a First Child. 2) The guidelines of Mamatography are very laid back, making it feel less of an obligation and more of a fun experiment. The one thing that really hooked me was this from the Mamatography info post:
"If things happen and you can’t participate for a while, that’s fine – just start up again when you can."

Mamatography 2012
Yay For Clean Dishes!

Day 8 (1/8/12)

Yeah, I was lazy. The only thing I did that was productive all day. Well, I made dinner, too, but it shouldn't count. I just opened a jar of spaghetti sauce, then added a few herbs and the leftover meatloaf from the night before. Oh, and cooked some pasta.


I Wear My Sunglasses at Night
Day 9 (1/9/12)

I saw the moon and just had to take a picture! I love how the clouds give a smoky, mysterious feel to the photo. And the corona is so bright! It was easier to see the line between the moon and the corona circling it with the naked eye than through the lens on my camera. One of these days I'll learn how to take photos that look the same as how I see them.


Mustache Man!
 Day 10 (1/10/12)

When my oldest was little, he called these beans. Well, actually, he still does (and so do I!) Little Guy, who seems to have a different way of looking at everything, has decided that they are not beans. They are most definitely mustaches, instead. Just after this picture was taken, my oldest came up and asked Little Guy what he was doing with the "bean". He got an earful and I don't think he'll be calling them anything but "mustaches" around Little Guy again!!


Zzzz...
Day 11 (1/11/12)

This hasn't happened... ever! He said, "Mama, please be quiet. I need a rest. I'm in a grumpy mood." Once I got over my shock, I began to wonder if he might be getting sick. Nope. Wouldn't it be cool if he was just learning to recognize his  need for sleep AND deciding to follow it?!


"Snot's On!"
Day 12 (1/12/12)

I've taken it upon myself to develop a recipe for a cotton play dough. I want something that is pliable like dough, but fuzzy like cotton balls. This was my first (failed) attempt. I wound up with a pot full of snotty cotton. ICK!

I added a bunch of flour until it was dough-ish, and let the kids have their fun with it.


Day 13 (1/13/12)

Yeah. Completely forgot to take the camera out all day.


Uh-Oh!

Day 14 (1/14/12)

We finally got some snow! This was Little Guy's first snowball fight. As you can see, the mittens are way too big for for him (the site I got them from said they fit ages 2-5. Those things are just a little too small for me to wear!) Anyway, my oldest showed him how to take his hands and push the snow together to pack it into a snowball-like formation. Pretty cool big brother, huh?


So, what did your week look like? If you'd like to join me on this endeavor, just click on the Mamatography button at the top of this post to learn more. I'll be linking this post at Diary of a First Child's Week 2 Mamatography Linky when it's posted on Wednesday (1/18), so if you'd like to see more photos you should head over!

Friday, January 13, 2012

Making Time for Me {Mindful Parenting Collaboration #5}

If you’re reading this, you might have the feeling that you want to change some of your parenting practices or, perhaps, you're curious about “mindful parenting” and what it could be. Well, congratulations for taking a moment from your day to click on the link. Erin of it’s OK and I are going to be working together over the next 40 weeks (!) on a journey toward more mindful parenting and would love to have you join us. To learn how we envision The Mindful Parenting Collaboration working, please read the introductory post HERE.
My post last week threw some readers for a loop. I received some private correspondence via my contact form that went from someone telling me what a terrible person I am all the way to someone sharing a story very close to mine that occurred on New Year's Day, too. I received reprimands, congratulations, and pats on the back. I know that what I told you about my lovely explosive reaction to being out of milk was pretty extreme. It was the result of self-neglect and holding everything in for a very long time. Just like the bottles of champagne that many people had shaken up just before midnight the night before, I blew my cork.

I am not proud of what happened. I probably would have not shared it here if the topic had been anything else! I apologized to my family. I felt guilty about my outburst for days. I even had nightmares about it. It took me a while to realize the root of the problem. I shared the experience here because I wanted you to know what could happen when we don't take care of ourselves as individuals. Taking care of our families is important, but we really can't be the best parent or partner if we neglect ourselves.

Below, I've shared some of the things I did over the past week to take care of myself, both mentally and physically.

Friday
Just after dinner, I left the dirty dishes in the sink. I told hubby that he was in charge of Little Guy - I was taking a bath. Soaked for an hour AND read a magazine. Actually shaved! THEN, took a shower, too. OMG! It felt so good to have that time to myself. I don't think it was the shower so much as the quiet and space to think. Yes, it felt over-indulgent, but the little bit of guilt was worth it.

Saturday
I won a $25 Gift Card to Sears recently. I had planned on using it to buy something we needed: a new toaster, for instance. Then I realized that I could use it at K Mart, too. You know what I did? I spent most of it on myself! I literally haven't had new underwear since BEFORE I got pregnant with Little Guy. Every pair O owned was either full of holes, stretched out, or totally unraveling. I bought 6 new pairs! (Came home and relegated the old ones to the rag pile!) I also got myself a new razor - the one I used last night was rusty and dull. I bought two brand new washcloths for just me. They're bright pink so no one forgets! I'm tired of hubby and oldest using a new washcloth every time they wash some part of their body, leaving me none. I bought a bottle of nail polish, too. This is another thing I haven't had since before I got preggo. I plan to use it, too! Oh, and I got an address book and a planner for my blog.  I really wanted a separate address book to keep track of my invisible friends in the computer. And, though I have a wall calendar where I keep track of my blogging, I really wanted a small book-type planner that I could carry around with me to keep ideas and plans as they come to me - lest I forget.

I did but some household stuff, too. Mainly toilet paper and cat food - things we always need. This, too, felt indulgent. I was very close to pulling my cart out of the check-out lane to put most of it back and get that toaster and maybe a family game, but then it was my turn to pay. I'm so glad I bought the stuff. I can't tell you how nice it feels to know I have pretty undies on! And I can't wait to give myself a mani/pedi.

Sunday
Didn't do much of anything specifically for myself, although I did use all of nap time to write blog posts and I spent a few hours after he went to bed reading and commenting on others' blog posts and entering giveaways.

Monday
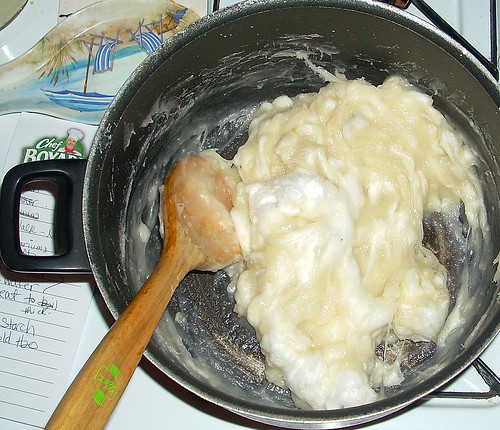
My husband and oldest took Little Guy out for an "explorer adventure" in the woods. They had planned to be gone for just an hour or so. They ended up gone for 2 1/2 hours! I took the time to wash the dishes (without a 3 y.o.'s "help") and do some baking. I even got to wear headphones and listen to music because I didn't have to keep an ear open to listen for crashes or the eerie silence of sneakiness. And, when they got home, there were freshly baked cookies greeting them! (BONUS: The extra-long walk tired out Little Guy enough to knock him out for a 2-hour nap!)

Tuesday
This was they day that we went on a nature walk and made our terrariums. Both of these events had a little in store for me as well as Little Guy. The walk was great because the area is open enough and safe enough foe him to run wild without me having to reel him in closer to me. I had a chance to enjoy being outside and was able to take extra time to look closely at the trees, watch wildlife, and take photos. And, making the terrariums was a lot of fun, too. I was able to release some pent-up creativity while also doing a project with Little Guy. I did not have to go out of my way today to find a way to get some isolated "me time" in.

Wednesday
Just not a good day. No time for myself and no time for much of anything else. The only time I had to myself was when I headed into the bathroom and screamed into a towel. Hey - it was better than reliving the scene I made on New Year's Day and it helped me get through the rest of the day.

Little Guy was in an ornery mood and tried every way he could to get me to explode. Yes, he was really trying - after he would do something (like drop a toy car into his peed-in potty), he'd look at me to see if I'd notice. I am pretty sure he was just testing limits, but an entire day of his testing had me close to the edge. And I'm not kidding, it was as if he was brainstorming and testing - "If this didn't make mama yell, maybe this will..."

And hubby was no help at all. He came into the living room to give me a break. Little Guy decided to test him, too. Within 5 minutes, my husband decided he just couldn't take it anymore and hid in the bedroom. As he was scurrying away, he looked at me and said, "I just can't get him to listen to me and you won't make him do what I say!" I have a LOT to say about this, but not now. This post would turn into a HUGE rant and that's not what it's about.

And, yes, the oldest was in on "make mom lose her cool" day, too. It wasn't any one thing from him, just lots of little stuff. He dropped his school stuff in the middle of the kitchen floor and left it there - he knows where to put it and that's NOT the place. He stood in the kitchen, eating some candy someone gave him at school, making all of the "mmmm!" sounds - three feet away from Little Guy. When Little Guy asked for some, he popped the last piece in his mouth and told him it was all gone, tough luck. (Teasing drives me nuts, especially when someone his age is doing it. He should know better. But, I do know that whatever the disparity of their ages, sibling rivalry lives.) He complained about dinner not being done, but refused to keep an eye on his little brother so I could make it. Etc. Typical teen behavior that I can usually deal with calmly, but after the rest of the day, this was the cherry on top.

Thursday
This is the last day I'm keeping track of what I've done for myself. My oldest forgot to set his alarm clock, so he missed the bus to school. When Little Guy woke up, he snuck into our room and quietly put puzzles together with him while I SLEPT IN! Now, my oldest got into a little trouble because he knows that he was supposed to head downtown and jump on a city bus to go to school. He is also required to pay for his bus ride because he is the one responsible for setting the alarm. His excuse for not doing that was because he didn't want to spend the money. Boy, is he lucky he let Mom sleep until 11am!

Since he didn't do what he was supposed to regarding missing the bus, he became "Bidderman" (definition for a Bidderman is at the link, second from last paragraph. I highly recommend getting your own if you have a teen or tween.) for the day, which gave me time to do more baking and play around on the computer. I looked up some recipes for hulled barley and am really looking forward to making them. I also managed to create a grocery list and match up coupons to it without having Little Guy's "help", making the job last 10 minutes rather than an hour!


Everyday
  • Meditation - Now, I've tried and tried to meditate and just couldn't. Too many thoughts running in and out of my head. Most started with, "Instead of this, I really should be doing..." Well, on Friday, I decided to give it a try again. I usually lay with Little Guy as he goes to sleep at night and watch an old movie or nature documentary with the sound off and closed captions on. I also list in my head all of the things I need to do. I decided to turn off the TV and just lay there, in the near-dark, thinking of... nothing. It took me some time to get all of those nagging thoughts out of my head. But, one-by-one, they flew out (through my ear?) I felt at peace. I floated on the bed. I was unconsciously smiling! Eventually, I got up and realized that I'd spent an entire hour, after Little Guy had passed out, just relaxing. I've done this every night since and I can't tell you how wonderful I feel. Some nights are harder than others to "find my bliss", but I'm getting the hang of it. It seems like my mind knows when that hour is up, too. So far, I haven't gone over or under it. 
  • First cup of coffee by myself. 

I cannot believe the difference that taking a little time for myself has made in my mood and my responses to my family. Doing things for myself each day still makes me feel guilty, though. I keep thinking about what I should be doing instead. I think that I will eventually get over this little hiccup, though.

I want to take more time to be creative. I could have done so during some of the time I was given to do so, but I found out something: I can't think of what to do! Creating used to be so natural. I'd pick up a pencil and doodle a little something. Pretty soon, I had a page covered. Then, I was coloring it in. As I created, I'd get a great idea for painting or drawing a more permanent form of my doodle and off I'd go. Now, when I start to doodle, all I seem to draw are monster trucks and trains. I have a couple of items that I really want to make, but I'm just sitting here, waiting for some inspiration. I might have to give myself a jump start by forcing the issue at first...

I never did get around to doing my nails. Oh, well. There's always next week, right?


    Grab the InLinkz code to add to your own Mindful Parenting Collaboration post!