Showing posts with label homeschooling. Show all posts

Friday, March 30, 2012

A New Parenting Blog (You'll Like It!)

It can be tough to jump back into writing on a regular basis after taking such a long vacation from it. It is especially difficult when you cannot think of anything to write about. I usually write about the fun projects the kids and I are working on or parenting in general. Unfortunately, things have been getting rougher and rougher around here with both kids. I know that some of it has to do with their reactions to the stress I'm feeling. No matter how much you try to hide something like this, it still shows. And, with my oldest, I am honest. He gets a simpler version of what's going on because 1) I don't believe in lying to him by saying that everything is going to be OK - it may not, and 2) if things do get bad, I don't want it to be a shock to him.

As for Little Guy, I am having a terrible time. It's as if he wants to constantly argue with me over everything. He'll ask for a flavor of juice that he knows we don't have, then whine and cry and throw a HUGE tantrum over not getting it. He wakes up in the morning telling me, "Today, I not gonna listen to you, Mommy!" All of the rules get broken all of the time. Not only the silly ones, like pick up your toys. The serious ones, too: no touching the electric outlets. He's thrown Hot Wheels at the TV screen, tossed my coffee mug down our wooden staircase, he runs off when we're on walks... into busy streets. I gave up on cooking and washing dishes with him because he's managed to cut me with a paring knife when I told him to please put it down (he put it down with force on my hand!) and he's broken a ton of dishes by tossing them on the floor just to see them crash. I feel that there is more than his reaction to stress to blame for this sudden change in behavior (no, he hasn't had any vax!)

Anyway, just when I thought I had no where but a physician to turn to (I really don't want labels such as "ADD" on his medical chart - especially at only 3 years old), I heard that a new blog is starting up that may just help me with these and many other parenting problems I will come across. The blog is written by three mothers who have a total of 17 children, ranging in age from 1 to 16 (and one on the way!). And, these aren't just any moms - they are moms who have the same parenting philosophies as I. They "...ascribe to Attachment Parenting, Gentle Discipline, & Natural Family Living philosophies; each in our own way. We wanted to create a place to share our lives as "crunchy" Moms with other similar-minded Moms." Their blog, Grateful Moms of Many, is scheduled to launch on April 1, 2012 and I, for one, cannot wait! On the site, you will find articles on many topics, including pregnancy & birth, breastfeeding, multiples, special needs children, schooling, discipline, frugality, crafts, recipes, mental health, and generally the unique challenges that moms face in daily life. It sounds like the PERFECT mom blog to me!

I really love how these three moms (Sasha, Nic, and Michelle) met each other. They were all on an Online Due Date Club - you know, where expectant moms can commiserate with other women who are at the same stage of pregnancy. Once their children were all born, the three moms stayed in touch via a private Facebook group. Though they all share similar parenting philosophies, they also believe that every parent does what he/she feels is best for their children. You won't find judgment on this blog, only support. And, with the years of experience that these Moms of Many have, you can almost bet that all kinds of interesting things have been encountered. That leaves me feeling as if I can find the help I need with my own kids.


If you can't wait for their April 1st launch, you can head over to their Facebook page, Grateful Moms of Many. There are already a few questions posted and the community there feels wonderful - lots of great ideas being generated and no judgemental attitudes.


 Oh, and I almost forgot! 
To celebrate the Grateful Moms of Many's blog launch 
on April 1st (you know what day that is, right?!), 
there will be a special giveaway 
with a nice little prank-like twist! 
April Fool's! 
So, don't forget to go check it out - I'll give you a quick reminder post so you don't forget. :)

Saturday, January 21, 2012

Storee Wryter Gets A Dog {Children's Book}

I was so happy to have the opportunity to review Storee Wryter Gets a Dog by Barbara Simpson Carducci. When I read the synopsis on the book's Web page, I just knew it would be a great book for my oldest to read to Little Guy. They've made it a habit to read books together when my oldest gets home from school every day. Here's what the page says about the story:
"Do you like to write? Are you always scribbling away in a journal or diary? Are you looking for inspiration for your next big story? If so, Storee Wryter Gets a Dog by Barbara Simpson Carducci is just for you! Storee Wryter is a young girl who loves to read and loves to write. Just like you, she hopes to see her stories get published someday.
Storee’s ideas for her writing often come from her many adventures. And when her friend, Kyria, talks her into getting a new puppy, Storee gets some great ideas for her next book while she and her cat, Critique, have fun watching her puppy learn to become a trained therapy dog.
                Join Storee as she learns to train her puppy to be helpful and soothing. Watch as Storee visits a classroom of special needs children, using her dog to reach out. And have fun with Storee as she gains new experiences certain to help her create her next bestseller! But most important of all, find inspiration for your next masterpiece as you read Storee Wryter Gets a Dog."

This book has so many different components that appeal to a wide range of young readers. Little Guy's favorite character was Critique, Storee's cat. This cat has such a large personality and is always entertaining. My oldest, who has always wanted a dog, said that he learned quite a few good way to train his puppy, "... if I ever get one." <Insert sad face here.>

For children with intense imaginations, I think this book will be a blessing. It will show them how their stories don't have to stay in their heads - they can be written down and possibly even published one day! I know that, as a kid, I had one of those imaginations. I never knew that my stories were worth anything - I thought they were just silly daydreams that only caused me to get in trouble for not paying attention in school. Had anyone shown me how to write my ideas down, I think I may have been a much happier and confident child. Storee Wryter is constantly on the lookout for writing ideas and, when she gets one, readers aren't just told that she writes it down. They learn the actual process of writing, just by reading the book. And, I ask you, what better way to learn than by simply enjoying a good book?

At the end of the book, there are two writing prompts so readers can give their writing abilities a try. These aren't the typical prompts that I see all too often and leave children struggling. I'm sure you've come across these, too: "Imagine you're a tree. What would you do?" GEEZ! How many of you could come up with a paragraph, or even a sentence, on the fly? No, these prompts are wonderful. They ask many questions and spark ideas. They give many paths for the writer to choose from and encourage the children with, "Use your imagination and start writing!"

And, if your child wants more prompts, you can head to Storee Wryter - A Blog For Young Writers every Thursday for a new prompt every week! I've already started using these prompts with both of my kids. Little Guy is too young to write, so my oldest gets paper and a pencil and he and Little Guy come up with a story together, based on the week's prompt. I absolutely LOVE hearing them working together. Often, I'll hear my oldest say something like, "You can't just decide the snake can fly!" And Little Guy will inevitably respond with, "Uh-huh! Mommy say stories are head pictures ["pictures in my head"]. My head sees snake fly!" How can you argue with that??? After dinner, my oldest will often draw a picture for little Guy to color in while I wash the dishes, then they'll read the story to me. And Little Guy almost always adds new parts to the story, driving my oldest nuts.

I am so happy that the kids are working together on such a great venture. And, I think that Barbara Simpson Carducci, the book's author, would be happy to know that her prompts have had such an impact on my family. I'm pretty sure she would because in addition to being an author, she is also the Executive Director for the Young Voices Foundation. This is a 501 (c) 3 Educational nonprofit that holds contests for young writers. From what I understand, the Foundation runs writing contests for children in kindergarten through 12th grade, where the writers can win cash prizes for their stories, poetry, and other pieces. Right now, my oldest (a wonderful verbal storyteller who hates school writing assignments) is working on his own story for their Young Voices of America Write Now! contest. He's got the incentive and motivation to put his story onto paper.

So , if you are looking for a book that is both appealing and will encourage your child to write more, this is it! This book would also make a great addition to an elementary school or classroom library. You can purchase an autographed copy of Storee Wryter Gets a Dog directly from the publisher. You can find unsigned copies from Amazon.com and Barnes & Noble. AND, you can also purchase this book for both Kindle and Nook!

***Disclosure: I received a paperback copy of Storee Wryter Gets a Dog for the purpose of this review. I will receive no other form of compensation. All opinions are my own.

Thursday, January 19, 2012

Reuse Last Year's Planners and Calendars!

What do you do with your old planners, schedule books, and calendars? I have one wall calendar, hanging by my desk, where I write down all of our plans and milestones. I save that one in a file box. It's kind of like a record of all of the things we did that year. I also have a planner that I use to keep track of blog posts and gardening (like when I planted the peas and when I picked the first tomato.) My husband has a day planner that he keeps all of his scheduled doctor's appointments in. And my oldest, of course, has a student planner that he is supposed to use to keep all of his assignments straight in - he doesn't use it very often... We also receive a few free promo planners in the mail that I usually give to Little Guy to write his "lists" of things to do in - just like Mommy, Daddy, and Brubber do.

At the end of the year, we find that we have these planners and calenders just sitting here. We don't want to throw them out, but what good are they? I'll tell you! You can use them as idea books.
As I was cleaning out my very messy corner of craft supplies, I found the stack of magazines and catalogs that I've been hoarding. Each one had at least one great idea that I wanted to use - a kids' craft, recipe, or DIY project. I really didn't have anywhere to put all of these magazines and, heck, I didn't even know which idea I was saving each book for just by looking at the cover. So, Little Guy and I went through each one and cut out all of the good ideas that we wanted to make someday.
Most of the time, I could just cut out a photo from the magazine or catalog and that would be enough. I don't really like following step-by-step instructions for things that are creative. Instructions make me feel as if I'm doing it wrong if I veer from the "rules" that have been set down. Plus, I tend to read the "Supplies Needed" list and, if I don't have one, I'll skip the project until I do have everything. By just having a photo of what I want to make, I can use my own imagination to figure out how to go about creating the item and which supplies we can use.

So, we spent a couple of afternoons just flipping through those magazines and catalogs, cutting out pictures of things that looked like fun. Now we had a pile of clippings. How was I going to keep them in some kind of order without losing them? As I pondered, hubby came through with his old planner and asked if he could throw it away (See how I have him asking about throwing things out? He's learned not to toss anything into the trash can before asking if I need it for something. Even banana peels are saved here - they add LOTS of potassium to the garden soil!) His asking me at that particular time was perfect - I could use the planner for the clippings!

I arranged the clippings into piles for each month - snowy/winter crafts for January, hearts and lovey crafts for February, etc. When he awoke, we got working on our books. His job was to put a tiny dot of glue onto each cut-out and place it on the planner page for the corresponding month. My job was to hand him the clippings, suggest a good place to glue the clipping (overlap can happen in an instant with an excited little guy!), and help turn the pages of the planner. Now we have our "Idea Book" to look at whenever we're feeling crafty. We can just open it up to the current month and choose from the pictures.


I also used planners for recipes and DIY projects. The recipe book was made from a planner that had an entire page for each day. There are many more pages in that book so I could clip the entire recipe (no, I can't just look at a picture of food and figure it out! LOL) and have room for more. Stew, soups, and other hearty, stick-to-your ribs recipes are glued into the winter months' pages. Quick, warm dinner ideas are in the November and December pages for those days when we're busy with holiday-related activities and there just isn't time for big, complicated dinners. And, of course, I have light, cool dishes in August; and I've got picnic-type recipes stuck to the June and July pages. Birthday cake ideas are now easy to find by turning to the months for everyone's birthdays.

My DIY book is separated by the seasons, rather than months. I simply took a marker and drew a border around each page for each season - blue for winter, green for spring, red for summer (hey, it's hot out!), and orange for fall. The times of year that each project would best be done is where I glued those clippings. So, I have a really neat indoor seed starter idea pasted on a green page. And there is a pretty wind chime made with dried leaves in the orange section. See what I mean?

I have more ideas for making other books:
  • I'm going to start looking for homeschooling ideas next, since Little Guy is getting to the right stage to start more learning activities. 
  • My oldest keep magazines for drawing ideas that he has seen in them - I think I could persuade him to cut the ideas out and recycle the magazines.
  • My husband takes a zillion different medications. He also collects old PDR's. I wonder if I could get him to cut the drug info and photos for each thing he takes and glue them into an old planner? It sure would take up less space than 6 old PDR's (have you seen how big they are?!). Plus, he'd have a little book to take to doctor's appointments, showing exactly what he takes. He could even pencil in the amounts and frequencies of each medication. I know that, if he ever keeled over, I'd have a list of meds to take to the ER with me for easy reference for the ER doctors.
I'd love to hear your ideas of books these used-up 
planners and calendars could be re-purposed into. 
What kind of clippings would YOU glue into an old planner???

Thursday, January 12, 2012

Moss Terrariums {Crafty Science!}

I have been wanting to make a terrarium since I first saw them on Etsy, at the end of last summer. I vaguely planned to make them as Christmas gifts, then got caught up in back-to-school & Halloween. Suddenly the holidays were upon us and it was too late. I figured we'd do it as one of our spring projects. Until I was gazing out the window, checking out the squirrels and birds, when I saw this:
 See that lovely patch of green between the dying grass and the fence? It's moss! With the weather being so mild, and even warm on some days, the moss has been "living" it up. I kept my eye on it for a few days and then I just couldn't contain myself any longer. I dressed Little Guy for a nature walk and tossed a few plastic bags and spoons into a tote and we were off to collect things for our terrariums. In January. In Michigan. (Yes, I'm going to keep saying that. I am still amazed at the weather and will continue to be awed until there is 6" of snow on the ground and the temperatures have stayed below 30 F for at least a week!)
Once he finished running around like a nut, we got down to business. It was time to walk very slowly and see if we could spy any moss growing. Once we found a good patch, we collected some of it. Now, when you look for moss for this project, make sure of a few things:
1) Only take a little from each patch and leave the rest to regenerate.
2) Use a spoon or spatula to carefully lift it from the ground. It's pretty hardy stuff, but you want to make sure to lift the entire plant - including its root system.  
3) Don't forget to get some soil from the same area, preferably from directly under where the moss was growing. We found three different types of moss on our outing and each one had a very different type of soil beneath it: One had mostly rocky, sandy soil; one had a soil that was composed mostly of dead grass; a third had very rich soil that was mostly composed of what Little Guy refers to as "worm poops".
4) Take note of how moist the soil below the moss is. You are going to want to try to mimic that amount of moisture in your terrarium.  
5) Also be on the lookout for some nice-looking small pebbles and a few sticks or pieces of tree bark that have signs of moss or mushrooms (or, what Little Guy calls "fun guys") on them. We found a stick with some white "moldy" spots on it, a piece of bark from a tree stump with a mushroom, and bark from a dormant tree with green spots. We're excited to find out if anything sprouts from them!
Now, I want to tell you that you can use nearly anything to make your terrarium. I learned quite a bit from Storm The Castle. (This is THE coolest site for finding really neat things to do, by the way. Go bookmark it right now. I promise you'll use it. Repeatedly.) We used two different things for our terrariums: old honey jars and a plastic cake carrier that someone gave us a store-bought cake in for our terrarium containers. But, really, as long as it is see-through and has a lid or small opening, go for it: aquarium with a crack in it, glass vase, 2-liter pop bottle... Just remember that you're going to have to be able to get stuff into the container and arrange it! (Storm the Castle has a great tutorial on how to make really long tweezer-type thingies from a wire coat hanger so you can reach. I told you that site is great!)


Start by laying down the dirt you collected. Because the cake carrier is near-impossible to open without really jostling whatever is inside, I knew that we wouldn't be able to open it up to add water very often. So, I took a plastic lid that is about 1/4" deep and placed some cotton into it (the white rectangle on the left of Little Guy in the photo). I put this in the center of the cake "plate" before adding dirt. After we got the soil in place, I poked a small hole in the mound above the cotton-filled lid and poured some water into it, as well as all over the rest of the soil. My reasoning for the cotton was so it would hold a layer of moisture without saturating the soil. Don't know if it will matter in the end, or not. Just my theorizing!

(After I took the photo above, I noticed that pieces of dirt and rocks were falling into the area where the dome part of the cake carrier would fit into the bottom. So, I tore up a piece of paper towel into strips and poked them into that area to keep the debris out. You can see the paper towels in the photos below. Keep this in mind while you do the next part!)

So, where was I?! Oh, yeah: add your soil. Make sure to keep track of which soil is added where if you're using different mosses with different soil needs! Pile it up so you have a nice hill if your base is a flat piece like out cake dome has. If you're using a bottle-like container, try using a funnel to direct the different soils to different areas and attempt to get a mound going in there. This is important because, if you ever really look at the lay of the land that your moss is found on, you'll notice that it is usually on an inclined surface, even if it's only slight. Make sure to save some of the soil for later - you're going to need it to fill in spaces between the moss. Once you have your mound of soil, ever so slightly pack it down and moisten it. I just poured a little water onto the cake plate, I used a spray bottle of water for the honey jars.

Now it's time to add the moss! The pieces we had were rather large chunks, so I showed Little Guy how to gently pull them apart into small pieces. I had him decide where to place it. He loved being in charge of this part of the operation! It took forever for him to decide. He kept putting a piece down, turning it a little... moving it to the left, to the right... Sometimes he completely abandoned a piece in favor of a different one. It was really cool to watch him!

Once the moss was in place, I carefully added the reserved soils in between the pieces of moss. Then it was time for Little Guy to add the embellishments we collected. Now, I considered grabbing some tiny "guys" toys and a couple of tiny cars to include in the terrarium, but though better of it. Just before I went digging through the toys, I had a very disturbing vision: Little Guy attempting to recover his toys. Dirt everywhere. Terrarium ruined. Now, if your kids are cool with using toys inside, go for it. I think it would be pretty cool to create a scene with them. Just make sure that whatever you add to your terrarium will be able to withstand the high levels of moisture that it will encounter. Also consider whether it might give off any toxic fumes when wet or warm. The cute little plastic bunnies you add could end up killing all of the living things in there.

I think that I probably added too much moisture to our cake dome terrarium. Since opening and closing it just isn't an option, I have a back-up plan. If I notice that the dome is constantly coated in water droplets or the mosses or fungi start dying, I am going to poke small holes in the top of the plastic dome. This can be done very easily without marring the view: Just take a small nail or even a thick sewing needle and hold it with a pair of pliers over fire (a lighter or the burner of a gas stove.) Um... make sure your pliers are insulated or you're wearing an oven mitt! It doesn't have to get red hot, just hot enough to melt the plastic. Then, poke small holes through the dome, toward the top. This should allow enough moisture to escape without completely drying it out.

Our Finished Products:


This was such a fun and easy project to do. While we worked on it, we had some great conversations about ecosystems, habitats, what plants need to grow, what kind of rocks we were using, the water cycle... We also pondered the possibility of small insects, seeds, and spores being mixed into the soil we used. I'm anxious to see if any surprises grow in our terrariums.

I have another plastic domed container that has been sitting on top of my refrigerator since last spring. I've known it would be great for some use, but was waiting until I was inspired with an idea to use it. This thing is 18" in diameter! I want to do a similar project with that one. I'm not telling you what it is just yet, so watch for a post. It's going to be a little while, though. I need to have the space for the thing to have a home near a window, so I really need to do some purging of "stuff". One of these days, my husband and oldest will be gone all day. That's the day I call Salvation Army for a pick-up, get out the boxes, and get rid of all of this crap we don't really need! That day is coming soon and I can't wait for it. :)

One more thing: If you like this idea, but don't have the time or desire to make your own terrarium (or if you just don't have a moss supply available to you), you can get there ready-made. One Etsy shop I know of that sells these is 8Days Of Treasures. (You can check out the review I wrote of her shop for the Made in Michigan Blog Hop in October HERE.) Stephanie lives in Michigan and creates some pretty awesome terrariums! She also sells some unique glass containers that you could make your terrarium in, such as vinegar decanters, salt ans pepper shakers, and covered candy dishes.

If you make a terrarium and write about it, 
please leave me a link in the comments. 

If you have an idea of what could be added to a terrarium 
for a cool scene, share it! 

If you have pictures of your terrariums, 
I'd love for you to post them to my Facebook wall!

This post has been linked at:
Preschool Teacher Chestnut Grove Academy Classified: Mom Photobucket

Tuesday, January 3, 2012

Organizing My Blogging and Some Plans!

So, I've managed to clean up around the house a little. I am proud that I've been able to keep the kitchen in order for a whole week - that place gets out of hand within hours! I'm taking steps to give Little Guy the full attention he needs every day by doing projects, reading together, or just watching him play with my full attention. I haven't been blogging much or even thinking about it. Until last night, that is.
Photo by: danielmoyle
I have been blogging for about a year. At first, I had absolutely no idea what to write about. Slowly, I found some topics to write about that others actually wanted to read. I still don't feel as if I've found my real niche, but I have some ideas as to where I want to go with my blog and am going to give it the old college try. Here's how I'm doing it:

First, I wrote down all of the topics that I like to write about and ended up with six that I really would like to concentrate on: education, crafting, recipes, parenting, green/alternative topics, and cool shops/products that I'd like to share. Then, I made a list of the blog carnivals, etc. that I'd like to get involved in -  Carnival of Natural Parenting, Mindful Mama Carnival, Mamatography, Sunday Surf, etc. Finally, I listed the regular memes that I take part in - Wordless Wednesday, Mindful Parenting Collaboration, etc. I also perused the Web for hops and linkies that I'd like to take part in. For instance, I love to share my child-centered posts on the Sunday Showcase and my crafty posts and recipes on the Chic & Crafty Party. I matched up the six subjects I'd like to focus on with a few of these hops and linkies - I'm going to have to sort through them and choose one or two that take place per day to add my posts to.

Next, I got out my calendar. Each subject will (hopefully) be a weekly post. Right now, for example, I have my crafty posts scheduled to go up on Thursdays. I left space for me to write a brief title for each subject so I can just jot it down when inspiration for a subject hits me. Then, I penciled in the topics, due dates, and post dates for the carnivals that have schedules posted. Finally, I filled in the dates of the postings for the memes that I already take part in.

I am hoping to be able to have a weekly review or giveaway, tentatively set to post on Saturdays, if I can find the sponsors. I don't want to take any reviews that happen to come my way - I'd like to concentrate on items that are handmade, green, and/or related to parenting. (If you're a business owner or PR rep and would like to get in touch, I have a nice little "Contact Me" page and form you can fill out - Hint, hint!) I got way too overwhelmed with this type of thing in December and need to make sure that I space things out and plan better!

One more thing that I plan to do is make a point to visit other blogs more often. I tend to read posts via Facebook, Google reader, and my email subscriptions. I don't leave comments very often. I have a goal to leave at least two comments on other blogs per day, two comments on Facebook updates per day, and tweet or re-tweet two posts per day. None of these little tasks take much time, so it should be no problem. There are so many bloggers/writers who I admire, who make me laugh, and who teach me something new. I feel like I owe it to them to let them know that their posts have meant something to me and to share their words with others. So don't freak out and think I've suddenly become a stalker if you see more and more comments/shares/tweets from me!


So, I was checking out my page stats on Blogger last night, too. I've always used Google Analytics to see my stats, but it is geared more toward larger bloggers and other, business-like Web sites. The Blogger one is much easier for me to understand. I found out my top five posts for last year and was quite surprised. I also saw that I had many more people actually reading posts than I thought. I guess I was gauging how many were reading by the number of comments I received. Boy, I was way off! So, just like 90% of the blogger out there, here are my top five most-read posts of last year:

May 13, 2011, 5 comments
2,982 Pageviews
Feb 25, 2011, 8 comments
1,026 Pageviews
Jun 28, 2011, 452 comments
963 Pageviews
Mar 4, 2011, 200 comments
723 Pageviews
Apr 13, 2011, 141 comments

647 Pageviews
I hope that you all have a great year and continue to stick with me. I really feel positive about the upcoming "organized" blog plan I have going. I am sure that I'll fall off of the horse once in a while, but I'll be sure to jump back on!

If anyone has any suggestions about hops, memes, carnivals, blog post topics, linkies... anything, please feel free to leave me a comment or get in touch via my Contact Me form. I'd love some suggestions!

Wednesday, November 30, 2011

Is Algebra Causing Homework or Homeschool Problems? {#Giveaway (12/6) US & Canada}

Sponsored by Tomoson.com I suck at math. Actually, I should say I used to. I barely got through my high school Algebra, Geometry, etc. classes with D's. It just didn't make sense to me most of the time, so I stopped trying to figure it all out. When I had to take "Problem Solving I & II" for my online degree, I knew it was going to really be just a bunch of Algebra (it was.) BUT, I found that I learned much better when I was teaching myself! There is usually more than one way to get the right answer to a math problem, but my high school teachers always only taught ONE way. By learning on my own, I was able to find an easier way to remember all of the rules and ended up getting A's in both classes (mostly while nursing a newborn at the computer!)

When my oldest started having problems in Algebra last year, I was more than happy to help him out. We worked a few times a week together on his homework. I loved seeing that light go on whenever he finally understood how to do a problem. Then came his first test. He failed. While all of his answers were correct (Oh, yeah. I checked!), his teacher had marked all of them wrong because he didn't show his work the way she taught him how to do the problems - HER way or the highway. I tried to talk to her, to the principal, to get him transferred to a different teacher - nada. He was stuck. I couldn't understand her way, so how could I explain it to my son? He ended up giving up around October and failed the class. While I was disappointed that his GPA had dropped and he was no longer a member of the Junior National Honor Society, it was OK. He was taking a high school Algebra class in 8th grade, so he could take it over again this year and there wouldn't really be a penalty.

This year's Algebra teacher has been wonderful. While she cannot teach every possible way to do every type of problem, she does allow for students to figure out the best way for them to do the problems. As long as their answers come out correct consistently and they show their work, she's cool with it. My son did great the first few weeks - they did a bunch of review work. When new stuff was introduced, though, he got lost. I think that he stopped listening just long enough to find himself completely baffled. I tried to do the homework thing with him again, but his teen "I know it all" attitude got in the way. We'd both end up angry and frustrated with one another. When I had the chance to try out the Algebrator Software Tutor Program, I jumped at it!

Here's my 13 year-old's review:
I really like this algebra program. All I have to do is put one of my homework problems on the screen and this will show me how to do each step of the problem. It seemed hard to do at first, then my mom showed me that there are demos of how to solve every kind of problem. I could use this all the way to college. I'm going to need it because I want to be a video game animator and they need to have a lot of math classes. This will really really help me.
So, there you have it. When you see a video game that my son created in 10 years or so, you can think, "Gee, I guess Algebrator really does work!" LOL The demos he referenced are really cool and he's right - there are Videos and Screenshots of how to solve nearly every kind of problem there is. And you can choose between seeing the demos animated or on slide shows. (I love this because I just cannot learn effectively while watching a video, unlike my son.)

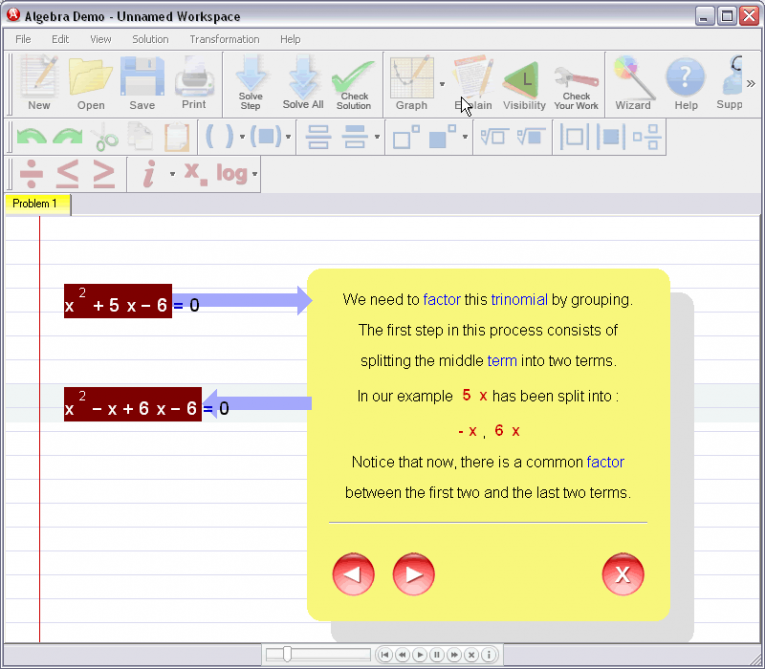
Algebrator covers all levels of algebra, from the basics of Pre-Algebra all the way up to college-level classes.  Below is a list of the types of problems that can be entered into the program. I've got to tell you, this is just amazing to me that you can enter your own problems and learn how to solve them! My son likes to check his homework with Algebrator now because, if the answer is incorrect, going step-by-step shows him where he made his mistakes.
This is a screen-shot from the Algebrator Web site. Click on the picture above to see the entire page.
I love having this available to my son and I know that it is going to come in handy for years to come. You can get your own download and optional CD-ROM RIGHT HERE. It is a special price at nearly 50% off for my readers! Algebrator has received an A+ rating from the Better Business Bureau and is used in a ton of public & private schools and colleges. *Algebrator is compatible with any PC running any version of Windows (including Windows 7) and any Intel Mac running OS X.*

Or, you can see if you can win your own download of Algebrator in the Rafflecopter form, below!


I received one or more of the products mentioned above for free using Tomoson.com. Regardless, I only recommend products or services I use personally and believe will be good for my readers.

Monday, June 20, 2011

Smart Summer Challenge - Are You Up for It?


I love summertime. I mean, I. LOVE. IT. Not only do I not have to bundle up every time I run out to get the mail, but I can go BAREFOOT! I love thunderstorms, too. And the occasional rainbow and beautiful sunset that the storms leave behind. I love checking out the hundreds of insects that grace me with their presence. And watching my garden grow from little seeds into huge plants and, eventually, food on my table. I love heading to the river in the evening and watching the birds fly just above the water, catching annoying mosquitoes and gnats. I love seeing wild animals and, occasionally, helping one recover from an accident or nurse a baby who's recently been orphaned in my bathroom.

But do you know what I love the most about summer?  
Sharing all of the above and more with my children!


smart summer button '11

When I received an email from Pink and Green Mama this morning that invited me to join in on the Smart Summer Challenge, I jumped on it! The idea is to pledge to incorporate fun, educational activities for six weeks into your daily plans. These can be as easy as reading a book, crafting, observing nature... you get the idea. And, if you can't think of anything, how about a free calendar of ideas?!
Just click on the photo for a printable calendar!
MaryLea Harris of Pink and Green Mama, Amy Mascott of Teach Mama and We Teach, and Candace Lindemann of Naturally Educational, have launched the Smart Summer Challenge.

From Pink and Green Mama's post, here are the steps you can take to join in on the fun:
Step 1

The first step is to "Like" the Smart Summer Challenge on Facebook, if you have an account.
We'll be using the Smart Summer Challenge FB page to share ideas, questions, and successes from challenge participants. 

Step 2: 

If you are a blogger, we would love for you to grab our "Smart Summer Challenge" Badge for your sidebar and/or Smart Summer Posts. 

Grab the button: 
<center><a href="http://www.facebook.com/smartsummerchallenge" title="smart summer button '11"><img src="http://farm6.static.flickr.com/5194/5829107237_2558c61bf9_m.jpg" width="150" height="150" alt="smart summer button '11"></a></center>
Step 3:

Each week, from June 27 through August 5, we will be posting daily activities on our three blogs. 
We would love it if you would blog along (as often as you wish - even once a week is great) and share what you are doing to keep the learning going over the summer. 

Step 4: 

On Friday of each of the Smart Summer Challenge weeks, we will post a themed "linky" on our blogs where you can share your recent or archived posts. If you do not have a blog, please feel free to share your activities and pictures on the Smart Summer Challenge Facebook page! We will highlight posts from participants on our blogs and on facebook. 


So, not only do you get to have fun doing educational activities with your kids, you can even win some pretty cool prizes! Here is a list of a few of the prizes that are posted on Teach mama (these aren't piddly little trinkets!):
I'm really looking forward to doing this and will be sharing as many of our activities as possible. Hopefully, some of you will join in, too!

Friday, May 20, 2011

Syrendell Silk Streamer Stick {Handmade Giveaway #5}


Remember, back in March, when I participated in Code Name: Mama's March of Kindness? If not, here's a quick run-down: All through March, she had a meme based on random acts of kindness. The goal was to go above of your everyday acts and do something extra for your family, friends, complete strangers, and even yourself. I took part, attempting to help others whenever I had the opportunity. I had a lot of fun finding new ways to perform these acts of kindness! (Read about them HERE.) Throughout the month, she had giveaways here and there for those who were participating. I was so lucky to have won a $20 gift certificate to Syrendell on Etsy, donated by Zoie of Touchstone Z!

What I chose to buy with the card were two Silk Streamer Sticks for Little Guy. We head off to our free community outdoor concerts every week all summer long and I am envisioning Little Guy dancing and twirling his streamers! When they arrived, we were having a gorgeous spring day, so we took them outside to give them a "whirl", so to speak. He loves them!


And, as always, here is a bit about Syrendell from their Etsy profile:
"Syrendell is the collaboration of love, abundance, peace, health and happiness in the Tan Family. We share our knowledge and talents with others through our arts, crafts, writing, and music in order to help others have an enriched, holistic, joyful life!"
In addition to these fun Silk Streamers, Syrendell offers an abundance of other items. I ordered myself enough of their handspun Alpaca Yarn to make my sister a scarf for next winter (shh... don't tell her!) It is dyed beautifully and so soft... I've often wondered if it might just be me who's wearing that scarf when it starts snowing again! Also, there are a ton of eBooks and patterns that show you how to do things like naturally dye eggs, create felted slippers (remember this if you win my Merino Wool Batts giveaway!), and even how to incorporate aromatherapy into holistic healing and daily routine - for children!

Well, on to the giveaway: I am going to give one of you a Silk Streamer of your very own! My little guy has so much fun with his that I feel that this is the perfect, no-voltage toy for any child - girl, boy, very young, older... if they like to play, they'll love this!
Use this as a fun toy, or a beautiful decoration. Stick is about 6-8 inches in length, made from hard wood, sanded, carved, and then sealed with a coat of organic beeswax. 6 ribbons that are .5 inches in width cascade down approximately a half a yard (18 in.) each in either yellow, orange, red, green, blue, tan, burgundy, pink, gold or lavender silk, naturally dyed by hand. Colors will vary with each order.
Habotai silk ribbon edges will gently fray over time. Beautiful!

Now, in addition to their Etsy items and eBooks, Syrendell has a few of blogs. At the Syrendell Blog, you will find all kinds of posts about home learning, music, art, and nature. There are posts about craft ideas, books, and general fun here. This is MY kind of blog! And I love their tag-line and acronym: "Learn and LAPHHwith us!"

                                                                       L = Love
A = Abundance
P = Peace        
H = Health       
 H = Happiness  

Then, you can head on over to their blog, The Waldorf Way, which focuses on tips, ideas, and thoughts about the Waldorf method of learning. I really like how this blog is written. I am a homeschool advocate to my very bones, but I tend to stay with the unschooling theory. Yet, after reading quite a few of the posts here, I am learning just how closely Waldorf and unschooling are. I will definitely be following their posts closely from now on - learning doesn't begin when a child is six and my little guy is just sucking up all the information that floats past his little head right now. Any tips on how to help him find, process, retain, and use that information are right up my alley!
And their third blog, Syrendell Academy, is their site for learning! Syrendell offers private lessons, teleseminars, eBooks, and video tutorials on a variety of subjects.Painting, fiber arts (knitting, felting, spinning, etc.), aromatherapy, and drawing are just a few of their lesson offerings. 

THERE'S MORE!!!
You can get yourself a great discount at Syrendell's Etsy shop! They are offering my readers a 15% discount if you use THE coolest code ever: KARMA1 (Yeah, I told you it was cool!)


ENTER TO WIN!
The winner of this giveaway will receive one Silk Streamer Stick.  Open to US and Canada!
Mandatory Entry:
Go to Syrendell and have a look around. Comment with one product that you would like to try most. **Leave you email address in your comment so I can contact you if you win.

Extra Entries:
For each extra entry, leave a separate comment. (If it says +2, leave two comments, etc.)
  • +1 entry- Follow the Syrendell Blog on GFC
  • +1 entry - Head over to Syrendell Academy and let me know which class sounds most interesting to you!
  • +1 entry - Like Syrendell on Facebook
  • +5 entries - Make a purchase from Syrendell. Just let me know you did so and the First name, Last initial you used to order. (Don't forget the coolest coupon code for 15% off - KARMA1)
  • +1 entry - Follow me on GFC - right sidebar
  • +1 entry - Like me on Facebook - or right sidebar
  • +1 entry - Follow me on Twitter
  • +3 entries - Subscribe (& confirm) to my emails - right sidebar under Networked Blogs
  • +3 entries – Share this giveaway on Twitter, Facebook, your blog, etc. Just leave me a direct link in the comments. ONE TIME ONLY!

This giveaway will end on May 28, 2011, at 11:59 PM EDT. Winner will be notified by email and have 48 hours to respond before a new winner is chosen. Winner will be chosen by the Random.org widget I have embedded at the bottom of this page. GOOD LUCK!
*I have NOT been compensated for this review or giveaway. I won an item from this business on another blog giveaway and liked it so much that I wanted to get the word out to my readers about this business.

Friday, May 13, 2011

Bubbles!

Yes, it's that time of year again... Bubble Time! The weather is warmer, there's a nice breeze, and the kids are looking for something fun to do. So, you have two choices: buy lots of bubble or make your own solution. Below, you will find some of my favorite bubble "recipes." While they aren't completely "green", I just can't see a childhood without bubbles, so this is one of those things I just feel guilty about later. If you know of a good, environmentally-friendly recipe, please share it - I'll write a post on it and link it back to you. I'd love to know that the beautifully-colored floaty orbs I'm sending off into the world won't do any harm!

The basic formula is the same for all bubbles: dish soap and water. The addition of glycerin will make the bubbles last a little longer in-flight. You can buy glycerin in almost any health-food store and many of the pharmacy sections of the larger chain stores carry it. My 8 oz. bottle of vegetable glycerin cost me $2.99 at our local health food store.

Also, a note about dish soap and water. Using any old dish soap will not result in the best bubbles. Yes, you can use the cheap stuff or the eco-friendly stuff, but the bubbles are NOT going to be all that great and may frustrate some kids. Original, blue Dawn or original Joy (I think it sells as "lemon") are the best soaps to use. And, if you really want to be precise, distilled water works best for the longest-lasting bubbles. The type of water you use, though, is not nearly as important as the soap.

So, I'm not going to include instructions for these recipes unless there is something out of the ordinary that you're going to have to do. It's simple enough: pour it all into a bowl or something, stir. Don't stir too fast or you'll end up with your bubbles 'pre-made' and, if you're a bubble-blowing professional, you know how those things can ruin the perfect giant bubble!

Recipe #1 - Long-Lasting Bubbles
1oz. dish soap
1oz. glycerin
1 c. water


Recipe #2 - Sugar Bubbles
4 c. very hot water
10 Tbsp. sugar
3/4 c. dish soap
Mix sugar and water. Stir until sugar is completely dissolved. Add dish soap. Do not use these if you have bees or wasps in your yard!


Recipe #3 - Colored Bubbles (a bit expensive, but might be worth it one time!)
1 c. liquid Tempra paint
1/3 c. dish soap
1 Tbsp. liquid starch (in laundry section of the store)
If you make these bubbles, take some paper outside. Have one person blow the bubbles and another person (or people) try to "catch" the bubbles on their paper. Please keep in mind that these are not going to be incredibly brightly-colored bubbles. Think about the thickness of the wall of a bubble and you can see why. Tempra paint will stain, so make sure to wear old clothes!


Recipe #4 - Super Bubbles
1/2 c. dish soap
1 c. glycerin (yeah, it's a LOT)
1/4 c. white corn syrup (Karo syrup)


Don't have any bubble wands? No worries, I've got you covered (and you'll be the COOLEST mom or dad - Ever!)

 Impromptu Bubble Wands
Plastic 6-pack holders
Bent metal coat hangers
Slotted spoons
Canning rings
Fly swatter (clean it first - Eww!)
Your own hands!


And one last idea that my kids LOVE:
You'll need:
Plastic water bottle
Rubber band
Old pair of Nylons
Scissors
Cut the bottom off of the water bottle. Pull the nylon over the cut end so it is flat across the bottom. Secure it with the rubber band. Cut off excess nylon material if it is hanging. Dip the nylon into bubble solution and blow into the top of the water bottle. You'll be making what my kids refer to as "bubble snakes"! Try experimenting with different types of cloth. The mesh from an onion bag, for instance. As long as it is woven loose enough to hold the bubble solution and to let air pass through, it should work. We've used old T-shirts, washcloths (they hold a LOT of solution so you don't have to keep refilling, and an old football jersey (made from netting.) BTW - this idea was born from one of those "I'm bored" days. I don't know how it popped into my head, but it did and we've used it many times since!

*** Bubbles are a great educational tool. While I'm an unschooling type of mom, I would jump at the opportunity to teach my kids about geometry, surface tension, etc. if they asked about it during a bubble-blowing session. If you want to use this activity to teach, here's a great site: http://www.exploratorium.edu/ronh/bubbles/bubbles.html

Have any great bubble recipes?
How about bubble games?
Please share!!!

Monday, April 25, 2011

I Have a NEW Page!


Hi! I went ahead and added a giveaway linky last night. See that link at the top of this page that says: Green Parenting Giveaway Linky? That's it! I'm sorry that those links up there are so hard to see. I have absolutely no idea how to change it into a darker color, so until I can afford a blog makeover it's going to stay that way. (I'm hoping to get a cool button for this linky, eventually, too!)


So, what kind of stuff will you find at the Green Parenting Giveaway Linky???? Just about any giveaways that have to do with eco-friendly products, anything that would appeal to children, educational products, stuff for moms and dads, healthy/natural foods, etc.It is an ongoing linky, meaning that you only have to link up one time and it will stay until the end date has passed.

So, whether you're looking for a place to link your giveaway, or you want to win some fantastic prizes, the Green Parenting Giveaway Linky is the place to go!

Pop on over - there are already some great giveaways linked up!!!

Tuesday, March 29, 2011

A Couple of Giveaways - Reminder


Please head over to two giveaways I am holding that will end this weekend.

First, there is a Quick Giveaway for a $5 gift card to use on any merchant at iCards Select. It is ending on Saturday night (3/2).

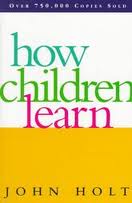
Next, is my March of Kindness giveaway. This one is a little different in that I am not asking anyone to follow, like, tweet, etc. for me. I just have a few fun questions that you can answer, if you'd like. This giveaway is for a copy of John C. Holt's How Children Learn and will end on Sunday night (3/3).


I have Tweet buttons at the top of both giveaway posts and would love it if you'd click on them and share these giveaways with your Twitter followers, or even let your Facebook friends know. Not required, just thought it wouldn't hurt to ask!

Thursday, March 24, 2011

My Random Act of Kindness for YOU - A GIVEAWAY!!! {March of Kindness 3/24}


Please - only enter this giveaway if you really, truly want this book!Thanks.


When my oldest was about 2 1/2 years old, we began making bi-weekly trips to the library. One trip to our local library in North Hollywood, and one trip to the "big, fancy library" in downtown Los Angeles. Since he was so little at the time, library trips were usually composed of him running through the stacks, stopping every once in a while to look at a book that he deemed interesting just by looking at its spine. I didn't have time to browse for just the right book. So, I learned the Dewey Decimal System by heart and would steer him toward the section I was interested in the most on that particular visit. I began choosing MY books the same way he did - which spine looked most interesting. Hey - I found a lot of really great books that way!
See why we went to this library? THIS is the inside!!!

Los Angeles Central Library


On one trip, I decided to hit the downtown library's basement where they kept all of the books on teaching and learning. As I was trying to keep up with my zooming little one, I saw a book with a bright yellow spine. I grabbed it without even looking at the title. After we had left the library and were on the subway heading toward the San Fernando Valley, Mr. Zoomy fell asleep. I pulled the book out from the bag filled with Dr. Seuss and Richard Scarry books and read the title, How Children Learn by John Caldwell Holt. "Hmm..." I thought to myself, "Sounds interesting." By the time we got off the train, I was hooked!

For those of you who are unfamiliar with John Holt, here's a very short explanation: John Holt was a teacher and a researcher. He was a fifth grade teacher in private schools for many years. Since he had friends and relatives with very young children, he began to notice the huge difference in attitude toward learning between his 10 year old students and the toddlers he was around. The young children were bold and never seemed to mind making mistakes - they just tried again. They were eager to learn by observing the people and the world around them. Conversely, the fifth graders were withdrawn and self-conscious of the possible errors they might make. Holt decided to study how and why children went from being bold explorers to timid and self-protecting pre-adolescents in an attempt to find a better way to educate. He and another teacher, Bill Hull took on a project where one would teach while the other observed - day in and day out - to see what teaching strategies worked and, when they failed, why. Holt ended up writing three books with his 11 years of observation: How Children Fail, How Children Learn, and Learning All the Time.


My RAOK to you, my readers, is a giveaway of How Children Learn. I LOVE this book! I think that, rather than putting some "just-in-case" formula samples in those free diaper bags they send new parents home from the hospital with, they should put a copy of this book. Every new teaching student needs a copy, too, along with anyone who works with children or has any say in education policies. In this book, Hold described his observations of children learning naturally. He explains his theories behind the tantrums of two-year-olds,why we should let children decide what they need to learn, and the importance of fantasy play and games for children. John Holt was a huge advocate for unschooling - some say he was the father of the homeschooling/unschooling movement. He founded "Growing Without Schooling",a homeschooling magazine.

To learn more about John Holt, start HERE.

Oh, geez... I just can't explain it well! This guy is my hero!!! As a mom and a student teacher, his writings hold special meaning to me. He just plain makes sense. Here are a few excerpts from the book:

"...All I am saying in this book can be summed up in two words - Trust Children. Nothing could be more simple - or more difficult. Difficult, because to trust children we must trust ourselves - and most of us were taught as children that we could not be trusted."
"...It is only in the presence of loving, respectful, trusting adults like Millicent Shinn or Glenda Bissex that children will learn all they are capable of learning, or reveal to us what they are learning ... Of two ways of looking at children now growing in fashion - seeing them as monsters of evil who must be beaten into submission, or as little two-legged walking computers whom we can program into geniuses, it is hard to know which is worse, and will do more harm. I write this book to oppose them both."
"... This book did not change, as I hoped it might, the way schools deal with children. I said, trust them to learn. The schools would not trust them, and even if they had wanted to, the great majority of the public would not have let them. Their reasons boil down to these: (1) Children are no good; they won't learn unless we make them. (2) The world is no good; children must be broken to it. (3) I had to put up with it; why shouldn't they? To people who think this way, I don't know what to say. Telling them about the real learning of real children only makes them cling to their theories about the badness and stupidity of children more stubbornly and angrily than ever. Why do they do this? Because it gives them a license to act like tyrants and to feel like saints."
And finally,

"...In this chapter I will say something very simple, that may not often have been said before. Children use fantasy not to get out of, but to get into, the real world."
*** Edit: I wrote this post at 3am, so I forgot to add something very important about this book. It's a very easy read! This is not full of technical mumbo-jumbo and theories. It's just a guy writing about what he's observed and his reflections of those observations. You could open this book at any page, read for 5 minutes, and take something away from it to think about. It goes kind of like this: "Today I was watching a two-year-old do _____. First she tried this way, then she tried that way. When she got frustrated and near tear, I thought I could help her out by doing ____." Then, after the story, he will explain why what he did (or didn't do) was the right or wrong thing and why he thinks so. He never tells you what you should or shouldn't do - only suggests!

The book will be used. I am sorry about that, but I have some very good reasons. First and foremost - this is reusing at its best! I could never understand why someone would insist on a brand new book when you could get one that was almost-new and not cut down trees or spend an arm and a leg. Second, The company I buy from, Better World Books, gives a major portion of their profits to literacy initiatives. And, finally, you may be wondering about whether my choosing used books to save a tree vs. using trucks, etc. to transport said books halfway across the country, right? Well, Better World Books works with a consulting company to actually make sure that the carbon imprint of shipping is the lowest possible. Check it out here. **Being a used book store, I may not be able to get it through them. Right now, they only have one copy. So, if you're the winner, don't be disappointed if the book doesn't come from them. I'll find another store with similar interests as Better World Books.

So, how do you enter? I'm not going to ask that you follow, like, subscribe to, or share my blog. If you like what I write, I hope you will. But, this is a random act of kindness and I want nothing in return except the knowledge that I've been able to share this book with someone else.


WIN: One slightly used copy (see above paragraph if you skipped down to the bottom!) of John Caldwell Holt's How Children Learn. Please leave a separate comment for each entry. Giveaway ends Sunday, April 3, 2011 at 11:59 pm, EDT. Winner will be notified via a blog post and email and will have 48 hours from the time the notification email has been sent to contact me or a new winner will be chosen.

Mandatory Entry:
Promise that, when you're through reading this book, you'll pass it on to someone else (a new parent, a teacher, anyone who might benefit from its message.) Just leave me a comment with your promise and a way to contact you.

Extra entries (these will be fun - I promise!)
Answer any or all of these questions. There are no right or wrong answers. PLEASE - keep your answers nice. There's no need to get nasty! I will delete any comments/entries that have a "them's fightin' words" ring to them. 

Please leave the number of the question you're answering in the comment, too, along with a way to contact you.
  1. If you had to be trapped in a TV show for a month, which show would you choose?
  2. If you could be any age again for a week, what age would you choose and why?
  3. Were you a sneaky child or teen? (Share a good story if you want!)
  4. Share your favorite quote! (Don't forget to say who said it!)
  5.  What vegetable do you most resemble?
The fine print: This is a giveaway that I am hosting on my own. I accept no liability. You enter at your own risk - reading this book may alter your opinions on raising children ans education You've been warned!