Showing posts with label crafts. Show all posts

Thursday, January 19, 2012

Reuse Last Year's Planners and Calendars!

What do you do with your old planners, schedule books, and calendars? I have one wall calendar, hanging by my desk, where I write down all of our plans and milestones. I save that one in a file box. It's kind of like a record of all of the things we did that year. I also have a planner that I use to keep track of blog posts and gardening (like when I planted the peas and when I picked the first tomato.) My husband has a day planner that he keeps all of his scheduled doctor's appointments in. And my oldest, of course, has a student planner that he is supposed to use to keep all of his assignments straight in - he doesn't use it very often... We also receive a few free promo planners in the mail that I usually give to Little Guy to write his "lists" of things to do in - just like Mommy, Daddy, and Brubber do.

At the end of the year, we find that we have these planners and calenders just sitting here. We don't want to throw them out, but what good are they? I'll tell you! You can use them as idea books.
As I was cleaning out my very messy corner of craft supplies, I found the stack of magazines and catalogs that I've been hoarding. Each one had at least one great idea that I wanted to use - a kids' craft, recipe, or DIY project. I really didn't have anywhere to put all of these magazines and, heck, I didn't even know which idea I was saving each book for just by looking at the cover. So, Little Guy and I went through each one and cut out all of the good ideas that we wanted to make someday.
Most of the time, I could just cut out a photo from the magazine or catalog and that would be enough. I don't really like following step-by-step instructions for things that are creative. Instructions make me feel as if I'm doing it wrong if I veer from the "rules" that have been set down. Plus, I tend to read the "Supplies Needed" list and, if I don't have one, I'll skip the project until I do have everything. By just having a photo of what I want to make, I can use my own imagination to figure out how to go about creating the item and which supplies we can use.

So, we spent a couple of afternoons just flipping through those magazines and catalogs, cutting out pictures of things that looked like fun. Now we had a pile of clippings. How was I going to keep them in some kind of order without losing them? As I pondered, hubby came through with his old planner and asked if he could throw it away (See how I have him asking about throwing things out? He's learned not to toss anything into the trash can before asking if I need it for something. Even banana peels are saved here - they add LOTS of potassium to the garden soil!) His asking me at that particular time was perfect - I could use the planner for the clippings!

I arranged the clippings into piles for each month - snowy/winter crafts for January, hearts and lovey crafts for February, etc. When he awoke, we got working on our books. His job was to put a tiny dot of glue onto each cut-out and place it on the planner page for the corresponding month. My job was to hand him the clippings, suggest a good place to glue the clipping (overlap can happen in an instant with an excited little guy!), and help turn the pages of the planner. Now we have our "Idea Book" to look at whenever we're feeling crafty. We can just open it up to the current month and choose from the pictures.


I also used planners for recipes and DIY projects. The recipe book was made from a planner that had an entire page for each day. There are many more pages in that book so I could clip the entire recipe (no, I can't just look at a picture of food and figure it out! LOL) and have room for more. Stew, soups, and other hearty, stick-to-your ribs recipes are glued into the winter months' pages. Quick, warm dinner ideas are in the November and December pages for those days when we're busy with holiday-related activities and there just isn't time for big, complicated dinners. And, of course, I have light, cool dishes in August; and I've got picnic-type recipes stuck to the June and July pages. Birthday cake ideas are now easy to find by turning to the months for everyone's birthdays.

My DIY book is separated by the seasons, rather than months. I simply took a marker and drew a border around each page for each season - blue for winter, green for spring, red for summer (hey, it's hot out!), and orange for fall. The times of year that each project would best be done is where I glued those clippings. So, I have a really neat indoor seed starter idea pasted on a green page. And there is a pretty wind chime made with dried leaves in the orange section. See what I mean?

I have more ideas for making other books:
  • I'm going to start looking for homeschooling ideas next, since Little Guy is getting to the right stage to start more learning activities. 
  • My oldest keep magazines for drawing ideas that he has seen in them - I think I could persuade him to cut the ideas out and recycle the magazines.
  • My husband takes a zillion different medications. He also collects old PDR's. I wonder if I could get him to cut the drug info and photos for each thing he takes and glue them into an old planner? It sure would take up less space than 6 old PDR's (have you seen how big they are?!). Plus, he'd have a little book to take to doctor's appointments, showing exactly what he takes. He could even pencil in the amounts and frequencies of each medication. I know that, if he ever keeled over, I'd have a list of meds to take to the ER with me for easy reference for the ER doctors.
I'd love to hear your ideas of books these used-up 
planners and calendars could be re-purposed into. 
What kind of clippings would YOU glue into an old planner???

Thursday, January 12, 2012

Moss Terrariums {Crafty Science!}

I have been wanting to make a terrarium since I first saw them on Etsy, at the end of last summer. I vaguely planned to make them as Christmas gifts, then got caught up in back-to-school & Halloween. Suddenly the holidays were upon us and it was too late. I figured we'd do it as one of our spring projects. Until I was gazing out the window, checking out the squirrels and birds, when I saw this:
 See that lovely patch of green between the dying grass and the fence? It's moss! With the weather being so mild, and even warm on some days, the moss has been "living" it up. I kept my eye on it for a few days and then I just couldn't contain myself any longer. I dressed Little Guy for a nature walk and tossed a few plastic bags and spoons into a tote and we were off to collect things for our terrariums. In January. In Michigan. (Yes, I'm going to keep saying that. I am still amazed at the weather and will continue to be awed until there is 6" of snow on the ground and the temperatures have stayed below 30 F for at least a week!)
Once he finished running around like a nut, we got down to business. It was time to walk very slowly and see if we could spy any moss growing. Once we found a good patch, we collected some of it. Now, when you look for moss for this project, make sure of a few things:
1) Only take a little from each patch and leave the rest to regenerate.
2) Use a spoon or spatula to carefully lift it from the ground. It's pretty hardy stuff, but you want to make sure to lift the entire plant - including its root system.  
3) Don't forget to get some soil from the same area, preferably from directly under where the moss was growing. We found three different types of moss on our outing and each one had a very different type of soil beneath it: One had mostly rocky, sandy soil; one had a soil that was composed mostly of dead grass; a third had very rich soil that was mostly composed of what Little Guy refers to as "worm poops".
4) Take note of how moist the soil below the moss is. You are going to want to try to mimic that amount of moisture in your terrarium.  
5) Also be on the lookout for some nice-looking small pebbles and a few sticks or pieces of tree bark that have signs of moss or mushrooms (or, what Little Guy calls "fun guys") on them. We found a stick with some white "moldy" spots on it, a piece of bark from a tree stump with a mushroom, and bark from a dormant tree with green spots. We're excited to find out if anything sprouts from them!
Now, I want to tell you that you can use nearly anything to make your terrarium. I learned quite a bit from Storm The Castle. (This is THE coolest site for finding really neat things to do, by the way. Go bookmark it right now. I promise you'll use it. Repeatedly.) We used two different things for our terrariums: old honey jars and a plastic cake carrier that someone gave us a store-bought cake in for our terrarium containers. But, really, as long as it is see-through and has a lid or small opening, go for it: aquarium with a crack in it, glass vase, 2-liter pop bottle... Just remember that you're going to have to be able to get stuff into the container and arrange it! (Storm the Castle has a great tutorial on how to make really long tweezer-type thingies from a wire coat hanger so you can reach. I told you that site is great!)


Start by laying down the dirt you collected. Because the cake carrier is near-impossible to open without really jostling whatever is inside, I knew that we wouldn't be able to open it up to add water very often. So, I took a plastic lid that is about 1/4" deep and placed some cotton into it (the white rectangle on the left of Little Guy in the photo). I put this in the center of the cake "plate" before adding dirt. After we got the soil in place, I poked a small hole in the mound above the cotton-filled lid and poured some water into it, as well as all over the rest of the soil. My reasoning for the cotton was so it would hold a layer of moisture without saturating the soil. Don't know if it will matter in the end, or not. Just my theorizing!

(After I took the photo above, I noticed that pieces of dirt and rocks were falling into the area where the dome part of the cake carrier would fit into the bottom. So, I tore up a piece of paper towel into strips and poked them into that area to keep the debris out. You can see the paper towels in the photos below. Keep this in mind while you do the next part!)

So, where was I?! Oh, yeah: add your soil. Make sure to keep track of which soil is added where if you're using different mosses with different soil needs! Pile it up so you have a nice hill if your base is a flat piece like out cake dome has. If you're using a bottle-like container, try using a funnel to direct the different soils to different areas and attempt to get a mound going in there. This is important because, if you ever really look at the lay of the land that your moss is found on, you'll notice that it is usually on an inclined surface, even if it's only slight. Make sure to save some of the soil for later - you're going to need it to fill in spaces between the moss. Once you have your mound of soil, ever so slightly pack it down and moisten it. I just poured a little water onto the cake plate, I used a spray bottle of water for the honey jars.

Now it's time to add the moss! The pieces we had were rather large chunks, so I showed Little Guy how to gently pull them apart into small pieces. I had him decide where to place it. He loved being in charge of this part of the operation! It took forever for him to decide. He kept putting a piece down, turning it a little... moving it to the left, to the right... Sometimes he completely abandoned a piece in favor of a different one. It was really cool to watch him!

Once the moss was in place, I carefully added the reserved soils in between the pieces of moss. Then it was time for Little Guy to add the embellishments we collected. Now, I considered grabbing some tiny "guys" toys and a couple of tiny cars to include in the terrarium, but though better of it. Just before I went digging through the toys, I had a very disturbing vision: Little Guy attempting to recover his toys. Dirt everywhere. Terrarium ruined. Now, if your kids are cool with using toys inside, go for it. I think it would be pretty cool to create a scene with them. Just make sure that whatever you add to your terrarium will be able to withstand the high levels of moisture that it will encounter. Also consider whether it might give off any toxic fumes when wet or warm. The cute little plastic bunnies you add could end up killing all of the living things in there.

I think that I probably added too much moisture to our cake dome terrarium. Since opening and closing it just isn't an option, I have a back-up plan. If I notice that the dome is constantly coated in water droplets or the mosses or fungi start dying, I am going to poke small holes in the top of the plastic dome. This can be done very easily without marring the view: Just take a small nail or even a thick sewing needle and hold it with a pair of pliers over fire (a lighter or the burner of a gas stove.) Um... make sure your pliers are insulated or you're wearing an oven mitt! It doesn't have to get red hot, just hot enough to melt the plastic. Then, poke small holes through the dome, toward the top. This should allow enough moisture to escape without completely drying it out.

Our Finished Products:


This was such a fun and easy project to do. While we worked on it, we had some great conversations about ecosystems, habitats, what plants need to grow, what kind of rocks we were using, the water cycle... We also pondered the possibility of small insects, seeds, and spores being mixed into the soil we used. I'm anxious to see if any surprises grow in our terrariums.

I have another plastic domed container that has been sitting on top of my refrigerator since last spring. I've known it would be great for some use, but was waiting until I was inspired with an idea to use it. This thing is 18" in diameter! I want to do a similar project with that one. I'm not telling you what it is just yet, so watch for a post. It's going to be a little while, though. I need to have the space for the thing to have a home near a window, so I really need to do some purging of "stuff". One of these days, my husband and oldest will be gone all day. That's the day I call Salvation Army for a pick-up, get out the boxes, and get rid of all of this crap we don't really need! That day is coming soon and I can't wait for it. :)

One more thing: If you like this idea, but don't have the time or desire to make your own terrarium (or if you just don't have a moss supply available to you), you can get there ready-made. One Etsy shop I know of that sells these is 8Days Of Treasures. (You can check out the review I wrote of her shop for the Made in Michigan Blog Hop in October HERE.) Stephanie lives in Michigan and creates some pretty awesome terrariums! She also sells some unique glass containers that you could make your terrarium in, such as vinegar decanters, salt ans pepper shakers, and covered candy dishes.

If you make a terrarium and write about it, 
please leave me a link in the comments. 

If you have an idea of what could be added to a terrarium 
for a cool scene, share it! 

If you have pictures of your terrariums, 
I'd love for you to post them to my Facebook wall!

This post has been linked at:
Preschool Teacher Chestnut Grove Academy Classified: Mom Photobucket

Wednesday, January 11, 2012

(Trying to Be) Creative with the Camera {Wordless Wednesday}

Rainbow Sunset

Shadows in the Stairwell

Pointillism?

OK - not "camera-creative", but creative just the same. We made these bookmarks with THIS PIN as inspiration.

River of Sticks - These must have been left over from the flooding we had a few months back. The dark area is made up of a 4-inch-thick bed of twigs, dead grass, and seed pods. All of the grass & sticks were pointing in the same direction. Well, either the flooding or miniature aliens...

Tuesday, December 20, 2011

Orange Spice Potpourri {Last-Minute Homemade Gift}

 I got the original idea from a post on Keeper of the Home. You should really check out this blog - she recently posted about different home remedies for winter ailments. I get tons of great ideas from her!

I cannot believe how great this stuff ended up smelling. I just added a few ingredients to it. It is so easy to make - Little Guy pretty much did it all himself! Just make sure that you have the whole family save their orange peels!

Orange Spice Potpourri

  • Cinnamon Sticks
  • Whole Allspice
  • Whole Cloves
  • Peels from Oranges
  • Bay Leaves
  • Pine cones or Wood shavings (from untreated wood!),
  • Orange or Citrus Essential Oil
Now, looking at the list of ingredients, I know what you're thinking: "Doesn't she have any idea how expensive those spices are???" Yes, I do. That's why I bought the dollar store out of them! As I mentioned in my Spiced Dough Ornaments post, if you're not eating it, it doesn't matter how good these things are. You want them for their scent only, so go the cheapest possible. You may even consider buying some of those Cinnamon-Scented Pine Cones to use - just pull them apart!

Next, I used Clementines. Little Guy can peel them by himself and the peels are very thin, they dry very quickly. I kept a bowl near the trash can and told everyone to put their peels into it. Little Guy's job, before bed, was to tear the peels into small pieces (about 1/2" X 1/2"). Then, we spread them onto a wax paper-lined cookie sheet and popped them into the oven. We have a pilot light that is on all of the time, so the little bit of heat generated by it helped dry the peels overnight. If you don't have a pilot light, try setting the sheet near a heating vent or anywhere that the air circulates.

You don't have to go collecting pine cones and wood shavings like we did. I just wanted to be able to bulk up my batch of potpourri so I could give out more and use less spices (they might have been bought at the dollar store, but the cost does add up, anyway!) We had a friend save his shavings for us. Since we had a lot of time before having to give the gifts, We mixed up a little food coloring into warm water and added the shavings. I let them sit for a couple of hours, then drained and spread onto a cookie sheet. I was worried about the orange scent being overpowered by the spices, so I shook a little bit of the essential oil onto the still wet shavings then put them into the oven to dry. They took about 24 hours, and I used my hand to turn them over a few times so they'd dry all over.It added a little extra color and extra scent to the mix.

Now, I didn't give any measurements because there really aren't any. I used about 8 cinnamon sticks. I had to get out a hammer and gently hit them so I could break them into 1/2" to 1" pieces. I used one jar of cloves (0.62 oz, I think), and the same amount of allspice. I think we had the peels from a dozen clementines (they shrink a ton when they dry!) and around 1 1/2 c. of wood shavings. I dumped it all into a bowl and Little Guy used a wooden spoon, then his hands, to mix it all together.

We wanted to have enough potpourri to give to ten people, so we put about 1/2 cup (eyeballed it) into a sandwich bag, then tied closed with a pretty ribbon. The potpourri smell good enough to just set in a bowl. When it stops being "smelly", just put a tablespoon or two into a mug filled about halfway with water and microwave for 45 to 60 seconds. Mmmm!

I linked this post at:
Classified: Mom

Pin It

Sunday, December 11, 2011

Making Really Cool Paper Snowflakes {Craft}


Our "Christmas Tree" is slowly getting decorated!
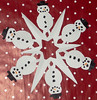
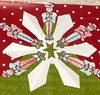
While at the library the other day, I passed one of the book display tables and saw Snowflakes for All Seasons by Cindy Higham. Now, one of our upcoming activities was making paper snowflakes, so I grabbed it. Boy, am I glad! This book has 72 different patterns to make snowflakes with stars, bells, trees - just about everything you can think of - included. You can check out how to fold the paper properly (if you don't understand my weirs instructions, below!) HERE. There are also a few snowflake patterns at the bottom of the page. Check out some of the ones we made:

There are a few things that are important to know before you start making your snowflakes:
  • Consider the thickness of your paper. I used construction and my hands have been angry with me ever since. If we do this again, I'll use newsprint or magazine pages!
  • Have some very sharp scissors. I had to trim rough edges from my snowflakes. This took forever and made a huge mess.
  • Cut the small bits first, then the bigger sections. This way, you have more paper to hold on to.
  • If your kids want to help, but aren't really great at using scissors yet, do the cutting part on your own. Have the kids decorate the paper with crayons, paints, pr markers before you fold and cut and/or have them decorate the finished snowflakes with glitter.
  • Try to line up the edges as you're folding as closely as possible to avoid lop-sided snowflakes. My Nutcracker one is completely missing a guy because of mis-folding. And make creases in the paper after each fold to keep it all together better.
Here's how to fold the paper (in pictures!):
1) Start with a square of paper. If you only have rectangles, HERE is how to make squares.


2)  Fold the square in half, corner-to-corner.


3) Fold in half again.


4) The tricky part! You need to fold the side that has two creases so that it looks like this:

5) Then, fold the other side of the triangle over. The more lined up all of the edges are, the more perfect the snowflake will turn out.

6) When I (finally) got the paper folded just right - construction paper is TOUGH! - I drew lines where the creases were and used that one as a template for folding the rest. It made life MUCH easier.

Time to Cut!

After I did a few of the book's patterns, I learned how the patterns were created. There were just a few rules to follow:

1) Make sure that there are plenty of places on both sides of the pattern that will keep the edges of the pattern intact.
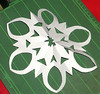
2) Try as hard as you can NOT to make a pattern that has a space in the center that you must cut out. You'll see in the pattern that I created below that I made this mistake.
3) Try to keep the size of the shapes you're cutting large. Not only does it make cutting easier; it also makes sure that the cut will show if you happened to fold the paper a little off.
4) Use an iron set to the lowest heat to flatten out your snowflakes. I put a piece of construction paper over the snowflakes before ironing so I wouldn't accidentally catch an edge on the iron and tear the paper.

I made my own pattern!
My oldest is a collector of Nutcrackers, so I was thrilled to find a pattern in the book. But there wasn't anything for Little Guy, so I decided to try making my own. I think it turned out pretty well:

I had to use an Xacto knife to repeatedly cut, cut, cut through the paper (including the curve of the wheels!) because my scissors just couldn't get in there without tearing the paper up.

In addition to making snowflakes, we also talked about snowflakes. I checked out another book that was filled with close-ups of snowflakes. We learned that there are different shapes for different types of weather (the colder it is when it snows, the more perfect the flakes are.) We counted the points, talked about hexagons, and talked about how snow if just frozen rain.

Have you made snowflakes yet? Did you manage to come up with your own unique pattern? Any tips and tricks you'd like to share. I imagine that we'll be making more snowflakes. It's a quick and easy project we can do with very little prep!

Pin It

Wednesday, December 7, 2011

Spiced Dough for Ornaments {Craft}

On Sunday, I had planned to make salt dough ornaments with the kids as our Advent calendar activity. Well, on Saturday night, I checked out all of the different recipes, looking to see if there was anyone with an unusual twist or different kind of ingredients. I'm always looking for stuff like that. Anyway, I saw an old recipe that I tried a few times with my oldest and didn't much care for: Cinnamon Applesauce Dough. I mean, it was OK for playing with, but it didn't set up well for ornaments and the scent seemed to go away as it dried. So, I switched my search to a cinnamon dough that had those two qualities I've been missing.
I decorated these two rather quickly so I could take pictures and write this post. The kids and I will decorate the rest on Thursday - it's another one of our activities!

I came upon the best recipe yet! It was posted on a blog called Heartland MOPS. And, if you know me, you know I changed it a little bit. (One thing I want to tell you before I get started on the recipe: Do not buy your spices at the grocery store for this one. Head to the dollar store, Aldi, anywhere else. They don't need to be fresh, you're not eating them - just using their smell!)

Spiced Ornament Dough
  • 1 c. ground cinnamon
  • 1 Tb. ground cloves
  • 1 Tb. ground ginger
  • 1 Tb. ground nutmeg
  • 1 c. applesauce
  • 2 Tb. white glue (I used Elmer's Glue All)
  • 2 Tb. flour + more for rolling dough 
  1.  Measure out the dry ingredients and stir them together. Make sure you pour the cinnamon and stir slowly! There will be cinnamon dust floating around and you probably don't want to be breathing it in. I had Little Guy get down off the chair he was standing on and wait at the kitchen table until I had the wet ingredients added.
  2. So, yeah... the next part is to add  the applesauce and glue. Now, the glue probably isn't a necessity, but it does hold everything together nicely once the ornaments are dry.
  3. Once everything is mixed pretty well, have you kid put his or her hands into that bowl and knead the dough for a while. It's not as if it has to be perfectly kneaded, so just let them feel it, squish it, and smell it for 5-10 minutes. What they're doing is helping the gluten in the flour come out, making the dough a little elastic. If the dough seems too wet or sticky, add a little more flour. It really shouldn't be sticky. You should be able to shake your hands and have the majority of it fall off.
  4. Now it's time for fun! Roll the dough on a lightly-floured surface to 1/4" thick. I had some that was slightly thinner, but you need to be careful - the thinner the ornaments are, the more likely they will break! Also, watch that you don't use too much flour. You can see faint white areas on my ornaments from using too much.
  5. Cut the ornaments and set on parchment- or foil-lined baking sheets. You don't really have to worry about them being far apart because they're not going to rise, but make sure that they aren't touching.
  6. Bake at 200 degrees for an hour - your house is going to smell AMAZING. If they're still wet, carefully flip them over and bake for 30 minutes to an hour more - check every 10-15 minutes to make sure they don't burn! (Burnt cinnamon is nasty-smelling and will hang around the house for days. Yuck!) If you don't want to bake them, you can let them dry on their own for 3 to 4 days, turning once a day to dry evenly.
  7. Once dry, you can decorate your ornaments in any number of ways. I chose to use obviously inedible decorations so no one would think they were cookies. While the ornaments are made of food and non-toxic glue, they taste nasty - just ask Little Guy who decided that I was wrong when I told him it was yucky. He took a HUGE bite of dough when my back was turned. He really wanted to prove me wrong and tell me it was yummy (yep, he's three!) When I turned back around, I knew, by the look on his face, what he'd done. I waited to see what he'd do. After holding it in his mouth for 30 seconds, it got spit right out.
If you don't celebrate any ornament-related holidays, you can also make beads from this dough. That's what I did with the scraps that were leftover. You could make a nice car freshener by threading a few large beads onto a ribbon and hanging it from the rear view mirror. I tossed a couple of flattened disks of dried dough into the exhaust of our vacuum cleaner, so every time I run it, the room gets deodorized, too!

Thursday, December 1, 2011

Easy DIY Advent Calendar with Stuff You Already Have {#Craft}

Every year, I make plans to make my own Advent Calendar... I always wind up picking one up at Walgreen's for $2 around December 5th. I also make a list of fun family activities that we can do together for the holiday season... and it ends up just sitting there because I don't plan ahead. Not this year!

I saw a really easy Advent calendar idea where you use muffin tins as the base. It's perfect - the little candy holders are already there! And, the next day, guess what hubby came home with... Yes, 6 aluminum mini muffin tins. It seems that someone he knew was going to just throw them out (I KNOW!) Knowing me, he figured if I couldn't use them, I'd recycle them. Two of them are now part of our Advent calendar, and I'll be able to use them again next year!

Another idea I saw was to make an Advent calendar that contained a surprise family activity for each of the 24 days leading to Christmas. If I put an activity on little pieces of paper for each day, I'd kind of have to do the stuff, right? You can't have the kids opening each section, read the paper, then say, "Eh... I don't feel like it!"

So, here's my little Advent calendar idea. It took me a total of one hour to make it, including the portions that the kids helped me with. I mostly used things I have around the house. I bought candy and some nice scrapbooking stickers that were on sale at 2/$2.

The mini muffin tins that I have hold one dozen muffins each, so I needed to figure out how to make them stick together. I don't keep glue that works on metal laying around the house, so I figured out a different way: bread ties. Yeah... I never throw them away. I even have other people save them for me! You can use those suckers for everything, even sticking two aluminum pans together! I had the kids help me peel the paper off of about 6 ties. Then, I used a pin to poke holes in both of the tins and threaded one end of each wire into the holes. I loosely twisted each wire before I flipped the tins over and tightened it all up.


*TIP: See the picture on the right up there? 
That paper clip saved me lots of trouble. 
I stuck it on there to remind me which cup
was Day 1. The tins got turned around so 
many times that I had to take all of the candy
out and read the activities so I knew which
one the calendar was supposed to start on.
Next, I had the kids help me. First, we had to agree on some activities. I found a wonderful list of over 30 ideas at Code Name: Mama that I borrowed from. Some of the things we chose will take effort, others are very easy: Make paper snowflakes, Take a family walk at night to look at the decorated houses, bake and decorate cookies (I have four days set aside for that!), family holiday movie night, write to Santa... The very next thing I did - and you shouldn't skip this step! - is to plan out what we;ll be doing on what day, then wrote it down in my planner. This is so important! You don't want to: 1) be surprised that today is the day you're supposed to go to the zoo, and 2) have something major planned for a bust night and something that takes 10 minutes planned for a day when you have lots of time to spare. I wrote all of the activities down on a piece of paper and we put them into the bottoms of the muffin cups.  The kids each got to pick out a bag of candy to fill each day's section with. So, they each took turns placing two of their candies into each cup.

While my oldest watched Little Guy, I got out the glue gun. I had to figure out how to cover each of the cups so they could be opened individually. I saw some great ideas on Pinterest that included cutting little circles from cardstock and covering each individually, making felt bags that contain the day's prize that had a glue dot holding them into the cups... I had two options with what I had on hand: wrapping paper or newsprint. They're both pretty easy to tear open. If I used one sticker for each day, when the kids puled on the sticker, the paper would rip and reveal the contents of the cup underneath. Although wrapping paper is a little more decorative, I went with newsprint. I've been carefully folding each piece of packing paper that I get and squirreling it away for projects just like this - not using it would have been insane, you know?


Now, I had to figure out how to make the paper stick to the aluminum well enough that the kids wouldn't end up ripping the entire sheet off on the first day. I came up with this nifty idea: I used a nail to poke holes in key areas of the tins. Then, I used the glue gun to glue the paper over each section - one at a time. I made sure to let the glue pool a little wherever I had poked holes. After I had the entire paper glued down, I carefully flipped the tins over and put extra dollops of glue over each hole. I also reinforced the bread ties by laying down a line of glue over the two edges of the tins they were holding together.


Then it was time for Little Guy's VERY IMPORTANT job. He had to put the stickers onto the Advent calendar! I had him leave Day 24 empty because I wanted to add a picture of Santa for Christmas Eve.

*TIP: If you have little ones helping, put dots where the center of each cup is.
Our last step was to fancy it up a little bit. I has all kids of ideas: the old tissue paper squares on the end of a pencil thing (too frustrating when it sticks to the pencil), glitter (and look like I ran into a pixie until February?!), paint (too easy for Little Guy to puncture the paper with the brush. AHA! We have tons of ribbon, so we simply glued a little in the spaces between the stickers.
The photo above is our almost-finished product (you can see some of the white glue's not even dry yet!) I plan on putting bows on each corner and then attaching a ribbon to hang the calendar on the wall. Where to put this posed a problem until I was downloading the pictures of our Christmas tree**.  When I saw the photo, I saw the perfect spot - just  left of the tree, up high. There's no way (short of using a long stick or throwing something heavy at it) for Little Guy to get that calendar down. He's is a candy freak and it doesn't agree with his disposition, so one piece a day is enough! He knows there's a whole lot of candy in those tins, so I have to be extra careful.
Don't you just love the thermostat? I think I'll put a big bow on top of it so it looks like an ornament. As we add our own ornaments to the tree, it should blend in... right?
**Now, we don't have a real or plastic tree for a variety of reasons. So, each year, I go out and look for the "perfect tree wrapping paper". In an hour or so, I cover the wall with wrapping paper , then cut out a tree shape from the tree paper. This year's was a quickie job - Little Guy was cranky and I was trying to hurry up and get it done so I could put him to bed. It's not even or anything, but that's how they come in real life, right? As we get closer to Christmas, we'll be making little crafts here and there and adding them to our tree as ornaments (we already have a beaded candy cane on there!)

This post has been added to the following crafty linkies:
 

The Crafty Nest
Classified: Mom