Showing posts with label DIY. Show all posts

Thursday, January 19, 2012

Reuse Last Year's Planners and Calendars!

What do you do with your old planners, schedule books, and calendars? I have one wall calendar, hanging by my desk, where I write down all of our plans and milestones. I save that one in a file box. It's kind of like a record of all of the things we did that year. I also have a planner that I use to keep track of blog posts and gardening (like when I planted the peas and when I picked the first tomato.) My husband has a day planner that he keeps all of his scheduled doctor's appointments in. And my oldest, of course, has a student planner that he is supposed to use to keep all of his assignments straight in - he doesn't use it very often... We also receive a few free promo planners in the mail that I usually give to Little Guy to write his "lists" of things to do in - just like Mommy, Daddy, and Brubber do.

At the end of the year, we find that we have these planners and calenders just sitting here. We don't want to throw them out, but what good are they? I'll tell you! You can use them as idea books.
As I was cleaning out my very messy corner of craft supplies, I found the stack of magazines and catalogs that I've been hoarding. Each one had at least one great idea that I wanted to use - a kids' craft, recipe, or DIY project. I really didn't have anywhere to put all of these magazines and, heck, I didn't even know which idea I was saving each book for just by looking at the cover. So, Little Guy and I went through each one and cut out all of the good ideas that we wanted to make someday.
Most of the time, I could just cut out a photo from the magazine or catalog and that would be enough. I don't really like following step-by-step instructions for things that are creative. Instructions make me feel as if I'm doing it wrong if I veer from the "rules" that have been set down. Plus, I tend to read the "Supplies Needed" list and, if I don't have one, I'll skip the project until I do have everything. By just having a photo of what I want to make, I can use my own imagination to figure out how to go about creating the item and which supplies we can use.

So, we spent a couple of afternoons just flipping through those magazines and catalogs, cutting out pictures of things that looked like fun. Now we had a pile of clippings. How was I going to keep them in some kind of order without losing them? As I pondered, hubby came through with his old planner and asked if he could throw it away (See how I have him asking about throwing things out? He's learned not to toss anything into the trash can before asking if I need it for something. Even banana peels are saved here - they add LOTS of potassium to the garden soil!) His asking me at that particular time was perfect - I could use the planner for the clippings!

I arranged the clippings into piles for each month - snowy/winter crafts for January, hearts and lovey crafts for February, etc. When he awoke, we got working on our books. His job was to put a tiny dot of glue onto each cut-out and place it on the planner page for the corresponding month. My job was to hand him the clippings, suggest a good place to glue the clipping (overlap can happen in an instant with an excited little guy!), and help turn the pages of the planner. Now we have our "Idea Book" to look at whenever we're feeling crafty. We can just open it up to the current month and choose from the pictures.


I also used planners for recipes and DIY projects. The recipe book was made from a planner that had an entire page for each day. There are many more pages in that book so I could clip the entire recipe (no, I can't just look at a picture of food and figure it out! LOL) and have room for more. Stew, soups, and other hearty, stick-to-your ribs recipes are glued into the winter months' pages. Quick, warm dinner ideas are in the November and December pages for those days when we're busy with holiday-related activities and there just isn't time for big, complicated dinners. And, of course, I have light, cool dishes in August; and I've got picnic-type recipes stuck to the June and July pages. Birthday cake ideas are now easy to find by turning to the months for everyone's birthdays.

My DIY book is separated by the seasons, rather than months. I simply took a marker and drew a border around each page for each season - blue for winter, green for spring, red for summer (hey, it's hot out!), and orange for fall. The times of year that each project would best be done is where I glued those clippings. So, I have a really neat indoor seed starter idea pasted on a green page. And there is a pretty wind chime made with dried leaves in the orange section. See what I mean?

I have more ideas for making other books:
  • I'm going to start looking for homeschooling ideas next, since Little Guy is getting to the right stage to start more learning activities. 
  • My oldest keep magazines for drawing ideas that he has seen in them - I think I could persuade him to cut the ideas out and recycle the magazines.
  • My husband takes a zillion different medications. He also collects old PDR's. I wonder if I could get him to cut the drug info and photos for each thing he takes and glue them into an old planner? It sure would take up less space than 6 old PDR's (have you seen how big they are?!). Plus, he'd have a little book to take to doctor's appointments, showing exactly what he takes. He could even pencil in the amounts and frequencies of each medication. I know that, if he ever keeled over, I'd have a list of meds to take to the ER with me for easy reference for the ER doctors.
I'd love to hear your ideas of books these used-up 
planners and calendars could be re-purposed into. 
What kind of clippings would YOU glue into an old planner???

Friday, January 6, 2012

I Cut His Hair

Yep, Little Guy got his first haircut on New Year's Eve - right before bed. I really didn't want to cut those gorgeous little ringlet curls. I had no idea if they'd come back or not. The top of his head had straight hair! I asked a few barbers what they thought and no one could predict whether the weight of the hair was weighing down so much that it became straight, or if it was just growing that way. BUT, he had been asking be to borrow my barrettes regularly. Yeah. He couldn't see his Hot Wheels when he was playing, it was poking him in the eye when he jumped on the bed, and he was getting really frustrated with the fact that it was ruining his paintings - he'd paint, turn his head to re-load the brush, and turn back to find that his hair has brushed the paper and messed up his artwork!
BEFORE
The final straw was when I washed his hair on New Year's Eve. When his hair was wet, it reached half-way down his back. I noticed black hunks of ??? at the ends as I was pouring on the water. Upon closer inspection, those hunks were fuzzies from blankets. They had become entangled in his hair and were beginning to turn into mini-dreads! (I didn't notice before because his hair brush has gaps that are too large, so I'm on the lookout for one that is smaller right now.)

I started the haircut by simply cutting out the gnarly wads of ick. Then, I decided to layer the back a little. See if the curl would come back. As his hair dried, it began to curl up - even on the shorter pieces! So, I thinned it out some more and then moved to the front. Now, this is where I've always screwed up my oldest's hair. Either I don't cut enough and his hair was back into his eyes in a matter of days, or I cut too much and it would take months for him to look like a normal little boy again! (I give him money to go get his hair cut now. There's no way I'm sending him to high school with a screwed up home haircut!) Anyway, I started out by just cutting a little bit. It curled up! So, I cut more until it was the right length. You see, my oldest has very straight hair, so there was no way to hide mistakes. But with Little Guy's crazy curls, I could have probably taken a huge chunk out and it wouldn't have been too noticeable.

So, without further ado,
Little Guy's New Haircut:
AFTER (I had forgotten what he looked like!)

Wednesday, December 21, 2011

Fizzy Bath Bombs {Last-Minute Homemade Gift}

I originally found the recipe for these on About.com - the place to find articles about anything by anyone! This recipe for the Bath Bombs is based on the one posted by David Fisher, so I'd like to thank him for showing me just how easy these are to make. Really, I've been wanting to try them out for a while now, but they always seemed so complicated and as if they needed a ton of ingredients that were expensive and hard to find. Not true on either! 

Now, I scented my bath bombs with lavender essential oil and dried rosemary from my garden, but you can use any number of scent combinations. Check out this tutorial on mixing essential oils to get the right scent on Easy Aromatherapy Recipes. Just remember: If you use herbs instead of the oils, you'll need to use more. Also, remember that once the herbs rehydrate in the tub, their scent will be stronger! I chose Rosemary and Lavender because I just love how the two blend. Also, I had to buy the essential oil for this and I wanted something that I'd use often. And, once again, don't go all out and buy some expensive and fancy rosemary - get the cheap bulk stuff.

There is one ingredient on the list that I was worried about finding: Citric Acid powder. I took a shot in the dark and visited our local health food store, Health Matters in Monroe, MI, and found that Maurine had it AND it wasn't expensive. I only got a 4 oz. bottle, so I had to halve the recipe on About.com and, of course, I changed it up a little. Here's what I ended up with:

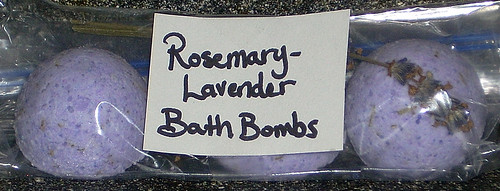
Rosemary-Lavender Bath Bombs

Ingredients
  • 1/2 c. Corn starch 
  • 1/2 c. Citric Acid (4 oz.)
  • 1 c. Baking Soda
  • 1/2 c. Epsom Salt
  • 1 tsp. Water
  • 1/2 tsp. Borax
  • 1/2 to 1 tsp Lavender Essential Oil 
  • 1 Tb. Dried Rosemary leaves, broken up into 1/4" or less pieces (I just pinched them in my hand to break them)
  • 1 Tb. olive oil
  • Colorant, if you want to use it (I used gel food coloring. If you have soap colorant you can use that, too)
Now, according to David Fisher, the most important part of the entire recipe is making sure that there is a 2:1 ratio of baking soda to citric acid. This is what makes the fizzies. All of the rest can be played with. The corn starch is there to make the bath water feel silky and it also helps hold the bombs together when they dry, but you can leave it out if you prefer. The Epsom salt can be exchanged in full or in part with sea salt. The oil is also up to you. I used olive oil because it's what I has on hand and I like it. Try grape seed, jojoba, anything you like!


Equipment
*Make sure that you either use all glass or metal equipment, or use plastics that you don't need for cooking. The essential oil will permeate the plastic and no amount of washing will help you!... Trust me - I found out the hard way!
  • Large glass or metal mixing bowl
  • Metal whisk
  • Measuring spoons and cups
  • Small squirt bottle (I picked up some ketchup and mustard bottles from the housewares section at the end of summer for $0.25. You could use anything that is small, squeezable, and has a top that allows you to control how much comes out.)
  • Spoons
  • Baking sheet lined with wax paper, foil, or paper towels
  • A mold for your bombs. I used the rounded half of a plastic Easter egg. Look around the house - lids, scoops, measuring cups, even a sturdy cardboard tube from the tin foil will work! You just want to make sure the mold is sturdy enough to withstand the pressure you're going to be putting on it by packing the mixture into it and that it is shaped to release the bombs easily.
How I Did It

I'm so sorry I didn't take pictures. Though, it would have been hard to do with my hands covered in bath bomb stuff! I made these on my own, without Little Guy's help, because I ended up making them at 2am. There are portions of this that he could have helped with, but it was rather powdery and I think I'm glad to have kept him out of this project - I wouldn't have wanted him, at his close level to the counter, to have breathed in all of that dust!

Make sure that you have all of your equipment at hand. This isn't a project where timing is everything, but it keeps things cleaner. I ended up trailing some of the mixture from one end of the kitchen to the other, collecting the things I needed as I went along.

  1. Mix the dry ingredients (*except the Borax) together with the whisk, or use a sifter: Cornstarch, Citric acid, Baking soda, Salt, and dried herbs. This is where I made the dusty powder bomb in my kitchen. Make sure you have food and clean dishes put away!
  2. In the squirt bottle, mix the wet ingredients and Borax: Water, essential oil, olive oil. Just put them all in and shake it up! This is where I added my food coloring, too. Remember to not over-do the coloring! The bombs will darken as they dry.
  3. Put your whisk in one hand and the squirt bottle in the other and get ready - this is where you have to make sure you went potty, the kids are going to be quiet for at least five minutes, and the answering machine is on. Just FIVE MINUTES! Squirt a tiny drop of the oil concoction into the middle of the dry stuff and wait a couple of seconds. See how it fizzes up? You don't want that to happen as you're mixing the wet and dry ingredients together, so make sure you keep stirring with that whisk. I don't know the scientific explanation as to why the stirring prevents the fizzing, it just does. So, as you drizzle the wet ingredients into the bowl, whisk like crazy. You may want to stop drizzling once in a while to make sure that it's all mixed in before adding more. 
  4. You want to check every once in a while to see if you have enough wet mixed in - depending on your ingredients, you may need less wet than you mixed up. Grab a small handful of the mixture and squeeze it hard. Open your hand and gently poke the mass. If it flakes up any, crumble it back into the bowl and keep adding the wet ingredients. If it doesn't - stop and go on to step 6. If you run out of wet stuff, go to step 5. (Check the picture that David Fisher was so kind to include in his instructions here.)
  5. If you need more wet, just put 1 TB of water into your squirt bottle. I added a little more food coloring here, too, because I wanted a darker color. Shake it up really well to get some of the leftover oils mixed in and keep squirting, mixing, and checking to see if you have enough wet in there. DO NOT USE TOO MUCH WET! I have no idea how to fix this!
  6. Now you're ready to mold your bath bombs! Get your mold and fill it up with the mixture. Press it in there as tightly as you possible can. This took everything I had to do - I have arthritis in my wrists and fingers. It's important to get it packed well, or they'll end up falling apart as they dry (if they do, just crumble them up, put it in a jar with a nice bow on top and call it Fizzy Bath Salts!) 
  7. If you're using a tube to mold them, set it directly on top of the lined baking sheet. Put some of the mixture into the tube, then use something to batter it down. I used a spice jar lid that fit perfectly inside the tube. kind of like a piston, and then used a long wooden spoon handle to pound it down. It worked great, but I didn't care for the giant pill-shaped bombs, so I scraped them and used the 1/2 egg mold. Once you have it packed well, just slowly lift the tube straight up. If it sticks, you can tap the sides of the tube and use the lid/spoon to press it out as you lift.
  8. Unmolding can be tough. You must have patience because you can't just plop them out unless your mold will allow it.I just repeatedly tapped and shook the mold against my hand until the bomb came out. There were times when I'd nearly given up - it was getting really late! - but then the bomb would pop into my hand. 
  9. Set the bombs on the baking sheet into your oven or other safe place to dry. Mine were dry in 12 hours, but I let them sit for about a day and a half just to make sure they were dry all the way through. When they were dry, they were rock hard and not at all fragile! 
  10.  I packed three bombs into each bag, added a sprig or two of dried lavender for pretties, and was done!
Now, after I made these, I thought of a few possibilities that I could have tried, had I had the time:
  • Split the dry mixture into two separate bowls, mix the wet ingredients into two separate bottles, and add different colors. When molding, create stripes or swirls of the two colors.
  • Wrap each bomb in plastic wrap and tie with a ribbon.
  • Put the bombs into wide-mouthed Mason jars with a pretty ribbon tied around the top.
  • Pack the bombs into a "spa gift basket" with herbal tea, raw honey, a pretty mug, handmade soap, a scrubby or pretty washcloth...  
I'm planning on making these more often! I tried one out (had to make sure they worked!) and I loved it. Do you have any scent combos that you think would be good? For me, for my husband and oldest, for little guy, for gifts?

Tuesday, December 20, 2011

Orange Spice Potpourri {Last-Minute Homemade Gift}

 I got the original idea from a post on Keeper of the Home. You should really check out this blog - she recently posted about different home remedies for winter ailments. I get tons of great ideas from her!

I cannot believe how great this stuff ended up smelling. I just added a few ingredients to it. It is so easy to make - Little Guy pretty much did it all himself! Just make sure that you have the whole family save their orange peels!

Orange Spice Potpourri

  • Cinnamon Sticks
  • Whole Allspice
  • Whole Cloves
  • Peels from Oranges
  • Bay Leaves
  • Pine cones or Wood shavings (from untreated wood!),
  • Orange or Citrus Essential Oil
Now, looking at the list of ingredients, I know what you're thinking: "Doesn't she have any idea how expensive those spices are???" Yes, I do. That's why I bought the dollar store out of them! As I mentioned in my Spiced Dough Ornaments post, if you're not eating it, it doesn't matter how good these things are. You want them for their scent only, so go the cheapest possible. You may even consider buying some of those Cinnamon-Scented Pine Cones to use - just pull them apart!

Next, I used Clementines. Little Guy can peel them by himself and the peels are very thin, they dry very quickly. I kept a bowl near the trash can and told everyone to put their peels into it. Little Guy's job, before bed, was to tear the peels into small pieces (about 1/2" X 1/2"). Then, we spread them onto a wax paper-lined cookie sheet and popped them into the oven. We have a pilot light that is on all of the time, so the little bit of heat generated by it helped dry the peels overnight. If you don't have a pilot light, try setting the sheet near a heating vent or anywhere that the air circulates.

You don't have to go collecting pine cones and wood shavings like we did. I just wanted to be able to bulk up my batch of potpourri so I could give out more and use less spices (they might have been bought at the dollar store, but the cost does add up, anyway!) We had a friend save his shavings for us. Since we had a lot of time before having to give the gifts, We mixed up a little food coloring into warm water and added the shavings. I let them sit for a couple of hours, then drained and spread onto a cookie sheet. I was worried about the orange scent being overpowered by the spices, so I shook a little bit of the essential oil onto the still wet shavings then put them into the oven to dry. They took about 24 hours, and I used my hand to turn them over a few times so they'd dry all over.It added a little extra color and extra scent to the mix.

Now, I didn't give any measurements because there really aren't any. I used about 8 cinnamon sticks. I had to get out a hammer and gently hit them so I could break them into 1/2" to 1" pieces. I used one jar of cloves (0.62 oz, I think), and the same amount of allspice. I think we had the peels from a dozen clementines (they shrink a ton when they dry!) and around 1 1/2 c. of wood shavings. I dumped it all into a bowl and Little Guy used a wooden spoon, then his hands, to mix it all together.

We wanted to have enough potpourri to give to ten people, so we put about 1/2 cup (eyeballed it) into a sandwich bag, then tied closed with a pretty ribbon. The potpourri smell good enough to just set in a bowl. When it stops being "smelly", just put a tablespoon or two into a mug filled about halfway with water and microwave for 45 to 60 seconds. Mmmm!

I linked this post at:
Classified: Mom

Pin It

Monday, December 12, 2011

Transform Your Bread Dough into Something Gooey! {Recipe... Kinda}

Yesterday, I made beef stew in the crock pot. Once the smell of the stew drifted into the front room and into my nostrils, I started daydreaming about eating it. In this daydream, I wasn't just eating that stew. It was accompanied by some very gooey cheesy bread and followed up with even gooier apple cinnamon bread. So, I tried to figure out how to move this vision from my mind to my plate. I could have made a pizza dough for the cheesy bread and a sweet dough for the cinnamon apple bread, but that means LOTS of measuring and even more dishes. So, I decided to make one of my rather bland bread recipes, split it in half, and sweeten up one part and add salt and herbs to the other.

Here's the base dough recipe that I used:
  • 3 Tb. Warm water
  • 2 1/4 Tb. Yeast (one packet)
  • 1 c. Milk
  • 5 Tb. Unsalted butter (cut into small pieces)
  • 3 Tb. Sugar
  • 1 tsp. Kosher salt (if you don't have it, use just 1/2 tsp. table salt)
  • 1 Lg. egg
  • 2 c. + 1 1/2 c. All-purpose flour
  1. Measure warm water (105 degrees F) into your mixing bowl. Sprinkle yeast onto the water and set aside.
  2. Mix milk, butter, sugar, and salt in a small saucepan. Heat on medium low, stirring, just until butter has nearly melted. Let cool to warm (105 degrees F.) I have a kitchen thermometer that I just pop into the pan. Every couple of minutes, I'll stir the milk to help it cool and then check the temperature. It's not necessary, though. Just poke your finger into the milk once in a while. It should just barely feel warm. Do not try to rush this - yeast dies at high temperatures. In fact, it's better if you use it too cool than too hot. If it's cold, it'll just take a little longer for the dough to rise - no harm done!
  3. Once it's cooled, lightly beat the egg into the milk mixture.
  4. Add the milk to the yeast and mix.
  5. Add the first 2 c. of lour to the yeast/milk mixture and stir well. Slowly, about 1/2 c. at a time, add the remaining 1 1/2 c. flour, stirring after every addition.
  6. When the dough comes together, don't mess up your counter! I knead the dough right in the mixing bowl for about 5 minutes. You can stop kneading it when it no longer sticks to everything and is stretchy.
  7. Oil a second bowl with vegetable oil (about 1 - 2 Tbsp.), you can use just about any oil, just remember that the flavor may transfer to the bread! Place dough into bowl and flip it around until it's coated in oil. Put a piece of wax paper or plastic wrap over the bowl, then cover with a kitchen towel.
  8. Find a warm place and set the bowl there. Let the dough rise until double, about 1 - 1 1/2 hours. *You can also put the dough into the fridge overnight. It'll still rise, it'll just take much longer. You'll need to pull it out of the refrigerator about 1/2 hour or so before making the breads.
*I find that the oven is a good, safe place to let my dough rise. If it's particularly cold in the kitchen, I'll turn the oven to 200 degrees F for a few minutes, then open the door to let it cool down some before putting the dough in to rise.

From here to the end of this post, I don't have any real measurements. I just guessed. I know that I should have added a little more salt to the cheesy bread and apples to the apple cinnamon bread.

Gooey Cheesy Bread
Split risen dough in half. Set one half of the dough onto a lightly floured surface. Sprinkle about 1 tsp. oregano, 1 1/2 tsp. basil, 1/2 tsp. Kosher salt, 1/2 tsp. rosemary, and 1/4 to 1/2 tsp. powdered garlic on the dough. Fold the dough over the herbs and start kneading. Knead for about 5 minutes, until all of the ingredients are mixed in pretty evenly.

Roll dough to about 1/2" thick. I actually just rolled it to roughly the size of my baking sheet! Place the rolled dough onto a lightly greased baking sheet (I admit it: I use Pam.) You can also skip greasing the sheet by sprinkling some corn meal onto the baking sheet. Put the dough somewhere warm for about 45 minutes to rise.

Heat the oven to 375 degrees. As the oven's heating, sprinkle cheese and any toppings you'd like over the dough. For this one, I used sharp cheddar, a little more garlic powder, and some cut-up pieces of salami that I found in the refrigerator drawer. Then, I cut a few chunks of mozzarella cheese and distributed them all over. Drizzle the whole thing lightly with olive oil or a little melted butter. Bake for about 15 minutes, checking after 10 minutes. You'll know it's done when the top is all bubbly and gooey-looking! Let cool for about 10 minutes before attempting to cut or the cheese will just melt back together. This is really good dipped in beef stew, ranch dressing, and leftover spaghetti sauce!

Cinnamon Apple Bread
As with the cheesy bread, place the dough on a lightly floured surface. Sprinkle the dough with 1 - 2 Tbsp. sugar and 1 tsp. cinnamon. Knead until the ingredients are distributed. Roll to about 1/2" thick and transfer to a greased baking sheet (you can use corn meal for this one, too, if you prefer.) Let rise for 45 minutes.

Brush the dough with melted butter. Peel and cut 2-3 apples, depending on the size, (tart ones like Granny Smith or Rome are best) into 1/8" thick slices. Distribute apples onto dough evenly. Sprinkle with 1 - 2 tsp. cinnamon and 1/2 tsp. ground cloves. You can add any other spices you like, such as nutmeg or allspice. Sprinkle about 1/2c. UN-packed brown sugar (light or dark) over the apples. Then, drizzle a little honey over that. Finally, melt 2 Tb. unsalted butter and drizzle that over the apples. Bake in  375 degree F oven for 15 - 20 minutes, until brown and bubbly.

While the bread is cooling, mix 2 Tb. melted butter, 1/2 c. powdered sugar, and 1 - 2 Tb. milk, half-and-half, or heavy cream in a small bowl. Drizzle over apples, then let cool for about 15 minutes before cutting.


Do you have any suggestions for toppings for these breads? 
It was so easy to do and my family loved them so much that I know I'll be doing it again... often. 
I'm thinking that a spinach/artichoke/Parmesan cheesy bread might be good. 
And I'm trying to figure out how I'd do a pumpkin version of the sweet bread.

Thursday, December 1, 2011

Easy DIY Advent Calendar with Stuff You Already Have {#Craft}

Every year, I make plans to make my own Advent Calendar... I always wind up picking one up at Walgreen's for $2 around December 5th. I also make a list of fun family activities that we can do together for the holiday season... and it ends up just sitting there because I don't plan ahead. Not this year!

I saw a really easy Advent calendar idea where you use muffin tins as the base. It's perfect - the little candy holders are already there! And, the next day, guess what hubby came home with... Yes, 6 aluminum mini muffin tins. It seems that someone he knew was going to just throw them out (I KNOW!) Knowing me, he figured if I couldn't use them, I'd recycle them. Two of them are now part of our Advent calendar, and I'll be able to use them again next year!

Another idea I saw was to make an Advent calendar that contained a surprise family activity for each of the 24 days leading to Christmas. If I put an activity on little pieces of paper for each day, I'd kind of have to do the stuff, right? You can't have the kids opening each section, read the paper, then say, "Eh... I don't feel like it!"

So, here's my little Advent calendar idea. It took me a total of one hour to make it, including the portions that the kids helped me with. I mostly used things I have around the house. I bought candy and some nice scrapbooking stickers that were on sale at 2/$2.

The mini muffin tins that I have hold one dozen muffins each, so I needed to figure out how to make them stick together. I don't keep glue that works on metal laying around the house, so I figured out a different way: bread ties. Yeah... I never throw them away. I even have other people save them for me! You can use those suckers for everything, even sticking two aluminum pans together! I had the kids help me peel the paper off of about 6 ties. Then, I used a pin to poke holes in both of the tins and threaded one end of each wire into the holes. I loosely twisted each wire before I flipped the tins over and tightened it all up.


*TIP: See the picture on the right up there? 
That paper clip saved me lots of trouble. 
I stuck it on there to remind me which cup
was Day 1. The tins got turned around so 
many times that I had to take all of the candy
out and read the activities so I knew which
one the calendar was supposed to start on.
Next, I had the kids help me. First, we had to agree on some activities. I found a wonderful list of over 30 ideas at Code Name: Mama that I borrowed from. Some of the things we chose will take effort, others are very easy: Make paper snowflakes, Take a family walk at night to look at the decorated houses, bake and decorate cookies (I have four days set aside for that!), family holiday movie night, write to Santa... The very next thing I did - and you shouldn't skip this step! - is to plan out what we;ll be doing on what day, then wrote it down in my planner. This is so important! You don't want to: 1) be surprised that today is the day you're supposed to go to the zoo, and 2) have something major planned for a bust night and something that takes 10 minutes planned for a day when you have lots of time to spare. I wrote all of the activities down on a piece of paper and we put them into the bottoms of the muffin cups.  The kids each got to pick out a bag of candy to fill each day's section with. So, they each took turns placing two of their candies into each cup.

While my oldest watched Little Guy, I got out the glue gun. I had to figure out how to cover each of the cups so they could be opened individually. I saw some great ideas on Pinterest that included cutting little circles from cardstock and covering each individually, making felt bags that contain the day's prize that had a glue dot holding them into the cups... I had two options with what I had on hand: wrapping paper or newsprint. They're both pretty easy to tear open. If I used one sticker for each day, when the kids puled on the sticker, the paper would rip and reveal the contents of the cup underneath. Although wrapping paper is a little more decorative, I went with newsprint. I've been carefully folding each piece of packing paper that I get and squirreling it away for projects just like this - not using it would have been insane, you know?


Now, I had to figure out how to make the paper stick to the aluminum well enough that the kids wouldn't end up ripping the entire sheet off on the first day. I came up with this nifty idea: I used a nail to poke holes in key areas of the tins. Then, I used the glue gun to glue the paper over each section - one at a time. I made sure to let the glue pool a little wherever I had poked holes. After I had the entire paper glued down, I carefully flipped the tins over and put extra dollops of glue over each hole. I also reinforced the bread ties by laying down a line of glue over the two edges of the tins they were holding together.


Then it was time for Little Guy's VERY IMPORTANT job. He had to put the stickers onto the Advent calendar! I had him leave Day 24 empty because I wanted to add a picture of Santa for Christmas Eve.

*TIP: If you have little ones helping, put dots where the center of each cup is.
Our last step was to fancy it up a little bit. I has all kids of ideas: the old tissue paper squares on the end of a pencil thing (too frustrating when it sticks to the pencil), glitter (and look like I ran into a pixie until February?!), paint (too easy for Little Guy to puncture the paper with the brush. AHA! We have tons of ribbon, so we simply glued a little in the spaces between the stickers.
The photo above is our almost-finished product (you can see some of the white glue's not even dry yet!) I plan on putting bows on each corner and then attaching a ribbon to hang the calendar on the wall. Where to put this posed a problem until I was downloading the pictures of our Christmas tree**.  When I saw the photo, I saw the perfect spot - just  left of the tree, up high. There's no way (short of using a long stick or throwing something heavy at it) for Little Guy to get that calendar down. He's is a candy freak and it doesn't agree with his disposition, so one piece a day is enough! He knows there's a whole lot of candy in those tins, so I have to be extra careful.
Don't you just love the thermostat? I think I'll put a big bow on top of it so it looks like an ornament. As we add our own ornaments to the tree, it should blend in... right?
**Now, we don't have a real or plastic tree for a variety of reasons. So, each year, I go out and look for the "perfect tree wrapping paper". In an hour or so, I cover the wall with wrapping paper , then cut out a tree shape from the tree paper. This year's was a quickie job - Little Guy was cranky and I was trying to hurry up and get it done so I could put him to bed. It's not even or anything, but that's how they come in real life, right? As we get closer to Christmas, we'll be making little crafts here and there and adding them to our tree as ornaments (we already have a beaded candy cane on there!)

This post has been added to the following crafty linkies:
 

The Crafty Nest
Classified: Mom

Monday, November 7, 2011

We've Got to Start Figuring Out How to Save $

After years and years of just barely having enough money to get by (and, often, not enough). I've been thinking about the future and it is scary. In the near future, I have the oldest to think about. He's in high school. This has already cost us money - sports fees, yearbook, a couple of field trips, and "special" fund raisers where they order a bunch of pizza and sell it at lunch time. Not to mention his constant needs for school supplies. And it always seems that the money for these things is due just a few days after I hear about it. It's not like I have an envelope of money sitting around from which I can take the $5 or $10 he needs. And, in a couple of years there will be prom, driver's ed, all the costs that come with graduation...

And after high school, there's college. Yes, he'll have to get student loans. But they won't pay for everything. My oldest wants to go to University of Michigan, so he's going to need a place to live, food & utility money, he'll have to buy books, and then there are all of the incidentals that go with being a college student. He'll probably end up needing to get a job or participate in a work study program. But I don't want him to miss the experience of the care-free college days - he'll have enough to bear when he gets out of school - he deserves to have a good time. It all takes money.

Little Guy is a little easier - for now. His wants and needs are simple. But, he'll be growing up and following in his big brother's footsteps. While the plan is to unschool him, plans sometimes go awry and then we're back to going to school and the fund raisers, year books, and field trips.

My dream has always been to live somewhere far away from people. Off the grid and self-sufficiently. I've spent years learning how to refurbish an old farmhouse and even how to build my own home. I have the basics down when it comes to plumbing, electricity, and heating. I know about the types of things I will need to grow in a garden to ensure we'll have enough food year-round. I even read up on raising animals for food (though I think I may just end up having some chickens, goats, and cows just for the eggs and milk!) Well, here's the one piece of good news I have about the future: In an article I found on Homestead.org, it can be done!

However, my biggest concern is what lies ahead for us in the far future. My husband has all kinds of health concerns that, in reality, will end up killing him. No matter what changes he makes in his life right now, it won't undo the damage he's done to his body previously. He was a drug addict through most of the 70's, 80's and 90's. He has medical emergencies due to his drug use that should have killed him more than once, but he managed to survive. These all left some kind of lasting medical problems that is getting worse with age. I don't know how long he has, but in the past year or so, he's been diagnosed with new debilitating problems that really have no cure. They can be controlled with medications and therapies for a time, but they'll never go away and slowly get worse.

How on earth will we manage when his physical and mental states just give out? Right now, I am able to make a little money here and there from surveys. I'm also working on getting back into school so I'll have a career to help keep our needs paid for. But what happens when I can no longer work? If there's no money now, there certainly won't be any later!

So, I did some checking around online and found this savings calculator at Discover Bank. I've never had reason to use one before because I just figured that those were for people who had extra money to stash away for retirement or even a rainy day. But, I found that I can really make some kind of a plan that will make sure I have at least a little bit saved up for when it will be needed most.

And, by using the savings calculator, I can figure out how much I'll need to save for my oldest's needs, Little Guy's upcoming needs, and how much I'll need just in case all hell breaks loose and it looks like we're screwed. But, most importantly, I can use it to figure out how much I will need to have to realize my dream of being self-sufficient. Once I have the goal in place and know how much I'll need, I can slowly scrape together the pennies needed to realize that goal. For me, having a visual, such as a graph, that shows me how much I'm saving will really help me out. Questions like, "Do you really need that, or would you rather have a house?" will pop into my head as I get ready to make an unnecessary purchase, along with a visual of that graph.

So, while I'm still worrying about keeping the electric company happy at this very moment, I'm feeling some hope for the future. How do you keep track of savings? Have you ever used a savings calculator to figure out where you stand?

*This is a sponsored post. I will receive compensation for it. However, as always, ALL opinions are mine!

Sunday, October 30, 2011

The Star Box - Review and Extra (Easy) Enrty {#MadeInMichigan}


This is a review for one of my sponsors of the Made in Michigan Blog Giveaway Hop, which will take place from October 28 – November 2. I will be offering my readers the chance to win a (Hand)Made in Michigan prize package worth nearly $200! Please take a moment to read about this wonderful Etsy shop and then fill out the Rafflecopter form below for a very easy extra entry into the giveaway.


I've been waiting for the item that The Star Box sent me to review, but it is in the hands of the USPS and I'm just not sure when it will arrive, so I'm going to tell you about this really cool Etsy shop right now and, hopefully, I'll be able to add my own review later!

If you are crafty in the least (or know someone who is), The Star Box is a shop to check out. Debra, the shop's owner, creates these stamps by hand, carving the rubber for each and hand sanding the wooden blocks they are mounted to. Now, I don't know how many of you have ever attempted making your own stamps, but I can tell you it isn't easy! I always skip over those neat and creative kids' crafts that I come across that include the word "stamp" in them - whether you make them from potatoes or Styrofoam, I cannot got them right. In high school, I had the opportunity to try to create stamps from rubber. Yeah. That didn't go well, either. One wrong move and the entire thing is ruined! And the time I put into very slowly and carefully carving them was too much for me to want to pursue the art any longer.
Look at how intricate the carving is for these Dragonfly Wings!

So, I have the utmost respect for anyone who has the skill and patience for making stamps. You really have to love your work when you do this! While I may not care for the actual making of stamps, I do love using them! Stamps aren't just for adding a little embellishment to a handmade card or scrapbook. I've seen tutorials that use rubber stamps to decorate clothing, for handmade wrapping paper, and to include as images in art. Check out the use of this Fancy Bird Cage Stamp, for instance:


In addition to single stamps, The Star Box offers stamp sets. These can be used in any number of ways. For this review, I'm waiting on a set of Art Doll Paper Doll Stamps. The set includes the five stamps pictured below, along with an entire kit to make a ton of little paper dolls for playing with or using for crafting:
  • (4) 4"x4" squares of light weight, up-cycled cardboard for the doll body parts

  • (10) 4"x4" sheets of assorted decorative papers

  • (4) metal bottle caps ( these are real used, clean bottle caps, not the shiny new ready made caps for crafting)

  • Assorted Paper Ephemera - this can include book pages, vintage images, tags, paper stubs, tickets, etc.

  • Assorted Embellishments - this can include tinsel pipe cleaners, metal letters, assorted beads, assorted buttons, fabric pom pom ribbon, small amounts of jewelry wire in various colors, sticky back label strips in various colors with words punched on them, etc.

  • (12)- mini brads for moveable arms and legs
I cannot wait to get my hands on this kit! I'd love to make my niece a set of paper dolls with family members' faces on them. I'm thinking of even creating a diorama of a dollhouse from a big box so she can play with them like that. The Star Box has this really cool set of Retro Kitchen Appliance Stamps that I think would be really neat to use in the background of the kitchen section of the house. Think of it: a pretty much flat dollhouse in which she can store all of her dolls and slide it under the bed when she's through! Not only would it be a gift, but a much-needed creative venture for me, too. Check out what Debra has done with this kit:
Today only (ends 10/30 at midnight EST), if you're a Twitter follower of The Star Box, you can get in on the Buy 1, Get 1 Sale! Buy one stamp or set, get one of equal or lesser value ABSOLUTELY FREE! So, head over and follow and get your order in ASAP. Oh, and if you follow, make sure to claim your entry in the Made in Michigan Blog Hop. You can win one of the above Art Doll Paper Doll Kits (including all of the extras!) or a $35 gift certificate to The Star Box as part of the HUGE prize package! 

In addition to The Star Box's Etsy shop and Twitter account, you can find the business on Facebook. Also, if you didn't make the connection, Debra is the owner of Michigan Spinning Company! You can find out more about that on my review post HERE (it was my favorite review so far!)

Disclosure: I will receive an Art Doll Paper Doll Stamp Set and Kit, as described above, for the purpose of review. No other compensation will be received. All opinions are 100% my own.

Saturday, October 29, 2011

Michigan Spinning Company - Review and Extra (Easy) Entry {#MadeInMichigan}


This is a review for one of my sponsors of the Made in Michigan Blog Giveaway Hop, which will take place from October 28 – November 2. I will be offering my readers the chance to win a (Hand)Made in Michigan prize package worth nearly $200! Please take a moment to read about this wonderful Etsy shop and then fill out the Rafflecopter form below for a very easy extra entry into the giveaway.


We all wear clothes, right? (Well, most of us - Little Guy has decided to venture into nudist territory lately.) Did you even consider the fact that everything we wear - from wool to cotton to synthetics all start with spinning fibers together to create a thread or yarn, which is then woven into some kind of fabric and put together into clothing. Now, consider how long people have been doing this. These are the kind of thoughts that are akin to contemplating how insignificant one is, while laying on a hill and looking at stars on a warm summer night. The thoughts that come rushing in can be mind-boggling. Well, at least, that's how it's been for me for the past two hours.

Debra, owner of Michigan Spinning Company on Etsy, sent me a handmade (in Michigan!) Maple & Birch Top Whorl Drop Spindle and some beautifully hand-dyed Shetland Wool Roving (also from Michigan!) to try out. Now, the closest I've ever gotten to working with roving was when I was about 10 years old and visited Greenfield Village. One of the displays had a basket of freshly-washed wool, some carding supplies, and a giant spinning wheel all ready for inexperienced visitors to try out. I think I made the biggest ball of fuzz on a string in the history of humans spinning!

So, you can imagine my apprehension when I opened the package from Michigan Spinning Company and had the weird spindle thingy in one hand and a giant roll of loosely-braided roving in the other. How in the world can I use this stick with a circle and hook on it to turn this fluffy stuff into something I can knit with?! Then I calmed myself by remembering that someone, a very, very, very long time ago, figured out hoe to do this without the benefits of having the roving and spindle delivered by USPS and the Internet with Google and YouTube videos! Now, I don't have sound on my computer, but just watching a few of these videos and the various techniques people use made it possible for me to feel confident enough to get started. And, you know what? I MADE YARN! Really!!! All by myself - for TWO hours. Debra warned me that it was addictive, but I really had no idea it would be such a great feeling. Oh, and meditative, too. For those two hours, I was able to just stare at the spinning spindle and contemplate all those ideas I mentioned above.

Now, I have to share Michigan Spinning Company's Mission Statement because they've succeeded 100% by simply sending me these things to review.
"Michigan Spinning Company is dedicated to promoting and preserving Fiber Art Traditions, including but not limited to, the art of natural fiber processing, hand dyeing, handspinning, knitting and weaving. We have a hands-on approach to learning and eagerly share our experience and enthusiasm for the Fiber Arts through informal informational videos, audio/video podcasting, newsletters, and participation in local Fiber Festivals and Events. We believe in the importance of introducing young people to the Fiber Arts, educating them in the traditions of earlier generations, fostering their love and appreciation for things handmade, and encouraging them to pass on their acquired knowledge and enthusiasm to future generations."

Did you take note of the mention of "young people" and "future generations"? My kids will be learning how to do this, too! My oldest has the most agile fingers and I just know he's do well with it. And, even at three, Little Guy could do this. Just think of the education and pride they'll get out of learning this. And, as kids who've been taught to ask questions, I know that we'll probably end up heading to the library to learn more about different fibers used for clothing, the science behind spinning, how clothes are made... the possibilities are endless!

You can find Michigan Spinning on Etsy, Facebook, and Twitter. You can also follow on their Blog!
Disclosure: I received one Drop Spindle and +/- 6 oz. Wool Roving from Michigan Spinning for the purpose of this review. I have received no other form of compensation. All opinions are 100% my own.

Monday, September 26, 2011

The Worst Laundry Day EVER!

(Photo by missycaulk)
 We've all seen the commercial. An 8-year-old kid, decked out in full body armor, playing full-contact football. He gets the ball and runs it to the end zone for a touchdown... just before a gaggle of other 8-year-olds in the other team's uniform tackle him... in a mud puddle. Next scene: Mom, in her perfectly clean laundry room, sun shining in through the window (where you can see little Johnny passing the football with dad outside). She picks up the uniform, covered in mud and grass stains. She's smiling and shaking her head (Boys will be boys!) She reaches (without looking, I might add) for the one product she knows will clean this mess up with very little work on her part. She merely pours on Super Stain-Lifting Name Brand Gel-Like Magic Stuff on the stains and they disappear in front of our very eyes. (If you're perceptive, you'll see the minuscule writing that mentions how you need to wait 30 minutes and scrub like hell to get these results.) Mom puts the uniform into the washing machine and adds her Super Stain-Lifting Name Brand Detergent, then goes and takes the guys some snacks.

Sometimes I have to ask myself why I don't use those magical products. This past Saturday's cross country meet was at our state park. Because it is "cross country", they didn't use the nicely paved trails for their runs. Nope - someone at the park got out the giant tractor mower and cut paths among the tall grasses for a 5k course. Did they think about the rain and plan the course to go through the thickest, nastiest muddy places? And we're not talking about the average mud. This entire area is boggy wetlands. The mud is stinky and black (some is even green!) It sticks to and sinks into everything. Plus there are burrs of every kind from all of the native wildflowers in the area. There were kids running in toward the finish line carrying a shoe, some even were completely missing one or both shoes! From what I understand, runners were calling one particular stretch of the course "Glue Curve" because they just couldn't run it. My son said that he stopped counting the shoes that were stuck in the mud when he got to 20 - and there were tons more.
One of the tamer muddy areas. The kid in red & white on the left is my oldest. See those shoes? (His teammate in front of him is wearing fluorescent orange shoes!)
THIS is what they're supposed to look like!

After a day of cheering on whatever kid who was running past wearing a "Monroe" jersey, I headed over to where the other parents of out high school cross country team was sitting. The mud really didn't bother me until one mom said, "Oh, no! I'm going to be scrubbing these clothes and shoes for the rest of the night so they'll be ready for the meet on Tuesday!" Uh-oh... I don't use super laundry stuff. I have my homemade stuff - basically washing soda, borax, and a bar of grated up Ivory. Oh, and a scrub brush. I rarely use a washing machine. It costs a dollar per load and is old - the thing uses gallon upon gallon of water and I suspect the landlord has it draining into the sewer-line that goes directly to the river (eventually out to Lake Erie.) So, we've figured out a way to do a full load of laundry using about 7 gallons of water. That is, the "average" load with peed in Little Guy pants, shirts with a little drip of last night's dinner, socks, etc. Muddy cross country clothes, I've found, take a LOT more water.
Sure would have been easier with this stuff! (Photo by Man vyi)
First, rinse the big chunks of mud off of everything. Now, I'm not sure of the coach's reasoning, but he issued a sweat suit to my kid that might fit him when he's 18. The pants are (no kidding) 8 inches too long and about 6 inches too big around the waist. The jacket hangs down almost to his knees. I took the waist of the shorts in because I didn't want my kid having to hold them up as he ran 3 miles. The jersey was also sewn a little so the armpits aren't below his waist. What does this all mean in terms of laundry? My kid, not to be one to waste time, decided not to roll up his pant legs. Nope. He walked around before and after his race with the bottom 8" of those pant legs under his muddy shoes. The mud was part of the weaving of the fabric. The shoes, themselves, are mesh, and had every crevice filled with mud. His shorts and (white!) jersey had stripes of mud going up the back of them.

First time around - the hunks of mud on his back come next time around...
I don't know how many gallons of water I wasted just rinsing the bigger hunks of mud out. Then, I got out the scrub brush and made a mixture of soda and borax for the stains. Man, was I wishing for some of that spray-on gel stuff on the commercial! I scrubbed and scrubbed and scrubbed. I got most of it, but there were some spots that just refused to budge. I began wondering if these were left over from last year's wearer. I did the same with the shoes. Every time I rinsed them to see if I had managed to get all of the mud out, the water kept turning black. Back to it. after a solid hour of scrubbing just 4 articles of clothing and a pair of shoes, I gave in. I was using too much water... I sent my kid down to the store to get some quarters. My friend lent us one of her Super-Duper Stain Release Name Brand Packets of detergent and we tossed all into the washer. They came out kind of clean. At least the places that you really noticed were clean. The legs of the pants have faint dark spots and there are a few spots of mud on the jersey, but good enough for me. The shoes even came clean. Well, at least I know that all of the dirt will be heading back to the wetlands... eventually. Right?

Guess I should be thankful that his entire uniform isn't WHITE!

Friday, September 16, 2011

Call for Crock Pot Recipes (PLEASE!)


 OK, so I really need some crock pot recipes for a 7 qt. slow cooker. I use mine about twice a month in the summer and once a week in the colder months. The problem is, it seems like everything I make tastes similar - either beef stew or chicken soup. I've looked up recipes for other things, but even looking up "spaghetti and meatballs", for instance, leads me to hundreds of recipes that are way different from each other. You see, what I usually do when I Google for a recipe is look at a bunch of different recipes, get the basic idea of the ingredients, then make my own version. I can't do that when there are a ton of extremely different ways to make the same thing! Why don't I just try one? Lots of reasons. Mainly: 1) I don't want to spend money on something that no one in the house will eat more than once; and 2) I don't want to have something cooking all day long and have it turn out like crap.

So, why bother asking for recipes? Well, I've found that bloggers and blog readers tend to be able to find the best of the best and are eager to share their little bits of advice with others. And... I am going to have to start cooking the majority of our meals in the crock pot (or the microwave... or an old electric skillet) for a while. See, Michigan Gas Utilities is calling in all of it's debtors this month. Everyone need to have a zero balance or that's it. They aren't allowed to shut people who rely on gas for heat from October through April, so September is pay up or else month here. And let me tell you, when they say "The 7th", they mean it!

We use gas for cooking, heating, and hot water. Well, we used to! I don't mind not being able to use the stove or oven. It forces me to actually plan meals. Plus, with the slow cooker being so large, I have leftovers to use for lunch the next day or to heat up for dinner a few days later. I can even freeze some for way later - like on that day I forget to plug the stupid crock pot in, maybe (yeah, it's happened more that I care to admit!) I don't mind not having the gas for heat, either. Let me tell you - out furnace has been broken for the past two winters. We bought two small electric heaters and have saved a ton of money! Our place is upstairs in a house-turned-apartments and the insulation between the downstairs apartment and ours is nil. When they turn on the heat, it rises up to us. Plus, our place is so small that those two little heaters keep us toasty on the really cold nights. I hate not having hot water, though. For all I talk about being green and conserving, I have to admit that I am queen of the 1-hour, super-hot shower. Hey, I take quick 10-minute showers all week, but Saturdays are my day to enjoy myself (and the peaceful white noise of the water.)

Anyway, since I'm going to be using my slow cooker about five times a week, I need to start making food that actually tastes like anything but beef stew and chicken soup! So, if you have a recipe posted on your blog (or lots of them!) or you know of a blog with a really great recipe, please link up below. Please don't link up to the main page of the blog - I would really like to be able to click the link and see a recipe (and so would everyone else who clicks!) If you don't have a blog post to link up to, please go ahead and use the comments section to share your recipe.

Thanks In Advance!


get the InLinkz code

Thursday, August 18, 2011

Looking for Inspiration or Want to Share a Project or Recipe? {The Frugal Girls!}


Frugal Girls!

So, every Thursday, I can't wait for The Frugal Girls' Chic & Crafty Party to get posted. What is it? Well, I'll tell ya! It's a great linky filled with a ton of really neat projects and recipes from all over blogdom. The links contain "chic & crafty" ideas that range from the super easy to very involved. I've learned how to completely make over the crappy-looking, yet functional pieces of furniture that hubby keeps dragging home on garbage night. I now have a recipe for Strawberry-Peach Jam that I'm planning on trying this weekend, after out next Farmer's Market trip. And, I used the Flowers for the Black Thumb idea to send flowers to my mother-in-law with the kids.

Oh, and did I mention that this linky doesn't just give you a place to feature your DIY craft, recipe, or idea. When you submit a link, you're entered to win something, too! As a special "Thank You" to those who link up, The Frugal Girls will choose (randomly) one person to receive a gift card of some sort. I was the lucky winner of a $25 Hobby Lobby GC a couple of weeks ago for linking up my revamped Seed Bombs post!!!

Little Guy and I made a special day of it, yesterday, with a bus ride to Hobby Lobby and a craft supply shopping spree. For the $25, we were able to get him 5 sets of watercolors (he goes through them like crazy!), his own box of 64 crayons, a ton of stickers, pop-poms, google eyes, pipe cleaners, a giant jug of glue, lots of construction paper... and more. I've never seen a kid so excited to be buying this kind of stuff - he was just in heaven! (Yeah, he's definitely my kid! LOL)

So, if you've got something you'd like to share, go link up. 
Anything that takes an iota of creativity is welcome, 
even party ideas, 
tips on cleaning and crafting, 
and, of course, 
those project and recipe posts.
The newest edition of the Chic & Crafty Party will post at 8pm tonight! (Thursday) Your idea could even be featured later in the week in its own post on The Frugal Girls. Let me tell you, that's no little thing - being featured by them will mean a ton of exposure for your idea!


**I didn't get anything for posting this. Heck, The Frugal Girls don't even know I'm posting this! I just want to share this really cool linky with you and tell you about a great chance to win a GC to some crafty-type of store. And to thank The Frugal Girls for sending me and Little Guy on our fun shopping spree, thanks to that GC I won!

Tuesday, August 16, 2011

Every Cleaning Recipe You'll Ever Need! {#Rafflecopter #GIVEAWAY!}


 Have you heard of The Peaceful Housewife yet? I met Jenny around March of this year, I think it was during Code Name: Mama's March of Kindness meme. Jenny was blogging about the same things that I was interested in, mainly: greening your home and parenting peacefully. She opened her online store, The Peaceful Housewife, soon after we "met" and I was excited to do a review and gift certificate giveaway with her to spread the word. Her items are wonderful - tons of homemade cleaning products, created with safe and natural ingredients.
Jenny - The Peaceful Housewife

Recently, Jenny published an eBook containing all of her recipes along with cleaning tips. She's included basic laundry detergent and dish soap recipes. Then she added some that I didn't think you could make at home: dishwasher detergent, brass cleaner, and even one for those oh-so-convenient disinfecting wipes! Her tips include how to get stubborn stains from clothes and how to replace chemical-laden carpet shampoo with a non-toxic version.

The book is very easy to read, all of the steps are laid out perfectly. I'd even give it to my husband to make some of these recipes and expect the results to come out perfectly (that's saying a LOT!) I am so thankful to Jenny for sending me this book and I know that, when I shop next, I'll be picking up lots of vinegar, baking soda, and some great-smelling essential oils!


You can buy the book for a mere $3 by heading to her online store. You will also find a ton of great cleaning products for amazingly low prices. For instance, this month's "Scent of the Month" is Apple Jack and Peel and if you'd like to try it, you can buy a 20-load bag of laundry detergent for only $2! I have a bottle of Linen and Room Spray in Lavender Vanilla (there are 12 scents to choose from) that I love. The stuff lasts forever (both the bottle, itself, and the scent) and it only cost me $3.50. Oh, and she even creates a wonderful furniture polish that I feel good about letting Little Guy use for just $5. You just cannot find items like this online or elsewhere for these prices. And, if you choose to buy the eBook, you'd really be saving money by making all of these (and more) yourself!

Would you like a chance to win The Peaceful Housewife: Natural Household Cleaners eBook? Just use the easy Rafflecopter form below (it may take a minute to load.) Open WORLDWIDE!


****By the way - I didn't receive any type of monetary compensation for this review. I did, however. get a really handy eBook - that's it. Everything I've said is in my own words and is my own opinion! OK, now get back to entering the giveaway!