Showing posts with label toddler. Show all posts

Friday, March 30, 2012

A New Parenting Blog (You'll Like It!)

It can be tough to jump back into writing on a regular basis after taking such a long vacation from it. It is especially difficult when you cannot think of anything to write about. I usually write about the fun projects the kids and I are working on or parenting in general. Unfortunately, things have been getting rougher and rougher around here with both kids. I know that some of it has to do with their reactions to the stress I'm feeling. No matter how much you try to hide something like this, it still shows. And, with my oldest, I am honest. He gets a simpler version of what's going on because 1) I don't believe in lying to him by saying that everything is going to be OK - it may not, and 2) if things do get bad, I don't want it to be a shock to him.

As for Little Guy, I am having a terrible time. It's as if he wants to constantly argue with me over everything. He'll ask for a flavor of juice that he knows we don't have, then whine and cry and throw a HUGE tantrum over not getting it. He wakes up in the morning telling me, "Today, I not gonna listen to you, Mommy!" All of the rules get broken all of the time. Not only the silly ones, like pick up your toys. The serious ones, too: no touching the electric outlets. He's thrown Hot Wheels at the TV screen, tossed my coffee mug down our wooden staircase, he runs off when we're on walks... into busy streets. I gave up on cooking and washing dishes with him because he's managed to cut me with a paring knife when I told him to please put it down (he put it down with force on my hand!) and he's broken a ton of dishes by tossing them on the floor just to see them crash. I feel that there is more than his reaction to stress to blame for this sudden change in behavior (no, he hasn't had any vax!)

Anyway, just when I thought I had no where but a physician to turn to (I really don't want labels such as "ADD" on his medical chart - especially at only 3 years old), I heard that a new blog is starting up that may just help me with these and many other parenting problems I will come across. The blog is written by three mothers who have a total of 17 children, ranging in age from 1 to 16 (and one on the way!). And, these aren't just any moms - they are moms who have the same parenting philosophies as I. They "...ascribe to Attachment Parenting, Gentle Discipline, & Natural Family Living philosophies; each in our own way. We wanted to create a place to share our lives as "crunchy" Moms with other similar-minded Moms." Their blog, Grateful Moms of Many, is scheduled to launch on April 1, 2012 and I, for one, cannot wait! On the site, you will find articles on many topics, including pregnancy & birth, breastfeeding, multiples, special needs children, schooling, discipline, frugality, crafts, recipes, mental health, and generally the unique challenges that moms face in daily life. It sounds like the PERFECT mom blog to me!

I really love how these three moms (Sasha, Nic, and Michelle) met each other. They were all on an Online Due Date Club - you know, where expectant moms can commiserate with other women who are at the same stage of pregnancy. Once their children were all born, the three moms stayed in touch via a private Facebook group. Though they all share similar parenting philosophies, they also believe that every parent does what he/she feels is best for their children. You won't find judgment on this blog, only support. And, with the years of experience that these Moms of Many have, you can almost bet that all kinds of interesting things have been encountered. That leaves me feeling as if I can find the help I need with my own kids.


If you can't wait for their April 1st launch, you can head over to their Facebook page, Grateful Moms of Many. There are already a few questions posted and the community there feels wonderful - lots of great ideas being generated and no judgemental attitudes.


 Oh, and I almost forgot! 
To celebrate the Grateful Moms of Many's blog launch 
on April 1st (you know what day that is, right?!), 
there will be a special giveaway 
with a nice little prank-like twist! 
April Fool's! 
So, don't forget to go check it out - I'll give you a quick reminder post so you don't forget. :)

Friday, February 24, 2012

Crafting With Little Ones {Re-Post}

This is one of my all-time favorite posts and it was written well before I had many readers. I'd like to share it with you again because I think that the message is important if you want to foster a love of creativity in your children from a young age: It's not the outcome that matters; the process is most important.

Thursday, January 12, 2012

Moss Terrariums {Crafty Science!}

I have been wanting to make a terrarium since I first saw them on Etsy, at the end of last summer. I vaguely planned to make them as Christmas gifts, then got caught up in back-to-school & Halloween. Suddenly the holidays were upon us and it was too late. I figured we'd do it as one of our spring projects. Until I was gazing out the window, checking out the squirrels and birds, when I saw this:
 See that lovely patch of green between the dying grass and the fence? It's moss! With the weather being so mild, and even warm on some days, the moss has been "living" it up. I kept my eye on it for a few days and then I just couldn't contain myself any longer. I dressed Little Guy for a nature walk and tossed a few plastic bags and spoons into a tote and we were off to collect things for our terrariums. In January. In Michigan. (Yes, I'm going to keep saying that. I am still amazed at the weather and will continue to be awed until there is 6" of snow on the ground and the temperatures have stayed below 30 F for at least a week!)
Once he finished running around like a nut, we got down to business. It was time to walk very slowly and see if we could spy any moss growing. Once we found a good patch, we collected some of it. Now, when you look for moss for this project, make sure of a few things:
1) Only take a little from each patch and leave the rest to regenerate.
2) Use a spoon or spatula to carefully lift it from the ground. It's pretty hardy stuff, but you want to make sure to lift the entire plant - including its root system.  
3) Don't forget to get some soil from the same area, preferably from directly under where the moss was growing. We found three different types of moss on our outing and each one had a very different type of soil beneath it: One had mostly rocky, sandy soil; one had a soil that was composed mostly of dead grass; a third had very rich soil that was mostly composed of what Little Guy refers to as "worm poops".
4) Take note of how moist the soil below the moss is. You are going to want to try to mimic that amount of moisture in your terrarium.  
5) Also be on the lookout for some nice-looking small pebbles and a few sticks or pieces of tree bark that have signs of moss or mushrooms (or, what Little Guy calls "fun guys") on them. We found a stick with some white "moldy" spots on it, a piece of bark from a tree stump with a mushroom, and bark from a dormant tree with green spots. We're excited to find out if anything sprouts from them!
Now, I want to tell you that you can use nearly anything to make your terrarium. I learned quite a bit from Storm The Castle. (This is THE coolest site for finding really neat things to do, by the way. Go bookmark it right now. I promise you'll use it. Repeatedly.) We used two different things for our terrariums: old honey jars and a plastic cake carrier that someone gave us a store-bought cake in for our terrarium containers. But, really, as long as it is see-through and has a lid or small opening, go for it: aquarium with a crack in it, glass vase, 2-liter pop bottle... Just remember that you're going to have to be able to get stuff into the container and arrange it! (Storm the Castle has a great tutorial on how to make really long tweezer-type thingies from a wire coat hanger so you can reach. I told you that site is great!)


Start by laying down the dirt you collected. Because the cake carrier is near-impossible to open without really jostling whatever is inside, I knew that we wouldn't be able to open it up to add water very often. So, I took a plastic lid that is about 1/4" deep and placed some cotton into it (the white rectangle on the left of Little Guy in the photo). I put this in the center of the cake "plate" before adding dirt. After we got the soil in place, I poked a small hole in the mound above the cotton-filled lid and poured some water into it, as well as all over the rest of the soil. My reasoning for the cotton was so it would hold a layer of moisture without saturating the soil. Don't know if it will matter in the end, or not. Just my theorizing!

(After I took the photo above, I noticed that pieces of dirt and rocks were falling into the area where the dome part of the cake carrier would fit into the bottom. So, I tore up a piece of paper towel into strips and poked them into that area to keep the debris out. You can see the paper towels in the photos below. Keep this in mind while you do the next part!)

So, where was I?! Oh, yeah: add your soil. Make sure to keep track of which soil is added where if you're using different mosses with different soil needs! Pile it up so you have a nice hill if your base is a flat piece like out cake dome has. If you're using a bottle-like container, try using a funnel to direct the different soils to different areas and attempt to get a mound going in there. This is important because, if you ever really look at the lay of the land that your moss is found on, you'll notice that it is usually on an inclined surface, even if it's only slight. Make sure to save some of the soil for later - you're going to need it to fill in spaces between the moss. Once you have your mound of soil, ever so slightly pack it down and moisten it. I just poured a little water onto the cake plate, I used a spray bottle of water for the honey jars.

Now it's time to add the moss! The pieces we had were rather large chunks, so I showed Little Guy how to gently pull them apart into small pieces. I had him decide where to place it. He loved being in charge of this part of the operation! It took forever for him to decide. He kept putting a piece down, turning it a little... moving it to the left, to the right... Sometimes he completely abandoned a piece in favor of a different one. It was really cool to watch him!

Once the moss was in place, I carefully added the reserved soils in between the pieces of moss. Then it was time for Little Guy to add the embellishments we collected. Now, I considered grabbing some tiny "guys" toys and a couple of tiny cars to include in the terrarium, but though better of it. Just before I went digging through the toys, I had a very disturbing vision: Little Guy attempting to recover his toys. Dirt everywhere. Terrarium ruined. Now, if your kids are cool with using toys inside, go for it. I think it would be pretty cool to create a scene with them. Just make sure that whatever you add to your terrarium will be able to withstand the high levels of moisture that it will encounter. Also consider whether it might give off any toxic fumes when wet or warm. The cute little plastic bunnies you add could end up killing all of the living things in there.

I think that I probably added too much moisture to our cake dome terrarium. Since opening and closing it just isn't an option, I have a back-up plan. If I notice that the dome is constantly coated in water droplets or the mosses or fungi start dying, I am going to poke small holes in the top of the plastic dome. This can be done very easily without marring the view: Just take a small nail or even a thick sewing needle and hold it with a pair of pliers over fire (a lighter or the burner of a gas stove.) Um... make sure your pliers are insulated or you're wearing an oven mitt! It doesn't have to get red hot, just hot enough to melt the plastic. Then, poke small holes through the dome, toward the top. This should allow enough moisture to escape without completely drying it out.

Our Finished Products:


This was such a fun and easy project to do. While we worked on it, we had some great conversations about ecosystems, habitats, what plants need to grow, what kind of rocks we were using, the water cycle... We also pondered the possibility of small insects, seeds, and spores being mixed into the soil we used. I'm anxious to see if any surprises grow in our terrariums.

I have another plastic domed container that has been sitting on top of my refrigerator since last spring. I've known it would be great for some use, but was waiting until I was inspired with an idea to use it. This thing is 18" in diameter! I want to do a similar project with that one. I'm not telling you what it is just yet, so watch for a post. It's going to be a little while, though. I need to have the space for the thing to have a home near a window, so I really need to do some purging of "stuff". One of these days, my husband and oldest will be gone all day. That's the day I call Salvation Army for a pick-up, get out the boxes, and get rid of all of this crap we don't really need! That day is coming soon and I can't wait for it. :)

One more thing: If you like this idea, but don't have the time or desire to make your own terrarium (or if you just don't have a moss supply available to you), you can get there ready-made. One Etsy shop I know of that sells these is 8Days Of Treasures. (You can check out the review I wrote of her shop for the Made in Michigan Blog Hop in October HERE.) Stephanie lives in Michigan and creates some pretty awesome terrariums! She also sells some unique glass containers that you could make your terrarium in, such as vinegar decanters, salt ans pepper shakers, and covered candy dishes.

If you make a terrarium and write about it, 
please leave me a link in the comments. 

If you have an idea of what could be added to a terrarium 
for a cool scene, share it! 

If you have pictures of your terrariums, 
I'd love for you to post them to my Facebook wall!

This post has been linked at:
Preschool Teacher Chestnut Grove Academy Classified: Mom Photobucket

Friday, December 9, 2011

Looking For a Fun & Educational Book for the Kids? {@CowsCantJump}

I've always been interested in how children learn. With my oldest, I was amazed to find he could suddenly do things that he didn't know how to do the day before. He taught himself to read seemingly overnight just after he turned four. Well, really he didn't - I just wasn't paying close enough attention to notice all of the little signs of reading that he had been showing. With Little Guy, I've been much more keen on every little thing he learns. Witnessing his speech go from babbles and coos to actual words was amazing! And I loved finding out that, although he didn't have the physical ability to say certain words, he knew what they meant when I said them to him. One particular thing I noticed in his speech and vocabulary development was that nouns came first. I "tested" my theory that this is the same for most toddlers while watching and listening to them talking to each other at the library. Their speech was mostly made up of nouns, with a few verbs and adverbs thrown in (usually due to a phrase that they often used, such as "Go bye-bye.")

Now that he's speaking very well, using full sentences and a wide array of words to express himself, I wanted to introduce him to new words. Since I believe heavily in unschooling, I didn't want to sit down and "teach" him these words. I wanted him to learn them in a way that was natural and fun. Boy, did I jump for joy when I received an offer to review two children's books that contain a ton of new words. Cows Can't Jump and Cows Can't Quack, written by Dave Reisman and illustrated by Jason A. Maas, are the perfect fit!


Cows Can't Jump starts with, "Cows can't jump... but they can swim." It goes through many different animals, starting with what the animal can't do, then showing what it can. The book moves from familiar verbs, such as swing, to those that children don't often hear very often, such as wallow. Cows Can't Quack is similar, except it uses animal sounds. I loved showing little guy what each of these new words meant. We wallowed in the blankets on the bed. We grunted loudly. We laughed quite a bit!

After asking me to read the two books about a zillion times withing a couple of hours of receiving them, Little Guy decided to read them to me. Then to his stuffed animals. And, when my oldest came home, he just had to read the books to him! Later that evening, as he was playing with his cars, I listened in on Little Guy's narration (he is always talking!) His BMW was "pouncing" on the Cadillac. The tow truck was talking to the bus with a series of clicks, just like dolphins. I was watching my little one practice his new words!

Another thing I observed him doing was building up his cars' self-esteem. (Yeah, I know it sounds weird!) But, at one point, he was using a piece of cardboard with a block under it as a ramp. One car would speed down, but the other one kept crashing half-way down. After a few times, my empathetic kid picked up the crashing car and said, "You can't race fast, but you can so stunts!" I'll be willing to bet that he made that car feel much better! He's also used this way of dealing with shortcomings on the cat and even me. And, just last night, after he tried to keep up with my oldest while playing a football video game that he kept losing, he was feeling pretty low. My oldest, being the big brother, kept saying things like, "Ha, ha! I win!" to him. (Yeah, I thought that sibling rivalries would be non-existent with 10 1/2 years between the two.) Little Guy was getting frustrated and feeling sad and I was just waiting for him to lose his composure. He came close, then he thought of something. "I can't win, but I can make pizza!" My oldest lost his interest in cooking early, an Little Guy knows he doesn't know how to cook much more than Ramen or a bowl of cereal. He made himself feel better AND stood up for himself in one sentence - and my oldest was dumbfounded! LOL

I highly recommend these two books to anyone with infants through preschoolers - even up to kids in elementary school who are learning to read. The illustrations are hilarious. You can check out some preview pages of Cows Can't Jump and Cows Can't Quack by clicking on the links. The books are are easy to read and interesting - something you often don't find in easy-readers. And, as I started off saying, they're educational without being "teachy", if you know what I mean. I am especially impressed with how, just by reading these books, Little Guy has managed to figure out how to deal with blows to his self-esteem (and his cars', too!)

Cows Can't Jump comes in paperback or board book, and Cows Can't Quack is available in paperback.You can order these books at Jumping Cow Press HERE. Shipping is only $1.99 for ANY quantity order in the U.S.! You can also find these books online at Barnes & Noble and Amazon.com. You can also find Jumping Cow Press on Twitter and Facebook.

I'd like to thank Dave Reisman for sending me a copy of each book to review. My little guy absolutely loves them both and so do I! I can't help but wonder if there is anything else cows can't do...

Disclaimer: I received paperback copies of Cows Can't Jump and Cows Can't Quack, and a board book copy of Cows Can't Jump (all signed! YAY!) from Jumping Cow Press for the purpose of this review. I did not receive any other form of compensation. All opinions are my own.

Outings Can Be Scary When Potty Training! {Giveaway! (12/17) US}

Sponsored by Tomoson.com Little Guy has been learning how to use the potty since the beginning of summer. He's only had a handful of accidents at home since we just let him run around without pants on all day. When he began learning to use the potty, I bought one small package of Pull-Ups (I know... guilty) to use. Those Pull-Ups ran out about a month ago and, even though it's tempting, I will not buy any more. That means that I need to be prepared for accidents while we're away from home. I have a plastic bag with a clean pair of pants, underwear, socks, and shoes in it that I lug around wherever we go. I didn't need to use it until last week's trip to the grocery store.

It seems that my husband shared raisins with Little Guy the night before. Lots of raisins. (How many of you just thought, "Oh no!"?) So, yeah... Now, I should have known something was up when he complained that his tummy hurt as we were walking to the bus stop. He only complains about "owies" when he really has them. We were almost there, so I told him that I'd rub his tummy while we waited for the bus. He seemed fine by the time the bus arrived and I forgot all about his tummy ache.

Well, the inevitable happened -  halfway through shopping, I start to smell something. Little Guy was walking funny. And he was unusually quiet - not running around trying to toss everything he could get his hands on into the cart. I just knew... Our Kroger does not have public restrooms, so I had to find an employee to show us the way to the "secret" bathroom in the back. I went through THREE people who refused to let us use the restroom! I had to make my way to the customer service desk, stand in line, and ask the manager. He started to shake his head, too. I threatened to clean a poopy little boy right there at the desk if he didn't show us to the restroom. That got him moving!

We got to the bathroom just as Little Guy's plastic pants began to leak - JUST in time! I looked around for paper towels that I could wet to clean him up and there weren't any (aren't employees - especially those working around food, supposed to wash their hands?!) There was only half a roll of that one-ply, see-through toilet paper. I started to dig through my bag. Band-aids, no. Camera, no. Crayons, no. Extra hat.... um, no. Then I saw it - I swear it had a heavenly glow surrounding it!

A few days earlier, I received two sample packs of QwikShower disposable washcloths. I tossed one of them into the bag and gave the other to my oldest to try out. I had planned on checking them out when I had a little extra time. I forgot and I am so glad! After undressing my poor little one, I opened up the package. I was expecting that fake lemony smell that wet wipes tend to have, but was surprised that it smelled really good! The wipe was about 10" X 12" and was thick enough that I knew it wasn't going to bleed through as I cleaned him up. I didn't think that just one was going to do the job very well, but it did. By the time we left the bathroom, Little Guy was clean and smelling fresh! (I let hubby deal with the laundry part after we got home!)

I plan on ordering a few more (you can get 10 for only $7) to carry around with us. After that experience, I don't want that feeling of dread at not having anything to clean him up with again! Plus, the scent is one that I know will appeal to my oldest. They'll be nice for him to toss into his bag for track or to use on those rare mornings when he wakes up just in time to get dressed and catch the bus. No one wants a nickname like "Stinky Kid" in high school!

You can buy your own QwikShower wipes at their online store - they will even send you a single-wipe sample for just $1 so you can try it out to see if you like it before buying more. QwikShower also has fundraising and affiliate programs, where they partner with PTA's, athletic booster clubs, and even bloggers. The organization (or blogger) will receive 10% of all proceeds from sales. You can learn more HERE, or contact Harvey via email.
Would you like a chance to win a 6-pack of QwikShower wipes to try out for yourself? Enter in the Rafflecopter form below!


Monday, November 14, 2011

Tantrums Are on the Rise (Again...)


I just read Mummy in Provence's post for Stream of Consciousness Sunday, titled: Toddler Tantrums.   about her 18-month-old daughter's tantrums. I started to write a reply, then realized it was so long that I may as well turn it into a post. This is in response to her question:
"Any tips on how to cope with these Toddler Tantrums?"


Here's my response:

Little Guy's tantrums have been steadily increasing since they started, when he was around 18 months old. Nowadays, a "good" day is when he only has three or four. There are days when he'll have four in an hour! I attribute them to his increasing independence. He gets frustrated when he can't do something (whether he's not allowed or incapable - it doesn't matter which.) I also noticed that growth spurts can lead to more tantrums, too. Between being hungrier and more tired, plus he's probably a little achy from growing pains, he gets extra-crabby.

Sometimes he will throw a tantrum because he cannot have something he wants, but knows that it is impossible for me to even give him. Yesterday, he wanted to watch Thomas and Friends... on TV, not the DVD's we have. Thomas was not on TV at that time, so I told him that we would have to watch a DVD if he wanted to see the show. This led to a ONE-HOUR TANTRUM - I kid you not. A couple of days ago, he wanted to go to the library at 10pm. He is well aware of the fact that the library is only open in the daytime, when it's light outside. It's as if he's asking for the impossible just so he can let loose with his emotions. It drives me nuts and I often find myself taking it personally. I need to walk out of the room, cover my ears, and count to 10, 50, even 100 just to keep my cool.

The good news is, the more he is able to effectively communicate with words, the shorter the regular tantrums have become. I started to ask him to talk to me from the time his vocabulary suddenly had a growth spurt, around 2 years old. My mantra has been "I can't understand you when you cry or whine. Please use words to tell me the problem." If he is too upset to talk and I've given him enough time to feel that he's shown me how displeased he is, I'll ask him questions using vocabulary that he needs. "Are you feeling sad because you can't do ___?" And: "You must be very frustrated that the puzzle piece won't fit there." When he can tell me what the problem is, at least he knows his feelings have been validated.

I also communicate my own emotions to him. "I am becoming very angry because you are just screaming and crying and won't come talk to me." It lets him know that I can feel the same emotions as he does. It also makes me feel better to let off that little bit of steam. Just saying that I'm angry/frustrated/sad aloud makes ME feel that MY emotions have been validated!

I don't give in. This sounds mean, doesn't it? The thing is, with Little Guy, I've learned that giving in once means he'll try the tactic 1,000 more times. What I do is offer alternatives. I don't just give him one thing: "The library's closed. We'll go to the park instead." I don't give him an infinite number of choices: "The library's closed. What else would you like to do?" I give him two options: "The library's closed. Would you like to go to the park, or go for a walk?" He's back in control of the situation, yet he's not completely overwhelmed with choices.

Recently, he's started having tantrums that seem pointless. Today he had one because one of his Hot Wheels ran into another one. HUH?! He's the one in charge of the damn cars, and now he's sad because he made one car be mean to another? I quickly learned that the cars have absolutely nothing to do with these outbursts. About 95% of the time, I can stop him in mid-scream by offering a hug. "Wow, you must feel very sad about your Mercury Coupe getting hit by the Viper! Why don't you take a break from your cars? I'll bet you'd feel better if we laid down on the bed together and I gave you a bunch of big hugs." Sometimes he falls asleep, ans sometimes he's back in action and feeling happy in a few minutes.

Sometimes, there's absolutely nothing I can do. He just gets himself so upset that anything I say or do just feeds the fire. That's when I feel some big mama anger bubbling up. I need to step out of the situation, and fast. I'll gently set him on the bed and let him scream, hit, kick, etc. I will tell him once or twice to let me know when he's done so we can talk or hug. Then, I have to mentally take myself out of the situation. I'll watch TV - any show! - with Closed Captioning on and really pay attention to it. Sometimes I head to Facebook or enter a couple of giveaways. Anything to keep my mind occupied. I'm always in the same room with him to make sure he stays safe and to be here for him when he's ready.

Finally, I don't hold a grudge or act superior. I'll never rub his nose in the fact that he did all of that screaming for nothing because he didn't get his way. I won't act angry with him after he's finished all the yelling. I never bring the subject up again, as in "Remember the last time you wanted to ___ and I said 'No'? You freaked out and cried and screamed." It just reminds him of a bad time he had and tells him that I might still be angry about it because I remember it. I'm working on getting my husband and oldest to avoid these things, too. When they do it to Little Guy, I can really see how badly he feels about himself. Who would want to make a little one feel sad and ashamed? Why would a parent ever want their child to feel as if they didn't love their son or daughter as much just because of an emotional outburst?

Now, I'm no expert on the subject of tantrums. My oldest had less than FIVE tantrums - ever. When people used to complain about their kids' tantrums, I'd be secretly rolling my eyes at them. Now that I'm in over my head with them, I understand. I also know that it's important to listen to other parents' solutions to the question of how to deal with them. I sometimes wonder if I'm raising a bratty little boy and it scares me that he could grow into a nasty adult. So, now it's MY turn to ask:

Do you have any tips on how to deal with tantrums?

Thursday, October 20, 2011

Groove Kid Nation - Music in Motion CD {Review}

Little Guy cannot stand kiddie music. You know, those cutesy nursery rhyme songs? I tried many fine times to play some of those popular children's CD's (I think you know the brand name I'm referring to?) and he became a different kid. He'd throw his toys, get crabby, and turn into a little monster. On the other hand, he has always been soothed by "grown-up" music (especially John Lennon!) So, when I had a chance to review Groove Kid Nation's Music in Motion, I really didn't know what to expect...

He loved it! The music sounds grown-up, but the lyrics are easy to understand and it's fun to sing along with the Kool Katz band. We don't listen to a lot of soul music around here, but we will from now on - Little Guy is always a happy camper when I play the kids' songs on his Music in Motion CD.

And, while he's being entertained, he's learning, too! The songs really bring the instruments and rhythm of the music to the forefront. Children are invited to dance, nod their heads, and even play air guitar along with the songs - all of which Little Guy enjoys. The CD also comes with a pretty cool little 10-page book. Each illustration features one of the songs on the album and highlights one of the members of the Kool Katz band along with the instrument they play. For instance, on Little Guy's favorite songs is "Fast and Slow". The song features the flute and children must lay down when the flute plays slowly, get up and run around when it plays fast, and stop when the back-up music plays and the flute stops. And so, the corresponding page for "Fast and Slow" in the book features Jasmine on Flute:
Other than being a CD filled with very cool and groovy, Music in Motion does something else: 10% of the wholesale price of the CD goes to CARE, an organization that fights global poverty.

You can listen to the songs and order your own copy of Groove Kid Nation's Music in Motion, and their first album, The Wheels on the Bus, on their Web site, at Amazon MP3, and iTunes. Also, if you sign up for their newsletter, you will receive FREE STUFF: an MP3 of the Itsy Bitsy Spider from the "Wheels on the Bus" CD, an MP3 of Funky Chicken from the "Music in Motion" CD, 2 Coloring Book downloads of the characters from both CDs, and an eclectic EP of their son's heartbeat and acoustic piano. You can also find Groove Kid Nation on Facebook. I received one or more of the products mentioned above for free using Tomoson.com. Regardless, I only recommend products or services I use personally and believe will be good for my readers.

Wednesday, October 12, 2011

Too Big for a Stroller, BUT... {Review & #GIVEAWAY - Ends 10/30}

If you've read my blog often enough, you know that we don't have a car for many reasons. This leaves us a few alternatives: ride the bus, ask a friend for a ride, or walk. The bus is nice, but the schedule and routes aren't always convenient, plus it costs a dollar each way (when we all go, that means $6 just to get there and back - more than gas!) Once a month, we carpool to the grocery store with a friend to get our frozen, bulk, and heavy stuff, but asking for a ride every time we want to go somewhere becomes annoying to friends with cars! Plus, we don't have a car because we chose NOT to drive everywhere in the first place. So, we walk more often than not.

Last summer, we took our stroller everywhere with us - to the park, outdoor concerts, the store... Little Guy would run alongside it for a block or two at a time, then ask to sit in the stroller. The stroller was a pain, though. You couldn't push it through grass easily, taking it into stores was sometimes impossible, someone had to always be watching it so no one would take it when we were at our destination and taking a child into crowds with a stroller can be dangerous! People tend to hold cigarettes at the eye-level of a child who's sitting in a stroller. We had a couple of near-misses at the River Raisin Jazz Festival last year.

This summer, we pretty much ditched the stroller. I can't tell you how free it felt to leave it at home. Little Guy was able to walk farther distances (actually, he runs everywhere), but he still needed to be carried sometimes. We live a mile away from our favorite park, the post office, and downtown - the three places we go most often. That means 2 miles round-trip, plus whatever walking/running we do while we're there. I almost always end up carrying Little Guy the last 1/2 mile home, oh, along with whatever we happened to take with us and/or buy while we were out. I have arthritis in my hands, elbows, shoulders, and knees. Plus, I get nice little flare ups of sciatica from time to time. Carrying him usually results in some major pains for me later on!

So, what's the solution? Baby Nari's Hip Hugger! I cannot give enough praises to this wonderful product. It is basically a fanny pack with a little seat for little ones. If only I'd had this for the past two summers... Well, can't go back and change time - I have one now and love it! There is a nice-sized storage pocket where I can keep an extra pair pf pants and underwear, sunscreen, snacks, etc. The Hip Hugger also has storage pockets on the inside of the waist strap for keeping money, an ID, etc. safe. PLUS, there is a mesh pocket on the outside where we keep Little Guy's water (or whatever car he's decided absolutely must go bye-bye with us.)


The Hip Hugger isn't just a fancy fanny pack, though. The waist strap is very wide 5 inches and padded so it distributes the weight evenly. It has both Velcro and a safety strap to ensure it will stay on and stay snug (Baby Nari recommends that you keep the belt tight to stay comfortable.) And, it's easy to change the size of the belt buckle, so two parents can use the Hip Hugger without having to go through a huge mess of trouble changing the size (it fits waists up to 40 inches.) The seat has a little heart of non-skid material to keep a wiggly child from slipping and constantly needing readjustment.

There are two versions of the Hip Hugger: Infant and Toddler. We, of course, have the toddler one, which can hold a child up to 40 pounds! I has an angled seat which tilts the child closer to your body, making it easier to carry them. The baby version can be used as support for a tired arm when they are tiny. As soon as baby can sit on his or her own, you can use it in the same way as the toddler version. It can be used from 5 months old (15 lbs.)


Oh, and did I mention that they come in a ton of COLORS?!

I can't wait to use this in the winter. We were pretty much stuck at home last winter because strollers aren't made for snow and ice and Little Guy couldn't go very far - snow take a LOT of hard work to walk through! Carrying him with all of the bulky clothes between us was nearly impossible - he was constantly slipping, making him pretty much dead weight. We'll be able to go so many more places this year - no cabin fever for us!

Baby Nari Hip Huggers are available to buy HERE. With the code: BABYNARI you can get $20 off your order. Oh, and shipping is free for orders over $50!

So, would you like one? Maybe you know someone with a baby or toddler who could really use one? Fill out the Rafflecopter form and give it a shot!

Wednesday, September 28, 2011

My Day Out with "Thomas"... Uh, Kinda {Wordless Wednesday}

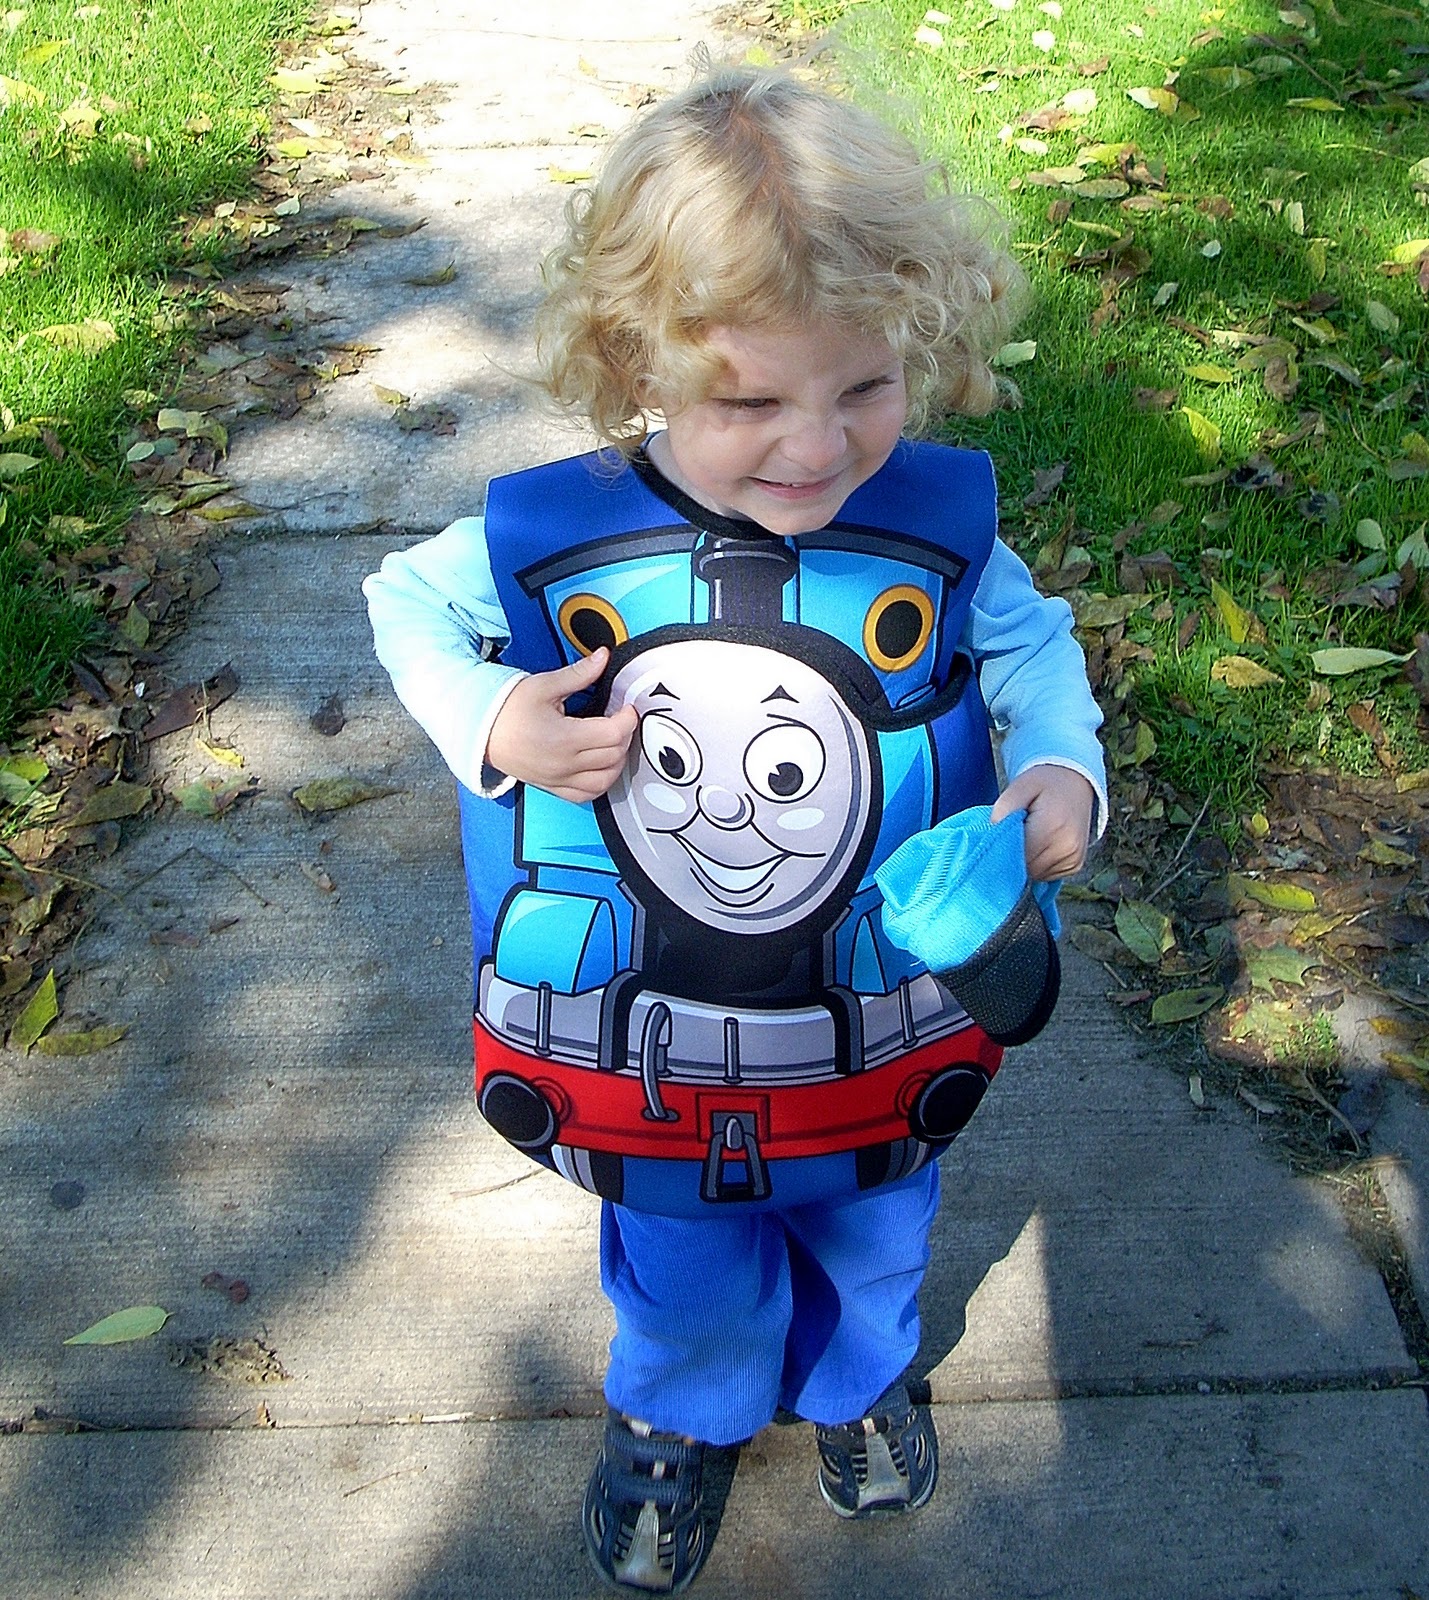
Not really like those "Day Out with Thomas" posts I was seeing all summer. But, I think this was even better! We received this cool costume from Wholesale Halloween Costumes for the review I posted HERE.


BOTH feet have left the ground!


 Little Brown Bear's author, "Aunt Bett" (Elizabeth Upham McWebb), lived in our town. This is a statue of Little Brown Bear that sits in front of the library downtown. If you ever get the chance, check out your local library to see if her books are available - they're great stories for little ones! HERE is a list of her books.

 Downtown is starting to get "dressed up" for Autumn!
When I say, "Look at Mommy!" this is what I get.


This is "The Tea Store" (a.k.a. Health Matters) where we get all of our teas and vitamins. Oh, AND snacks when we're downtown!

 Nothing like heading to the library by our house to play with the really cool Thomas & Friends track while wearing your really cool Thomas costume!
And you just have to do some coloring, especially when the librarians just added fresh crayons to the box!
OK, know what he's doing here? Well, let me just say that when your kid is really interested in a leaf on a bush, pay close attention. As I was snapping the picture, I saw his hand go up to his mouth. It was a berry (?!) that he was after. I'm so glad I caught this before he popped it into his mouth!
So, that was my "Day Out with Thomas" - as I said, I'm sure it was better than any other one!

Thanks, once again, to Wholesale Halloween Costumes for sending us this really neat costume to review. I love the candy catcher pocket in front even better than before - Little Guy could carry his own sticks, leaves, rocks, and nuts (lots of black walnut trees around here) so I didn't have to!

Friday, September 23, 2011

Kitty Cat Gluing Project {#Craft}

I was paging through a rather popular catalog that has all kinds of kids' crafts in it and came across quite a few that I decided to try with Little Guy. The first is this Kitty Cat:
I attempted to create a template that you could print out for the cut-out parts, but I just can't figure it out without making it look like Little Guy drew it free-hand. So, here's what you need to cut out:
  • 4-inch diameter circle in black (head)
  • 6-inch diameter circle in black (body)
  • 2 1/2-inch diameter circle, then cut in half in black (paws)
  • 7-inch long (about 2 inches wide at largest spot) crescent shape with rounded top in black (tail)
  • 1 1/2-inch square in black, then cut in half in black (ears)
  • Two 1-inch diameter circles in yellow (eyes)
  • about 3/4-inch tall heart shape in pink (nose)
  • 1/2-inch tall triangle in pink (mouth)
And then you're also going to need this stuff:
  • 1 White pipe cleaner cut into four equal pieces, then curl one end of each piece around a crayon
  • 1 piece of yarn or ribbon tied into a bow
  • 2 small black pom-poms for eyes
  • White crayon
  • Glue stick
  • White glue or glue dots
Now, if you don't have all of this stuff, no biggie. You can use two different-sized plates for the head and body, just paint or even color them whatever color you (or your kids) want. No pipe cleaners? How about bread ties, spaghetti, string...? For those who aren't great at tying bows, cut one out of paper. You don't need pop-poms, either. Just use black paper or color them in with a crayon or marker. Oh, and the sizes? Not a big deal, either. I just kind of guessed at them.

Here are the basic steps to making kitty:
  1. Outline all black parts with the white crayon (as you can see, Little Guy decided to go the extra mile!) And then draw the kitty's mouth on (I did that part.)
  2. Use glue stick to glue on these parts: head, eyes, nose mouth, paws. Then flip it over and use the glue stick to add the tail and ears.
  3. Use the white glue or glue dots to add the pom-poms to the eyes, then glue on the whiskers, and finally add the bow. 
  4. The last step is always the hardest - let it all dry. We did our project before bed with the promise that it would be dry when he woke up.

The main thing to remember here is that this is a project that should be relatively easy for a preschooler to do with little help. I cut out all of the pieces while he was napping and put them into a paper bag. I found that when he wants to do a project, he wants to do it NOW, so waiting for me to do all of the cutting can make a fun project become a tantrum.

I had a picture of the project from the catalog taped onto the wall in front of Little Guy so he could see how it should look (great way to teach them to see how pictures can translate into real things!) I had him show me where he was planning on putting each piece AND where he planned on putting the glue before he actually did it. If his planned spots were way off, I'd say something like, "Well, let's look at the picture and see if it looks right." Often, he'd see the mistake. If not, I'd put the piece in the right place and ask him if that looked OK. If the pieces were going to be placed slightly off, I just left it alone - it wasn't MY project!

To keep the white glue from being over-used or getting everywhere, we have a "deal". He guides the bottle and I help squeeze it. I get to guide it, too, he just doesn't realize it. And I can control how fast the glue comes out. Try to work from top to bottom with the white glue so arms don't accidentally move previously added parts.

Have LOTS of fun!


Pin It

Friday, September 16, 2011

"Trick-or-Treat, It's Thomas!" {Wholesale Halloween Costumes}


I have always prided myself in my ability to make Halloween costumes for my kids. Until this year, that is. Little Guy loves Thomas the Train and, with lots of goading from the Oldest, has talked non-stop about wanting to be Thomas for Halloween. So, I decided to get started early - I've done the last-minute costume thing and it's not fun. I found a box just the right size, measured Little Guy, cut holes, and sketched out the design. Before painting, I wanted to make sure it would fit him, so I tried to try it out on him. He hated it. I mean, one second he was a happy little boy who was going to try on his Thomas costume, the next minute he was a kicking, screaming toddler who managed to tear apart a very well-made, sturdy box. So much for the make-your-own-Thomas-costume idea!

Luckily, a few days after this fiasco, I received the opportunity to try out a costume from Wholesale Halloween Costumes! I mean, how lucky can a mom at her Halloween costume wit's end get? Before heading straight for the Thomas section, I decided to look around a little - you never know what you might find. I was amazed at their selection of Halloween costumes for kids! They have a huge number of costumes, from pirates to princesses, TV characters to classic characters kids have dressed as for years... anything you could possibly want.

Too many choices for me, so I narrowed my browsing down to Boys Costumes. The first thing I noticed was that the costumes are really made for boys - they come in jumpsuits, shirt and pants or tunics that are worn over clothes. All of these are definitely Little Guy-friendly. And they're really cool costumes, too. I remember the days when your costume was either homemade, or came in the form of an ill-fitting mask that you couldn't see out of and never stayed on and a plastic apron-like thingy that you tied on around your neck and waist. Those days are gone, baby!

 And then I saw it... the PERFECT Thomas the Tank Engine Costume!  This thing is awesome, and I know that he'll wear it all year round. In fact, our entire neighborhood has already seen his costume because he wore it everywhere we went the day it arrived.  It's a tunic-like costume, so he wears it like a big shirt - no mobility issues! And, being in Michigan, it can be hard to know what the weather will be like. I was in pre-labor with Little Guy on Halloween in 2008 and it was a balmy 70 degrees out. Last year, his first Trick-or-Treating experience, it was rainy, windy, and freezing. This costume is large enough that I could put a winter coat under it, and it's light enough that he wouldn't sweat to death if we are lucky enough to get a nice Indian Summer Halloween (is that P.C.?!) Another neat feature of this costume is that he doesn't need to carry a bag for his goodies. It is designed with a built-in "candy catcher" pocket! Our town is full of houses with porches, so he'll be able to use both his hands for balance on the steps.

Oh, and a couple more things -  Wholesale Halloween Costumes is very customer-oriented!
The costume came in a neat bag with a hanger, so we can hang it in the closet when he's not wearing it. They also have a wonderful customer care section on their site where you can find the answer to almost any question. Oh, and if you can't find the answer, you can reach them by phone, via a contact form, and even live chat! And, along with our costume, came a Return/Exchange Procedures Form. This company doesn't wait until you have a problem to let you look up the rules on returns - they let you know the deal up front, before you even take the costume out of the package. I have to say that this really impressed me. It shows that they really want to make sure that the customer knows what to do if any problems should arise. I can't say that for a lot of companies - even the big, expensive ones! Oh, and they even direct you to where you can print out a prepaid return label so you don't have to go stand in line at the post office forever and then pay to ship your product back.

Speaking of price... these costumes really are at wholesale prices. The price of our Thomas the Tank Engine Costume was only $23.50. They even have one priced at $19.90! And they have a flat rate shipping fee to the continental US of only $5.90 ($6.90 expedited) no matter how big your order is. I just hate finding the perfect item for an amazing price only to find out the shipping costs twice as much as the thing I want to buy! You don't have to ever wonder about that here!

(And, yes, I know I just posted about the Costume Swap. We'll be participating next year or donating our Thomas costume to a kid who doesn't have anything to wear!)

Disclosure:  I received a free Thomas the Tank Engine Costume in exchange for my honest review.  No monetary compensation was received. I only recommend products or services I use personally and believe will be good for my readers. All opinions are mine and not influenced by the company.