Showing posts with label design. Show all posts

Monday, January 30, 2012

One SCARY Guy! {Mouth Man Hoodie #Giveaway (2/9) US}

This is what I get when I ask him to say "Cheese!"
If you aren't familiar with Mouth Man Hoodies, you're missing out! I was sent the Kids' Skeleton Hoodie Shirt for Little Guy and it has quickly become his favorite thing to wear. The graphics are beyond amazing - sharp and detailed - and printed with eco-friendly inks. And the hoodies are made of 100% Polyester Sport Fabric (recycled!) This isn't a heavy-weight material and is made to breathe, so it's perfect for year-round wear. Right now, it's cold out around here, so Little Guy has been wearing a long-sleeved tee under his hoodie. But, as the weather warms up, this will be perfect to wear outside in the spring or fall, and a great cover-up to carry around all summer for cool nights or windy days at the beach.

VERY cool graphics.
Now, I don't know how old each of my readers is but, according to my stats, it looks as if most of you grew up in the 70's and 80's - like me. So you'll be pretty familiar with the band Journey.  Guess who came up with the idea of Mouth Man Hoodies... The bass player, Ross Valory. AND, some of the graphics have been designed for Mouth Man by another (former) band member, drummer Prairie Prince. (((I can't get "Don't Stop Believin'" out of my head!)))You can read more about the creation of these fabulous hoodies and their designs HERE.

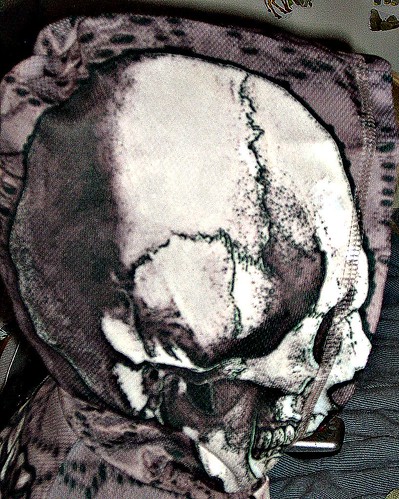
And check out those graphics. I think that the hood is my favorite part. The photos on the site don't show the hood, so I was really surprised and impressed when Little Guy pulled it over his head. And these aren't just cool graphics - we were able to even get a little learning about bones in over the past week. Now, whenever he bumps his head, I hear him say, "Mommy! I hurt my cranium!"

Here's the best part of the hoodies, and the reason they're named "Mouth Man" - when you cross your arms in front of you, the graphics on the elbow-area of the shirts create a head with a mouth! Once I put Little Guy in front of a mirror and showed him how he could cross his arms and then make the skeleton's mouth open and close, he was running around "YOMP-ing" Daddy, Brubber, and the poor, confused cat!
Don't you just love it when red-eye actually works in your photos?
Mouth Man has many more designs and is available in sizes from Kids 2T all the way up to Adults XXL. 

Enter To Win!
Mouth Man would like to give one reader their very own hoodie shirt! Just fill out the Rafflecopter form below.


Thursday, January 12, 2012

Moss Terrariums {Crafty Science!}

I have been wanting to make a terrarium since I first saw them on Etsy, at the end of last summer. I vaguely planned to make them as Christmas gifts, then got caught up in back-to-school & Halloween. Suddenly the holidays were upon us and it was too late. I figured we'd do it as one of our spring projects. Until I was gazing out the window, checking out the squirrels and birds, when I saw this:
 See that lovely patch of green between the dying grass and the fence? It's moss! With the weather being so mild, and even warm on some days, the moss has been "living" it up. I kept my eye on it for a few days and then I just couldn't contain myself any longer. I dressed Little Guy for a nature walk and tossed a few plastic bags and spoons into a tote and we were off to collect things for our terrariums. In January. In Michigan. (Yes, I'm going to keep saying that. I am still amazed at the weather and will continue to be awed until there is 6" of snow on the ground and the temperatures have stayed below 30 F for at least a week!)
Once he finished running around like a nut, we got down to business. It was time to walk very slowly and see if we could spy any moss growing. Once we found a good patch, we collected some of it. Now, when you look for moss for this project, make sure of a few things:
1) Only take a little from each patch and leave the rest to regenerate.
2) Use a spoon or spatula to carefully lift it from the ground. It's pretty hardy stuff, but you want to make sure to lift the entire plant - including its root system.  
3) Don't forget to get some soil from the same area, preferably from directly under where the moss was growing. We found three different types of moss on our outing and each one had a very different type of soil beneath it: One had mostly rocky, sandy soil; one had a soil that was composed mostly of dead grass; a third had very rich soil that was mostly composed of what Little Guy refers to as "worm poops".
4) Take note of how moist the soil below the moss is. You are going to want to try to mimic that amount of moisture in your terrarium.  
5) Also be on the lookout for some nice-looking small pebbles and a few sticks or pieces of tree bark that have signs of moss or mushrooms (or, what Little Guy calls "fun guys") on them. We found a stick with some white "moldy" spots on it, a piece of bark from a tree stump with a mushroom, and bark from a dormant tree with green spots. We're excited to find out if anything sprouts from them!
Now, I want to tell you that you can use nearly anything to make your terrarium. I learned quite a bit from Storm The Castle. (This is THE coolest site for finding really neat things to do, by the way. Go bookmark it right now. I promise you'll use it. Repeatedly.) We used two different things for our terrariums: old honey jars and a plastic cake carrier that someone gave us a store-bought cake in for our terrarium containers. But, really, as long as it is see-through and has a lid or small opening, go for it: aquarium with a crack in it, glass vase, 2-liter pop bottle... Just remember that you're going to have to be able to get stuff into the container and arrange it! (Storm the Castle has a great tutorial on how to make really long tweezer-type thingies from a wire coat hanger so you can reach. I told you that site is great!)


Start by laying down the dirt you collected. Because the cake carrier is near-impossible to open without really jostling whatever is inside, I knew that we wouldn't be able to open it up to add water very often. So, I took a plastic lid that is about 1/4" deep and placed some cotton into it (the white rectangle on the left of Little Guy in the photo). I put this in the center of the cake "plate" before adding dirt. After we got the soil in place, I poked a small hole in the mound above the cotton-filled lid and poured some water into it, as well as all over the rest of the soil. My reasoning for the cotton was so it would hold a layer of moisture without saturating the soil. Don't know if it will matter in the end, or not. Just my theorizing!

(After I took the photo above, I noticed that pieces of dirt and rocks were falling into the area where the dome part of the cake carrier would fit into the bottom. So, I tore up a piece of paper towel into strips and poked them into that area to keep the debris out. You can see the paper towels in the photos below. Keep this in mind while you do the next part!)

So, where was I?! Oh, yeah: add your soil. Make sure to keep track of which soil is added where if you're using different mosses with different soil needs! Pile it up so you have a nice hill if your base is a flat piece like out cake dome has. If you're using a bottle-like container, try using a funnel to direct the different soils to different areas and attempt to get a mound going in there. This is important because, if you ever really look at the lay of the land that your moss is found on, you'll notice that it is usually on an inclined surface, even if it's only slight. Make sure to save some of the soil for later - you're going to need it to fill in spaces between the moss. Once you have your mound of soil, ever so slightly pack it down and moisten it. I just poured a little water onto the cake plate, I used a spray bottle of water for the honey jars.

Now it's time to add the moss! The pieces we had were rather large chunks, so I showed Little Guy how to gently pull them apart into small pieces. I had him decide where to place it. He loved being in charge of this part of the operation! It took forever for him to decide. He kept putting a piece down, turning it a little... moving it to the left, to the right... Sometimes he completely abandoned a piece in favor of a different one. It was really cool to watch him!

Once the moss was in place, I carefully added the reserved soils in between the pieces of moss. Then it was time for Little Guy to add the embellishments we collected. Now, I considered grabbing some tiny "guys" toys and a couple of tiny cars to include in the terrarium, but though better of it. Just before I went digging through the toys, I had a very disturbing vision: Little Guy attempting to recover his toys. Dirt everywhere. Terrarium ruined. Now, if your kids are cool with using toys inside, go for it. I think it would be pretty cool to create a scene with them. Just make sure that whatever you add to your terrarium will be able to withstand the high levels of moisture that it will encounter. Also consider whether it might give off any toxic fumes when wet or warm. The cute little plastic bunnies you add could end up killing all of the living things in there.

I think that I probably added too much moisture to our cake dome terrarium. Since opening and closing it just isn't an option, I have a back-up plan. If I notice that the dome is constantly coated in water droplets or the mosses or fungi start dying, I am going to poke small holes in the top of the plastic dome. This can be done very easily without marring the view: Just take a small nail or even a thick sewing needle and hold it with a pair of pliers over fire (a lighter or the burner of a gas stove.) Um... make sure your pliers are insulated or you're wearing an oven mitt! It doesn't have to get red hot, just hot enough to melt the plastic. Then, poke small holes through the dome, toward the top. This should allow enough moisture to escape without completely drying it out.

Our Finished Products:


This was such a fun and easy project to do. While we worked on it, we had some great conversations about ecosystems, habitats, what plants need to grow, what kind of rocks we were using, the water cycle... We also pondered the possibility of small insects, seeds, and spores being mixed into the soil we used. I'm anxious to see if any surprises grow in our terrariums.

I have another plastic domed container that has been sitting on top of my refrigerator since last spring. I've known it would be great for some use, but was waiting until I was inspired with an idea to use it. This thing is 18" in diameter! I want to do a similar project with that one. I'm not telling you what it is just yet, so watch for a post. It's going to be a little while, though. I need to have the space for the thing to have a home near a window, so I really need to do some purging of "stuff". One of these days, my husband and oldest will be gone all day. That's the day I call Salvation Army for a pick-up, get out the boxes, and get rid of all of this crap we don't really need! That day is coming soon and I can't wait for it. :)

One more thing: If you like this idea, but don't have the time or desire to make your own terrarium (or if you just don't have a moss supply available to you), you can get there ready-made. One Etsy shop I know of that sells these is 8Days Of Treasures. (You can check out the review I wrote of her shop for the Made in Michigan Blog Hop in October HERE.) Stephanie lives in Michigan and creates some pretty awesome terrariums! She also sells some unique glass containers that you could make your terrarium in, such as vinegar decanters, salt ans pepper shakers, and covered candy dishes.

If you make a terrarium and write about it, 
please leave me a link in the comments. 

If you have an idea of what could be added to a terrarium 
for a cool scene, share it! 

If you have pictures of your terrariums, 
I'd love for you to post them to my Facebook wall!

This post has been linked at:
Preschool Teacher Chestnut Grove Academy Classified: Mom Photobucket

Wednesday, November 16, 2011

#WIN a Great Stocking Stuffer! {UGLee Pen #Giveaway (11/26) US #Rafflecopter}

Sponsored by Tomoson.com I used to wait tables. I had a huge callous on the middle finger of my left hand for years. I also had some major pain in mu thumb and index finger on that hand. On busy days, the pain would be so bad that I'd ice my hand when I got home just to numb the pain away. Though I haven't taken an order in years, that phantom pain comes back, especially in the winter. 


My husband has a central nervous system disorder which makes it very hard for him to write. His hand shes so badly that his writing just looks like a bunch of zigzag lines. He must put a tom of pressure on his writing instruments to keep the shaking under control. With that much pressure, just writing his name is a long and arduous task. Writing an entire sentence can leave his hand, wrist, entire arm... even his shoulder and neck in pain.

Then, there's my oldest. Now, no kid should have problem with his hands at only 13 years old, but with the amount of homework he has been getting since starting high school and constantly having to take notes in every class, he comes home complaining of the pain in his hand. It worries me. How badly will his hand hurt when he gets out of college??? Is all of this writing messing up the way the bones, tendons, and muscles are developing? Will he be at risk for early onset of arthritis?


Oh, and I don't want to forget about Little Guy. Being the kind of person he is, he wants to do everything the rest of his family can do. He sees me making lists for things we have to do or buy. He wants to make his own lists. I give him a pad of paper and a pen and let him write his "list", but he can't grip a pen very well. It ends up slipping out of his fingers. He can't even draw a circle without having to reposition the pen. He ends up frustrated and angry. I've tried giving him a crayon or marker, but he wants to be like me and only a grown-up looking pen will do.


Last week, something pretty cool came to my family! We received a package of UGLee pens. Now, these are aptly named - they're not really pretty and sleek. But they're great for all of our problems. On those days when my pain returns, I can still write. My husband still has shaky hands, but he can write for a longer period of time. My oldest's hand pain has already become a memory. And even Little Guy can "write" his lists without the frustrations he's been feeling. (In fact, I've noticed that he can actually write a few letters. I just didn't know it when he was using cumbersome fat crayons and slippery pens and pencils.)


What makes UGLee Pens so different? The have a squishy grip on them. This thing is really weird-feeling and almost seems sticky. I kept expecting to have to wash my hand after using it. But I got used to it after a few tries and began to love it! It also contains ink that flows easily and smoothly. I have always preferred gel pens because they write so nicely, but UGLee Pen's ink has them beat. Finally, the pen is lightweight. You may not think of this when writing, but just a few ounces can make a huge difference!


"UGLee" stands for Ultimate Grip; Lee is the name of the doctor who invented this pen, Dr. Lee. Dr. Lee has a BS in Molecular Biophysics and Biochemistry from Yale University and earned his MD from Stanford University School of Medicine. He's not just some guy who decided to invent a different kind of pen! It took him years of studying the human hand and building tons of prototypes before he came to his final version of the UGLee Pen.

Would you like a chance to win your own 
3-pack of UGLee Pens?
Enter in the Rafflecopter form below!
***If you are viewing this post from my homepage, please click on the title to go to the post page. Rafflecopter has a glitch that mixes up all of my giveaways when they're all shown on the same page. I received one or more of the products mentioned above for free using Tomoson.com. Regardless, I only recommend products or services I use personally and believe will be good for my readers.

Friday, November 11, 2011

How Do You Thank a Coach? {Budugalee Giveaway!} (11/21) US


As many of you know, my oldest decided to join the Cross Country team this year. Now, I had absolutely no experience with high school sports (or any organized sports, for that matter.) I really had no idea what was expected from me or from my son. Well, one of the things, it turns out, was to be part of the parent carpool when these was no bus available for transportation. Another was to pick him up from his daily practice at a park nearly 4 miles from out home. And, finally, I was expected to show up at the meets with snacks and to cheer on the team. Um… we have no car. I prepared my son for the begging for rides from kids who live near us to both the track meets on Saturdays and home from practice Monday through Friday. I missed all but two of the meets because I managed to plot a route that included a bus ride and long walk. Oh, and thanks to my son, I had no idea that I was supposed to be sending snacks each week! ("I forgot.")

Let me tell you something – my idea of a coach used to be the ones you see on TV and in movies. You know the ones, they yell at and belittle the kids in order to “motivate” them and toughen them up. They act uncaring and apathetic toward any adversity a kid might face outside of the sport. My views have been changed forever! My son’s coach was a really nice guy. He could tell that my son really wanted to participate in Cross Country, so he worked out transportation. In fact, most of the time, the coach, himself, would drive 20 minutes in the opposite direction of his house in order to drive my son home from practice. Every. Day. Since he had to be at the Saturday meets extra early, he arranged rides for my son to be picked up and brought home. I only met the guy twice, and he was busy coaching at the time, so I never really got to know him. He was a quiet manly-man, from what I could tell… and that’s all I knew about him!

I really wanted to thank him for all of the extra things he’d done that made it possible for my son to be on the team, but what do you give to a guy like this? I thought on this for a couple of day, then I knew: My friend, Bernie, recently opened an Etsy shop and she makes some of the most interesting and unique cards I’ve seen. A “Thank You” card made by Bernie would be just right. She also loves doing custom jobs… She’d know exactly what kind of Personalized Greeting Card to make for this coach!

So, I got in touch with her on Etsy through her shop, Budugalee, and explained all of the nice things this coach has done (there’s more – I just don’t want to bore you all to death!) and asked if she’d be interested in creating a Thank You for him. Oh, she replied right away with quite a few great ideas!
She asked if I had any photos of the team’s jersey, running shoes, anything like that. So, I sent some and she worked out a design for me. In the meantime, I had looked up a few quotes about coaches and cross country and found the quote on the front of the card. Bernie suggested adding “Thanks for going the extra mile” inside the card – now, how perfect is THAT?!
Now, if you check out most of the cards that Bernie makes, they have pretty borders and sparkly paints on them. Mr. Bernie, who acted as the consultant with a male perspective, suggested she skip those thing – the recipient was a manly-man, athletic type, after all. I’m glad he did! The card came out just right. I sent it with my son to the last meet of the season. When my son turned in his uniform a few days later, he saw the card smack dab in the middle of the coach’s bulletin board in his office for everyone to see. Now, this tells me that the guy is quite proud of it – and deservedly so! I think that Bernie came up with the perfect Thank You card for the situation!
Front
Inside
If you are looking for the perfect card for someone special, you really need to check out Budugalee. Bernie’s card run from the weird to insightful, witty to serious. She starts with copies of old photos and then uses props, paint, cardstock… whatever she has, to add the perfect touch and set the mood of the card. Check out these...

GIVEAWAY!
Do you have someone special who you’d like to give one of Bernie’s personalized cards to? She’s offering to create the perfect personalized card for one winner! It will be a process similar to the one I experienced for the coach’s card. You can send you own photos, include any special sayings or messages, etc. Just let her know, and then stand back while the brainstorming begins! 


If the Rafflecopter form is wonky, please click on the title of this post. Do not attempt to enter on my home page because Rafflecopter has a glitch and you may end up entering a different giveaway!

Thursday, November 3, 2011

Have You Checked Out My New Blog Design???

Late last year, I discovered blog giveaways. I entered left and right, trying to make Christmas happen for the kids. I won some pretty cool stuff. One thing I won is what prompted me to start this blog. I entered to win an Amazon.com gift card. I didn't see that there was a second prize - a blog design. Guess which one I won... So, I got a blog design. I had no idea what I wanted to write about, but thought it might be fun to just blab about whatever I wanted, you know? The design was simple and didn't really have much of a theme (except for my button) because I really just had no idea... It was nice and it prompted me to start writing. I've made some really great friends, have gotten to try out and review some pretty cool products, and have used my blog to express my views and share cool ideas with whoever feels like reading it.

I am so excited about the new look of my blog. I swear, just a few weeks ago, I mentioned to someone that I would love to have a new look. It just wasn't something I could fathom paying for, though. I didn't really need it and money's extremely hard to come by. If I was trying to make money off of my blog, it would be a different story. I'm not, so I'd have to be happy with the design I have. That's when I received an email from Krista at Heavenly Savings. Must have had some good karma floating around because I won a complete blog re-design in her International Giveaway Hop!!!

Within an hour of responding to that winning email, Margaret of W.A.I.S.T.Eed Space Designs sent me a "Congratulations" email and a link to a form. I had no idea (again) of what I really wanted. Her questions on the form were very good and got me thinking in the right directions. I wanted a cleaner look. I wanted two sidebars, but still wanted space so my main posts wouldn't look squished. I really wanted a change in my header and button. I told her what colors I like and mentioned that I love Klimt's Tree of Life.

A couple of days later, she had a design all ready for me to look at. I was blown away! Except for one minor detail, it was perfect. That detail was fixed withing 15 minutes and it was time for her to install my new design! How's that for fast?!

There are a few thing that I just love more than all the rest: The header is ME! She managed to find a great Tree of Life-inspired tree and the writing is nice and casual. The widgets with the rotating blog buttons in the sidebar are just too cool! I always try to keep the blog buttons to a minimum because they take up space and no one ever looks at them anyway. Well, now they catch the readers' eyes and don't take up a lot of space. Everyone's blog button will be noticed! I have a cool little tree favicon now! My button is softer and not as bold as my old one (grab it from the sidebar if you'd like!) And check out my neat social networking buttons at the top, right! I even have a Google+ button to match the others. Oh! And I have a siggy now, too.

After checking out her prices, I know that I could have saved up some PayPal payments and gotten this great design, anyway. She's got some amazing packages for both Blogger and Wordpress. Plus she does ala carte items if you just need a button for a hop or a header or something. Oh, and right now (only through Nov. 4th! - HURRY!):
Everyone who orders a package can either get something free off of the A La Cart mean or you can take $15 off the cost of what ever package you order. Please go here and fill out the order from and use the coupon code 15OFF!
In addition to W.A.I.S.T.Eed Space Designs' Web site, you can find Margaret on her Blog, Facebook, and Twitter. Follow her in some way so you can catch her next sale if you miss this one!

Sunday, October 30, 2011

The Star Box - Review and Extra (Easy) Enrty {#MadeInMichigan}


This is a review for one of my sponsors of the Made in Michigan Blog Giveaway Hop, which will take place from October 28 – November 2. I will be offering my readers the chance to win a (Hand)Made in Michigan prize package worth nearly $200! Please take a moment to read about this wonderful Etsy shop and then fill out the Rafflecopter form below for a very easy extra entry into the giveaway.


I've been waiting for the item that The Star Box sent me to review, but it is in the hands of the USPS and I'm just not sure when it will arrive, so I'm going to tell you about this really cool Etsy shop right now and, hopefully, I'll be able to add my own review later!

If you are crafty in the least (or know someone who is), The Star Box is a shop to check out. Debra, the shop's owner, creates these stamps by hand, carving the rubber for each and hand sanding the wooden blocks they are mounted to. Now, I don't know how many of you have ever attempted making your own stamps, but I can tell you it isn't easy! I always skip over those neat and creative kids' crafts that I come across that include the word "stamp" in them - whether you make them from potatoes or Styrofoam, I cannot got them right. In high school, I had the opportunity to try to create stamps from rubber. Yeah. That didn't go well, either. One wrong move and the entire thing is ruined! And the time I put into very slowly and carefully carving them was too much for me to want to pursue the art any longer.
Look at how intricate the carving is for these Dragonfly Wings!

So, I have the utmost respect for anyone who has the skill and patience for making stamps. You really have to love your work when you do this! While I may not care for the actual making of stamps, I do love using them! Stamps aren't just for adding a little embellishment to a handmade card or scrapbook. I've seen tutorials that use rubber stamps to decorate clothing, for handmade wrapping paper, and to include as images in art. Check out the use of this Fancy Bird Cage Stamp, for instance:


In addition to single stamps, The Star Box offers stamp sets. These can be used in any number of ways. For this review, I'm waiting on a set of Art Doll Paper Doll Stamps. The set includes the five stamps pictured below, along with an entire kit to make a ton of little paper dolls for playing with or using for crafting:
  • (4) 4"x4" squares of light weight, up-cycled cardboard for the doll body parts

  • (10) 4"x4" sheets of assorted decorative papers

  • (4) metal bottle caps ( these are real used, clean bottle caps, not the shiny new ready made caps for crafting)

  • Assorted Paper Ephemera - this can include book pages, vintage images, tags, paper stubs, tickets, etc.

  • Assorted Embellishments - this can include tinsel pipe cleaners, metal letters, assorted beads, assorted buttons, fabric pom pom ribbon, small amounts of jewelry wire in various colors, sticky back label strips in various colors with words punched on them, etc.

  • (12)- mini brads for moveable arms and legs
I cannot wait to get my hands on this kit! I'd love to make my niece a set of paper dolls with family members' faces on them. I'm thinking of even creating a diorama of a dollhouse from a big box so she can play with them like that. The Star Box has this really cool set of Retro Kitchen Appliance Stamps that I think would be really neat to use in the background of the kitchen section of the house. Think of it: a pretty much flat dollhouse in which she can store all of her dolls and slide it under the bed when she's through! Not only would it be a gift, but a much-needed creative venture for me, too. Check out what Debra has done with this kit:
Today only (ends 10/30 at midnight EST), if you're a Twitter follower of The Star Box, you can get in on the Buy 1, Get 1 Sale! Buy one stamp or set, get one of equal or lesser value ABSOLUTELY FREE! So, head over and follow and get your order in ASAP. Oh, and if you follow, make sure to claim your entry in the Made in Michigan Blog Hop. You can win one of the above Art Doll Paper Doll Kits (including all of the extras!) or a $35 gift certificate to The Star Box as part of the HUGE prize package! 

In addition to The Star Box's Etsy shop and Twitter account, you can find the business on Facebook. Also, if you didn't make the connection, Debra is the owner of Michigan Spinning Company! You can find out more about that on my review post HERE (it was my favorite review so far!)

Disclosure: I will receive an Art Doll Paper Doll Stamp Set and Kit, as described above, for the purpose of review. No other compensation will be received. All opinions are 100% my own.

Thursday, October 27, 2011

Amore Vivo - PREview and Extra (Easy) Entry {#MadeInMichigan}


This is a review for one of my sponsors of the Made in Michigan Blog Giveaway Hop, which will take place from October 28 – November 2. I will be offering my readers the chance to win a (Hand)Made in Michigan prize package worth nearly $200! Please take a moment to read about this wonderful Etsy shop and then fill out the Rafflecopter form below for a very easy extra entry into the giveaway.


Amore Vivo is an Etsy shop that specializes in beautiful floral arrangements, wreaths, wine art (a little more on that later!), and upcycled cork art. In Italian, "Amore Vivo" means "Love Life" and it is the perfect name for this shop! Many of the items you will find at Amore Vivo are full of life - live and silk Floral Arrangements, beautiful Peacock Feather Wreaths, and Unique Handmade Wine Bottle Toppers are at the heart of this shop. The shop's owner, Michele, is from South Lyon and has been a floral designer and crafter for over 25 years. Her love of local wines and penchant for floral design kind of coalesced into a passion.
 Now, my "review" is actually going to be a PRE-view. Rather than sending me one of her Fresh Christmas Centerpieces now, Michele has agreed to wait to send it until the perfect time for me & my family - between November 20 and December 18 - so we can enjoy it during the holidays. Because this is an arrangement made with Fresh Michigan Evergreens (balsam fir, blue spruce, juniper, cedar, pine...), it will last 2-3 weeks and I'd really prefer to enjoy it during the holiday season. I can almost smell it now and almost don't want to wait!

Isn't that just beautiful?! I wish I had a scratch-n-sniff monitor! And, just so you know, Michele will work with customers to get the look they want. It is completely customizable in color, size, style... the possibilities are endless. Each arrangement comes in a foam "oasis" container to keep the fresh pieces looking great and help them last. Michele also includes care instructions and a nice information sheet about Michigan Evergreens. Hey - sounds like a great learning opportunity as an added bonus!

This is what the information sheet says:
"This centerpiece is handmade with wonderful evergreens from our vast Winter Wonderland state of Michigan!  I hand cut these greens just before arranging my Christmas Centerpieces to keep them long lasting and naturally fragrant!  Most of them come from my home in Southeastern Michigan with accents from areas of Traverse City, Tawas by Lake Huron and the Tri City area.  In these times when so many of us have artificial trees, my special fresh evergreen centerpieces still give the home the fresh tree aroma."

Since I cannot write a review because I haven't received the item yet, I'm going to share some of the feedback that Amore Vivo has received on Etsy and via email. The first is from a client who was so happy with her order that she actually got out paper and pen and wrote an actual letter (anyone who takes the time to do this has got to be a happy customer!):
"Michele
Hope you remember, me. I ordered 5 of your Made In Michigan centerpieces for Christmas to be shipped to different states. Wow, what a great response of thanks I received! I now live in Michigan and every year search of special gifts for my family Made In Michigan. Yours was perfect, along with the evergreen information you attached. Thank you so much, I will be back next year!
Nicole"
Her Etsy feedback is just wonderful - 100% positive. I keep seeing two things that people have written over and over: her shipping is very fast and her items are beautiful. Both of these are important to me, as a buyer. No one wants to purchase something and then wait weeks for it to arrive, especially on sites like Etsy where you really don't know the person you're dealing with. If it takes more than a week and a half for me to receive an order or a tracking number... something from the seller, I start getting nervous. Did I just send money to someone who isn't going to send me my item??? Then there's the disappointment you sometimes have when an item that looked absolutely gorgeous on the computer screen ends up being something I could have made with Little Guy and had it turn out better. You just never know and there's a level of trust that you must put into the shop owner. From the looks of the feedback, Amore Vivo has surprised clients in the opposite direction! Just check out some of these feedback excerpts:
"Even prettier in person!"
"Fantastic job!"
"So awesome! Even better looking in person!"
"BEAUTIFUL!"
"Wonderful person to deal with. My mother loved the arrangement, and it's so nice to know the evergreens were fresh. I'll never buy from [popular fresh florist] again!"

In addition to Amore Vivo, you can find Michele's work at her other Etsy shop, Amore Bride. I cannot believe the amazing pieces that she's created - from Peacock Feather Bouquets to Hairpieces to Cake Toppers - that are both beautiful and will last. They're all artificial arrangements, although Michele says that the most frequently asked question she receives is: "Are the florals real or fresh?" They look that good!


Disclosure: I will receive one Christmas Centerpiece, as pictures above, for this review. No other form of compensation will be exchanged. All opinions are my own.

Tuesday, September 20, 2011

I Already Ordered My #Christmas Cards! {MixBook}


NEW DISCOUNT!!! 
Good through 9/21/11:

 
So, I'm sure you've been hearing quite a bit about MixBook lately. Well, I'm one to think ahead. I ordered my Christmas cards from them already! Yeah, I know, I know... It's only September, but I like being prepared.

Plus, I was able to get a little creative! MixBook offers customizable products, such as photo books, photo cards, and calendars, where you can choose photos, fonts, borders, embellishments, etc. to suit your own tastes and needs. Their templates are great, but I really wanted to start from scratch and experience the whole thrill of creating my very own cards. Let me tell you - you MUST have some kind of vision of what you want before getting started because the options are endless! I got the chance to review my choice of completely customizable 5x7 flat Mixbook cards from any of the following 10 categories to review:

Wedding Invitations
Bridal Shower Invitations
Save the Date Cards
Wedding Thank You Cards
Birthday Party Invitations
Rehearsal Dinner Invitations
Engagement Party Invitations
Engagement Announcements
Photo Birth Announcements
Christmas Cards
 Here's what I came up with for this year's Christmas cards to family:
| Learn About Mixbook Photo Books | Create your own Photo Book
In addition to being able to order printed items, MixBook also offers free collaborative scrapbooking. What's this? Well, let's say you and your sister, who happens to live 1,000 miles away, want to create a photo book of family memories for your parents' 25th anniversary. You can do it on MixBook! You can invite as many people to become editors of the project as you'd like. They can upload photos and help choose creative elements. If you've ever attempted to create a photo book, you know how much work can go into a job like this - being able to share the work with someone else is amazing. Plus, if you're giving it as a gift, it can truly be from everyone!

And, if you're interested in getting started on holiday gifts and/or cards early (trust me - it's better to start early. It'll be one less thing to remember!), go over to the Mixbook Facebook page and become a fan and also follow Mixbook on Twitter. Through these two social media sites, you'll find tons of great discounts and be kept up-to-date on any new creative elements and products they add to their site. (I just saw that new Facebook fans can get anywhere from $10 to $15 off their orders just by liking them!) Oh, and Mixbook also has a blog! There, you'll find the occasional discount code (there's one right now for 25% off your order!) and helpful tips and tricks to make your experience of creating lasting photo memories even easier.


Yeah, but are they a green company???
Short answer: YEP!


But you know I can't just leave it there - I need to write and write and write!  I couldn't find much information about whether the company is eco-friendly or not. So I emailed Sara, one of the company's Customer Service Representatives (they also have Live Chat for help!) asking about this. Here's her answer to me:
"...our paper products all are processed from sustainable resources, and our Premium Silk card stock does contain 10% recycled paper products. The toner used for book text printing and calendars is non-toxic, and all our photo books and products are manufactured with 100% wind energy. Paper used for the book text is FSC certified and produced with wind power. Our hardcover board is FSC recycled and made of 100% recovered paper."
Well, there you have it! I really love that the paper comes from sustainable resources. Many times, I am told what percentage of the products are made from recycled materials, but I often wonder where the other percentage is coming from! Oh, and the wind power is just wonderful. I love seeing that more and more companies are opting to shell out a few bucks up front in order to create a more green product (and they have the foresight to know that they'll end up saving a bundle in utilities costs later!)
photo books

(Oh, and one more thing! I want to let you know that I had a small problem placing my order. Even thought their system requires you include payment information (credit card) to order, I cannot do that - I don't have credit cards! The customer service representative got with me almost immediately and had my review product shipped out right away. Now that's what I call customer service!)

I received one or more of the products mentioned above for free using Tomoson.com. Regardless, I only recommend products or services I use personally and believe will be good for my readers.

Monday, August 15, 2011

Add A Special Touch to Your Children's Homemade Gifts & More! {AmyAdele.com}


We are constantly working on one project or another. On those days when I just don't have the "umph" in me to actively participate in one of the projects, or when Little Guy is in a "I do myself! Mommy no helping me!!!" kind of mood, I hand over some glue and a variety of stuff from our crafts box(es), set him up in his high chair, and put a piece of paper down in front of him. While I lazily sip my coffee and leaf through a magazine, he goes nuts.
:
TIP: Wash out a paint applicator (like those you get glitter paints in) and save it for gluing time. Lots less wasted glue and it's easier for little hands to squeeze the glue right where they want it!
For a while, I ended up with a pile of "glue project" pieces of art. What the heck do you do with them??? I couldn't throw them away. Little Guy puts so much concentration and time into them, and he's so very proud of each one, that I just can't. Our walls are already covered with all kids of kids' art, so there's really no more room there.
I found the perfect solution: Grandmas!!!
Yep - we pop artwork into envelopes once or twice a month and take a little walk down to the post office. It gets the artwork to someone who will appreciate it. Little Guy loves getting "thank you" calls from his grandmas and he especially enjoys all of the praise (this kid's ego is not something I worry about!) 

One problem we've had with this is Little Guy's inability to sign his name. He sees his brother's signature on the drawings that he adds to our envelopes and wants to be able to do the same. I tried just letting him "sign" his work, but he can see that what he's doing has nothing to do with writing words. If I attempt to sign his name for him, he just loses it (right back to the "I do it myself!" thing.) When I saw AmyAdele.com's fun labels and stickers, I knew we had to have some. 
Little Guy loves stickers and when I told him that these were special stickers that he could use to "sign his name" with, he was all for it. We made it serious business, the oldest and I, when we showed him where his "signature" should go. My oldest pulled out some of his drawings and showed him how he always signed at the bottom, away from the drawing so nothing would get covered up. Now he's a happy camper and even prouder that HE has a signature on his artwork, just like "Brubber".
You really should consider getting some of these labels if your kids like to mail out pictures to friends or relatives or, as in out situation, they really want a special way to show that "I made this!" I chose the Arts & Crafts Label for Little Guy's projects. Check it out:

In fact, there are a ton of products that you can buy with the Arts and Crafts Design. I'd love to have a crafting birthday party for Little Guy's 3rd birthday in November. I could get some of AmyAdele.com's Arts and Crafts Invitations completely personalized with what I want to say. Maybe I could get Little Guy his own Arts and Crafts T-shirt with something like "Happy 3rd Birthday!" on it? Oh, and I wouldn't want to forget to include an Arts and Crafts Photo Invitation. Since you can personalize anything to say whatever you want, I'd love to use a photo of Little Guy at his party and use the personalization to turn it into a "thank you" note.


Now, there are a ton of places where you can buy personalized stationery, invitations, labels & stickers, calling cards, announcements, cards, and children's clothing. But I choose AmyAdele.com because of the eco-friendly steps the company when creating and shipping their products. First of all, the items from AmyAdele.com are printed on 100% post-consumer recycled paper - that's ONE HUNDRED PERCENT. I've seen other companies boast of using post-consumer recycled paper, but if you look into it, you'll often find that the percentages are pretty low - usually around 10% to 25%. 


 So, the next time that you are looking for labels, invitations, stationery, T-shirts, announcements.... anything like this, go check out AmyAdele.com first. Amy's artwork makes these items extra-special and the prices won't gouge your pocketbook!

I received one or more of the products mentioned above for free using Tomoson.com. Regardless, I only recommend products or services I use personally and believe will be good for my readers.