
Showing posts with label creative. Show all posts
Showing posts with label creative. Show all posts
Friday, February 24, 2012
Crafting With Little Ones {Re-Post}
This is one of my all-time favorite posts and it was written well before I had many readers. I'd like to share it with you again because I think that the message is important if you want to foster a love of creativity in your children from a young age: It's not the outcome that matters; the process is most important.


Wednesday, February 22, 2012
AWOL?
I'm sorry that I haven't been writing much at all lately. I finally have my shop up on Etsy, now I'm working hard to get some items made, photographed, and descriptions written. I should be up and running by next Wednesday. That's may goal, anyway. February 29th, Leap Day, is our anniversary. I figured I'd like to make that my shop's Grand Opening day, too.
Saturday, January 21, 2012
Storee Wryter Gets A Dog {Children's Book}
I was so happy to have the opportunity to review Storee Wryter Gets a Dog by Barbara Simpson Carducci. When I read the synopsis on the book's Web page, I just knew it would be a great book for my oldest to read to Little Guy. They've made it a habit to read books together when my oldest gets home from school every day. Here's what the page says about the story:
This book has so many different components that appeal to a wide range of young readers. Little Guy's favorite character was Critique, Storee's cat. This cat has such a large personality and is always entertaining. My oldest, who has always wanted a dog, said that he learned quite a few good way to train his puppy, "... if I ever get one." <Insert sad face here.>
For children with intense imaginations, I think this book will be a blessing. It will show them how their stories don't have to stay in their heads - they can be written down and possibly even published one day! I know that, as a kid, I had one of those imaginations. I never knew that my stories were worth anything - I thought they were just silly daydreams that only caused me to get in trouble for not paying attention in school. Had anyone shown me how to write my ideas down, I think I may have been a much happier and confident child. Storee Wryter is constantly on the lookout for writing ideas and, when she gets one, readers aren't just told that she writes it down. They learn the actual process of writing, just by reading the book. And, I ask you, what better way to learn than by simply enjoying a good book?
At the end of the book, there are two writing prompts so readers can give their writing abilities a try. These aren't the typical prompts that I see all too often and leave children struggling. I'm sure you've come across these, too: "Imagine you're a tree. What would you do?" GEEZ! How many of you could come up with a paragraph, or even a sentence, on the fly? No, these prompts are wonderful. They ask many questions and spark ideas. They give many paths for the writer to choose from and encourage the children with, "Use your imagination and start writing!"
And, if your child wants more prompts, you can head to Storee Wryter - A Blog For Young Writers every Thursday for a new prompt every week! I've already started using these prompts with both of my kids. Little Guy is too young to write, so my oldest gets paper and a pencil and he and Little Guy come up with a story together, based on the week's prompt. I absolutely LOVE hearing them working together. Often, I'll hear my oldest say something like, "You can't just decide the snake can fly!" And Little Guy will inevitably respond with, "Uh-huh! Mommy say stories are head pictures ["pictures in my head"]. My head sees snake fly!" How can you argue with that??? After dinner, my oldest will often draw a picture for little Guy to color in while I wash the dishes, then they'll read the story to me. And Little Guy almost always adds new parts to the story, driving my oldest nuts.
I am so happy that the kids are working together on such a great venture. And, I think that Barbara Simpson Carducci, the book's author, would be happy to know that her prompts have had such an impact on my family. I'm pretty sure she would because in addition to being an author, she is also the Executive Director for the Young Voices Foundation. This is a 501 (c) 3 Educational nonprofit that holds contests for young writers. From what I understand, the Foundation runs writing contests for children in kindergarten through 12th grade, where the writers can win cash prizes for their stories, poetry, and other pieces. Right now, my oldest (a wonderful verbal storyteller who hates school writing assignments) is working on his own story for their Young Voices of America Write Now! contest. He's got the incentive and motivation to put his story onto paper.
So , if you are looking for a book that is both appealing and will encourage your child to write more, this is it! This book would also make a great addition to an elementary school or classroom library. You can purchase an autographed copy of Storee Wryter Gets a Dog directly from the publisher. You can find unsigned copies from Amazon.com and Barnes & Noble. AND, you can also purchase this book for both Kindle and Nook!
***Disclosure: I received a paperback copy of Storee Wryter Gets a Dog for the purpose of this review. I will receive no other form of compensation. All opinions are my own.
"Do you like to write? Are you always scribbling away in a journal or diary? Are you looking for inspiration for your next big story? If so, Storee Wryter Gets a Dog by Barbara Simpson Carducci is just for you! Storee Wryter is a young girl who loves to read and loves to write. Just like you, she hopes to see her stories get published someday.Storee’s ideas for her writing often come from her many adventures. And when her friend, Kyria, talks her into getting a new puppy, Storee gets some great ideas for her next book while she and her cat, Critique, have fun watching her puppy learn to become a trained therapy dog.Join Storee as she learns to train her puppy to be helpful and soothing. Watch as Storee visits a classroom of special needs children, using her dog to reach out. And have fun with Storee as she gains new experiences certain to help her create her next bestseller! But most important of all, find inspiration for your next masterpiece as you read Storee Wryter Gets a Dog."

This book has so many different components that appeal to a wide range of young readers. Little Guy's favorite character was Critique, Storee's cat. This cat has such a large personality and is always entertaining. My oldest, who has always wanted a dog, said that he learned quite a few good way to train his puppy, "... if I ever get one." <Insert sad face here.>
For children with intense imaginations, I think this book will be a blessing. It will show them how their stories don't have to stay in their heads - they can be written down and possibly even published one day! I know that, as a kid, I had one of those imaginations. I never knew that my stories were worth anything - I thought they were just silly daydreams that only caused me to get in trouble for not paying attention in school. Had anyone shown me how to write my ideas down, I think I may have been a much happier and confident child. Storee Wryter is constantly on the lookout for writing ideas and, when she gets one, readers aren't just told that she writes it down. They learn the actual process of writing, just by reading the book. And, I ask you, what better way to learn than by simply enjoying a good book?
At the end of the book, there are two writing prompts so readers can give their writing abilities a try. These aren't the typical prompts that I see all too often and leave children struggling. I'm sure you've come across these, too: "Imagine you're a tree. What would you do?" GEEZ! How many of you could come up with a paragraph, or even a sentence, on the fly? No, these prompts are wonderful. They ask many questions and spark ideas. They give many paths for the writer to choose from and encourage the children with, "Use your imagination and start writing!"
And, if your child wants more prompts, you can head to Storee Wryter - A Blog For Young Writers every Thursday for a new prompt every week! I've already started using these prompts with both of my kids. Little Guy is too young to write, so my oldest gets paper and a pencil and he and Little Guy come up with a story together, based on the week's prompt. I absolutely LOVE hearing them working together. Often, I'll hear my oldest say something like, "You can't just decide the snake can fly!" And Little Guy will inevitably respond with, "Uh-huh! Mommy say stories are head pictures ["pictures in my head"]. My head sees snake fly!" How can you argue with that??? After dinner, my oldest will often draw a picture for little Guy to color in while I wash the dishes, then they'll read the story to me. And Little Guy almost always adds new parts to the story, driving my oldest nuts.
I am so happy that the kids are working together on such a great venture. And, I think that Barbara Simpson Carducci, the book's author, would be happy to know that her prompts have had such an impact on my family. I'm pretty sure she would because in addition to being an author, she is also the Executive Director for the Young Voices Foundation. This is a 501 (c) 3 Educational nonprofit that holds contests for young writers. From what I understand, the Foundation runs writing contests for children in kindergarten through 12th grade, where the writers can win cash prizes for their stories, poetry, and other pieces. Right now, my oldest (a wonderful verbal storyteller who hates school writing assignments) is working on his own story for their Young Voices of America Write Now! contest. He's got the incentive and motivation to put his story onto paper.
So , if you are looking for a book that is both appealing and will encourage your child to write more, this is it! This book would also make a great addition to an elementary school or classroom library. You can purchase an autographed copy of Storee Wryter Gets a Dog directly from the publisher. You can find unsigned copies from Amazon.com and Barnes & Noble. AND, you can also purchase this book for both Kindle and Nook!
***Disclosure: I received a paperback copy of Storee Wryter Gets a Dog for the purpose of this review. I will receive no other form of compensation. All opinions are my own.
Thursday, January 19, 2012
Reuse Last Year's Planners and Calendars!
What do you do with your old planners, schedule books, and calendars? I have one wall calendar, hanging by my desk, where I write down all of our plans and milestones. I save that one in a file box. It's kind of like a record of all of the things we did that year. I also have a planner that I use to keep track of blog posts and gardening (like when I planted the peas and when I picked the first tomato.) My husband has a day planner that he keeps all of his scheduled doctor's appointments in. And my oldest, of course, has a student planner that he is supposed to use to keep all of his assignments straight in - he doesn't use it very often... We also receive a few free promo planners in the mail that I usually give to Little Guy to write his "lists" of things to do in - just like Mommy, Daddy, and Brubber do.
At the end of the year, we find that we have these planners and calenders just sitting here. We don't want to throw them out, but what good are they? I'll tell you! You can use them as idea books.
 As I was cleaning out my very messy corner of craft supplies, I found the stack of magazines and catalogs that I've been hoarding. Each one had at least one great idea that I wanted to use - a kids' craft, recipe, or DIY project. I really didn't have anywhere to put all of these magazines and, heck, I didn't even know which idea I was saving each book for just by looking at the cover. So, Little Guy and I went through each one and cut out all of the good ideas that we wanted to make someday.
Most of the time, I could just cut out a photo from the magazine or catalog and that would be enough. I don't really like following step-by-step instructions for things that are creative. Instructions make me feel as if I'm doing it wrong if I veer from the "rules" that have been set down. Plus, I tend to read the "Supplies Needed" list and, if I don't have one, I'll skip the project until I do have everything. By just having a photo of what I want to make, I can use my own imagination to figure out how to go about creating the item and which supplies we can use.
 So, we spent a couple of afternoons just flipping through those magazines and catalogs, cutting out pictures of things that looked like fun. Now we had a pile of clippings. How was I going to keep them in some kind of order without losing them? As I pondered, hubby came through with his old planner and asked if he could throw it away (See how I have him asking about throwing things out? He's learned not to toss anything into the trash can before asking if I need it for something. Even banana peels are saved here - they add LOTS of potassium to the garden soil!) His asking me at that particular time was perfect - I could use the planner for the clippings!
 I arranged the clippings into piles for each month - snowy/winter crafts for January, hearts and lovey crafts for February, etc. When he awoke, we got working on our books. His job was to put a tiny dot of glue onto each cut-out and place it on the planner page for the corresponding month. My job was to hand him the clippings, suggest a good place to glue the clipping (overlap can happen in an instant with an excited little guy!), and help turn the pages of the planner. Now we have our "Idea Book" to look at whenever we're feeling crafty. We can just open it up to the current month and choose from the pictures.
I also used planners for recipes and DIY projects. The recipe book was made from a planner that had an entire page for each day. There are many more pages in that book so I could clip the entire recipe (no, I can't just look at a picture of food and figure it out! LOL) and have room for more. Stew, soups, and other hearty, stick-to-your ribs recipes are glued into the winter months' pages. Quick, warm dinner ideas are in the November and December pages for those days when we're busy with holiday-related activities and there just isn't time for big, complicated dinners. And, of course, I have light, cool dishes in August; and I've got picnic-type recipes stuck to the June and July pages. Birthday cake ideas are now easy to find by turning to the months for everyone's birthdays.
My DIY book is separated by the seasons, rather than months. I simply took a marker and drew a border around each page for each season - blue for winter, green for spring, red for summer (hey, it's hot out!), and orange for fall. The times of year that each project would best be done is where I glued those clippings. So, I have a really neat indoor seed starter idea pasted on a green page. And there is a pretty wind chime made with dried leaves in the orange section. See what I mean?
I have more ideas for making other books:
At the end of the year, we find that we have these planners and calenders just sitting here. We don't want to throw them out, but what good are they? I'll tell you! You can use them as idea books.

Most of the time, I could just cut out a photo from the magazine or catalog and that would be enough. I don't really like following step-by-step instructions for things that are creative. Instructions make me feel as if I'm doing it wrong if I veer from the "rules" that have been set down. Plus, I tend to read the "Supplies Needed" list and, if I don't have one, I'll skip the project until I do have everything. By just having a photo of what I want to make, I can use my own imagination to figure out how to go about creating the item and which supplies we can use.
 So, we spent a couple of afternoons just flipping through those magazines and catalogs, cutting out pictures of things that looked like fun. Now we had a pile of clippings. How was I going to keep them in some kind of order without losing them? As I pondered, hubby came through with his old planner and asked if he could throw it away (See how I have him asking about throwing things out? He's learned not to toss anything into the trash can before asking if I need it for something. Even banana peels are saved here - they add LOTS of potassium to the garden soil!) His asking me at that particular time was perfect - I could use the planner for the clippings!
 I arranged the clippings into piles for each month - snowy/winter crafts for January, hearts and lovey crafts for February, etc. When he awoke, we got working on our books. His job was to put a tiny dot of glue onto each cut-out and place it on the planner page for the corresponding month. My job was to hand him the clippings, suggest a good place to glue the clipping (overlap can happen in an instant with an excited little guy!), and help turn the pages of the planner. Now we have our "Idea Book" to look at whenever we're feeling crafty. We can just open it up to the current month and choose from the pictures.
I also used planners for recipes and DIY projects. The recipe book was made from a planner that had an entire page for each day. There are many more pages in that book so I could clip the entire recipe (no, I can't just look at a picture of food and figure it out! LOL) and have room for more. Stew, soups, and other hearty, stick-to-your ribs recipes are glued into the winter months' pages. Quick, warm dinner ideas are in the November and December pages for those days when we're busy with holiday-related activities and there just isn't time for big, complicated dinners. And, of course, I have light, cool dishes in August; and I've got picnic-type recipes stuck to the June and July pages. Birthday cake ideas are now easy to find by turning to the months for everyone's birthdays.
My DIY book is separated by the seasons, rather than months. I simply took a marker and drew a border around each page for each season - blue for winter, green for spring, red for summer (hey, it's hot out!), and orange for fall. The times of year that each project would best be done is where I glued those clippings. So, I have a really neat indoor seed starter idea pasted on a green page. And there is a pretty wind chime made with dried leaves in the orange section. See what I mean?
I have more ideas for making other books:
- I'm going to start looking for homeschooling ideas next, since Little Guy is getting to the right stage to start more learning activities.
- My oldest keep magazines for drawing ideas that he has seen in them - I think I could persuade him to cut the ideas out and recycle the magazines.
- My husband takes a zillion different medications. He also collects old PDR's. I wonder if I could get him to cut the drug info and photos for each thing he takes and glue them into an old planner? It sure would take up less space than 6 old PDR's (have you seen how big they are?!). Plus, he'd have a little book to take to doctor's appointments, showing exactly what he takes. He could even pencil in the amounts and frequencies of each medication. I know that, if he ever keeled over, I'd have a list of meds to take to the ER with me for easy reference for the ER doctors.
I'd love to hear your ideas of books these used-up
planners and calendars could be re-purposed into.
What kind of clippings would YOU glue into an old planner???
Thursday, January 12, 2012
Moss Terrariums {Crafty Science!}


1) Only take a little from each patch and leave the rest to regenerate.
2) Use a spoon or spatula to carefully lift it from the ground. It's pretty hardy stuff, but you want to make sure to lift the entire plant - including its root system.
3) Don't forget to get some soil from the same area, preferably from directly under where the moss was growing. We found three different types of moss on our outing and each one had a very different type of soil beneath it: One had mostly rocky, sandy soil; one had a soil that was composed mostly of dead grass; a third had very rich soil that was mostly composed of what Little Guy refers to as "worm poops".
4) Take note of how moist the soil below the moss is. You are going to want to try to mimic that amount of moisture in your terrarium.
5) Also be on the lookout for some nice-looking small pebbles and a few sticks or pieces of tree bark that have signs of moss or mushrooms (or, what Little Guy calls "fun guys") on them. We found a stick with some white "moldy" spots on it, a piece of bark from a tree stump with a mushroom, and bark from a dormant tree with green spots. We're excited to find out if anything sprouts from them!


Start by laying down the dirt you collected. Because the cake carrier is near-impossible to open without really jostling whatever is inside, I knew that we wouldn't be able to open it up to add water very often. So, I took a plastic lid that is about 1/4" deep and placed some cotton into it (the white rectangle on the left of Little Guy in the photo). I put this in the center of the cake "plate" before adding dirt. After we got the soil in place, I poked a small hole in the mound above the cotton-filled lid and poured some water into it, as well as all over the rest of the soil. My reasoning for the cotton was so it would hold a layer of moisture without saturating the soil. Don't know if it will matter in the end, or not. Just my theorizing!
(After I took the photo above, I noticed that pieces of dirt and rocks were falling into the area where the dome part of the cake carrier would fit into the bottom. So, I tore up a piece of paper towel into strips and poked them into that area to keep the debris out. You can see the paper towels in the photos below. Keep this in mind while you do the next part!)
So, where was I?! Oh, yeah: add your soil. Make sure to keep track of which soil is added where if you're using different mosses with different soil needs! Pile it up so you have a nice hill if your base is a flat piece like out cake dome has. If you're using a bottle-like container, try using a funnel to direct the different soils to different areas and attempt to get a mound going in there. This is important because, if you ever really look at the lay of the land that your moss is found on, you'll notice that it is usually on an inclined surface, even if it's only slight. Make sure to save some of the soil for later - you're going to need it to fill in spaces between the moss. Once you have your mound of soil, ever so slightly pack it down and moisten it. I just poured a little water onto the cake plate, I used a spray bottle of water for the honey jars.

 Now it's time to add the moss! The pieces we had were rather large chunks, so I showed Little Guy how to gently pull them apart into small pieces. I had him decide where to place it. He loved being in charge of this part of the operation! It took forever for him to decide. He kept putting a piece down, turning it a little... moving it to the left, to the right... Sometimes he completely abandoned a piece in favor of a different one. It was really cool to watch him!
  Once the moss was in place, I carefully added the reserved soils in between the pieces of moss. Then it was time for Little Guy to add the embellishments we collected. Now, I considered grabbing some tiny "guys" toys and a couple of tiny cars to include in the terrarium, but though better of it. Just before I went digging through the toys, I had a very disturbing vision: Little Guy attempting to recover his toys. Dirt everywhere. Terrarium ruined. Now, if your kids are cool with using toys inside, go for it. I think it would be pretty cool to create a scene with them. Just make sure that whatever you add to your terrarium will be able to withstand the high levels of moisture that it will encounter. Also consider whether it might give off any toxic fumes when wet or warm. The cute little plastic bunnies you add could end up killing all of the living things in there.
I think that I probably added too much moisture to our cake dome terrarium. Since opening and closing it just isn't an option, I have a back-up plan. If I notice that the dome is constantly coated in water droplets or the mosses or fungi start dying, I am going to poke small holes in the top of the plastic dome. This can be done very easily without marring the view: Just take a small nail or even a thick sewing needle and hold it with a pair of pliers over fire (a lighter or the burner of a gas stove.) Um... make sure your pliers are insulated or you're wearing an oven mitt! It doesn't have to get red hot, just hot enough to melt the plastic. Then, poke small holes through the dome, toward the top. This should allow enough moisture to escape without completely drying it out.
Our Finished Products:


I have another plastic domed container that has been sitting on top of my refrigerator since last spring. I've known it would be great for some use, but was waiting until I was inspired with an idea to use it. This thing is 18" in diameter! I want to do a similar project with that one. I'm not telling you what it is just yet, so watch for a post. It's going to be a little while, though. I need to have the space for the thing to have a home near a window, so I really need to do some purging of "stuff". One of these days, my husband and oldest will be gone all day. That's the day I call Salvation Army for a pick-up, get out the boxes, and get rid of all of this crap we don't really need! That day is coming soon and I can't wait for it. :)
One more thing: If you like this idea, but don't have the time or desire to make your own terrarium (or if you just don't have a moss supply available to you), you can get there ready-made. One Etsy shop I know of that sells these is 8Days Of Treasures. (You can check out the review I wrote of her shop for the Made in Michigan Blog Hop in October HERE.) Stephanie lives in Michigan and creates some pretty awesome terrariums! She also sells some unique glass containers that you could make your terrarium in, such as vinegar decanters, salt ans pepper shakers, and covered candy dishes.
If you make a terrarium and write about it,
please leave me a link in the comments.
If you have an idea of what could be added to a terrarium
for a cool scene, share it!
If you have pictures of your terrariums,
I'd love for you to post them to my Facebook wall!
This post has been linked at:


Wednesday, January 11, 2012
(Trying to Be) Creative with the Camera {Wordless Wednesday}
 |
| Rainbow Sunset |
 |
| Shadows in the Stairwell |
 |
| Pointillism? |
 |
| OK - not "camera-creative", but creative just the same. We made these bookmarks with THIS PIN as inspiration. |
 |
| River of Sticks - These must have been left over from the flooding we had a few months back. The dark area is made up of a 4-inch-thick bed of twigs, dead grass, and seed pods. All of the grass & sticks were pointing in the same direction. Well, either the flooding or miniature aliens... |
Saturday, January 7, 2012
Mindful Parenting Collaboration - Topic 5: Take Care of YOU!
If you’re reading this, you might have the feeling that you want to change some of your parenting practices or, perhaps, you're curious about “mindful parenting” and what it could be. Well, congratulations for taking a moment from your day to click on the link. Erin of it’s OK and I are going to be working together over the next 40 weeks (!) on a journey toward more mindful parenting and would love to have you join us. To learn how we envision The Mindful Parenting Collaboration working, please read the introductory post HERE.

Now, here's a topic that I can't stand to deal with. Yes, I know. This is one of those pieces of advice that everyone gives, yet no one seems to actually take. How in the world am I supposed to find time to do what I want when I have to take care of all of these people and make sure the house is clean, too?! Wanting to do my own thing just feels too... indulgent. Until recently.
You see, I've been becoming increasingly resentful toward my husband and sons. They constantly ask me for things, even expect them to be done, and I don't get much reciprocity in return. Christmas was the breaking point for me. I had so looked forward to the holiday. Planned lots of fun things to do, had high hopes for getting a chance to bake and craft, and wanted this to just be a great time of excitement for the kids. But it was all a struggle. Now, I'm not going to say I took on too much or expected too much from everyone. I asked my husband and oldest to PLEASE take turns hanging out with Little Guy for one hour a day so I could do my own thing, which was essentially to "make" Christmas for them. It worked for about a week, then they were too busy (watching TV, eating, and playing games on the computer) to help. "Why don't you just wait until he's taking a nap?" And the resentment wasn't just aimed at my ungrateful hubby and teen. Little Guy, who loved helping me in the kitchen just a few weeks earlier, decided that he was bored with it all and preferred to run like a heathen through the kitchen, grabbing everything he could reach and throwing down the stairs. So, yes, I was not too keen on his "help", either.
All of this resentment came to a head on New Year's Day. I woke up in a great mood. New year, new outlook, let's start fresh, blah, blah, blah... My oldest woke up and very snottily informed me that we were out of milk, as if it was MY fault and MY sole responsibility to get more. Little Guy, upon hearing of the milk situation, demanded warm milk and honey to drink. The demands became ear-piercing screams because my oldest (who is very lucky I didn't decide that my no-spanking policy was shit) was holding the empty milk jug in Little Guy's face, saying in a cheeky tone, "What's wrong with you? Are you STUPID? There IS no milk! Mom didn't get us any!" That's when hubby came out. "Will you guys keep it down? I can't hear the TV." He decided to go take a shower (which I hadn't gotten a chance to take in a week, by the way, because no one would hang out with Little Guy - he needs to be paid attention to while he's sleeping, too, because he tends to wake up and be very stealthy!)
"SHUT UP! SHUT UP! SHUT UP!
I AM SO GODDAMN SICK AND TIRED OF
YOU PEOPLE BEING HELPLESS IDIOTS.
OLDEST - GO TO THE F***ING STORE AND
BUY SOME F***ING MILK!!!
LITTLE GUY, JUST F***ING DEAL WITH
THE FACT THAT THERE'S NO MILK.
AND, HUBBY, IF EVEN ONE DROP OF WATER
TOUCHES YOUR BODY BEFORE I GET A SHOWER,
YOU'LL REGRET IT FOR THE REST OF YOUR LIFE -
WHICH WILL NOT BE VERY LONG!!!!!"
You could hear a pin drop. They all stared blankly at me. I pointed at my oldest and he RAN into the bedroom to change his clothes for his trip to the store. My husband jumped at the teen's movement and ran to pick up Little Guy. He got him some hot tea to satisfy him until the milk showed up. Little Guy did the best thing of the three of them: He ran over and gave me a big hug and said, "Sorry, Mama." I took my shower and felt 100% better... physically. I apologized to my family and they all looked at the floor guiltily. They "got" why I flipped out.
Now, I told you this because this could happen to you if you do not take time for yourself. You can become burned out, miserable, resentful, and may even begin to wonder if you really want to be "mommy" and "honey" to these people you live with. You slowly forget who you are, what you want out of life, what makes you happy. You're there to please others. Period.
So, this week, I suggest you try to remember who you were before hubby and the kids. What did you expect you'd be doing at your age? What kind of things do you enjoy doing? Do not make a list of things that you need/want to do around the house. It doesn't count. Make a dream list. Next, see if any of those things on your list could be modified to fit into your life right now. I expected to be an artist. While I have neither the money for supplies, nor the time to devote to this, I can take a little time each week to just create... Pinterest, here I come! Next, make yourself a list of realistic things you'd like for yourself. These could be as simple as "Take an hour-long bath." or "Give myself a pedicure." Nothing that takes a huge amount of time or money. Do one each day. Yes - each day.
Love on yourself. If it makes you feel guilty, think of it this way: You want to be a mindful parent, right? In order to be a mindful of others, you need to practice on yourself. I was angry at my family. Looking back to the weeks before my New Year's Day Fireworks, I was not treating my family mindfully. Heck, I was not treating them well at all. I did all the things I was supposed to do, but there was no smile on my face or love in my heart while I was doing them. I fought for every second of time to be able to do those things and, by the time I actually got that time, I was ticked off at my family.
This week, I will make sure to take time for me. Creatively, physically, and emotionally. In fact, I've already started tonight. But, I'll wait until next week to tell you about it!
I'd like to invite you to link any posts you have written on the topic of being mindful of yourself in the linky below. I'd love to hear your ideas and thoughts on this subject. I really need all the help I can get - I do not ever want to feel that way I did about the most important people in the world, nor do I want them to ever witness the explosion from me the way they did first thing in the morning on the first day of 2012!

Get Your Own CODE for This Linky
Wednesday, January 4, 2012
What We Did Last Week {Wordless Wednesday}
 |
| Discovered that art easels can be used as forts! |
 |
| Designed a puzzle. |
 |
| Went for a (very cold) twilight walk. |
 |
| Took lots of naps. |
And...


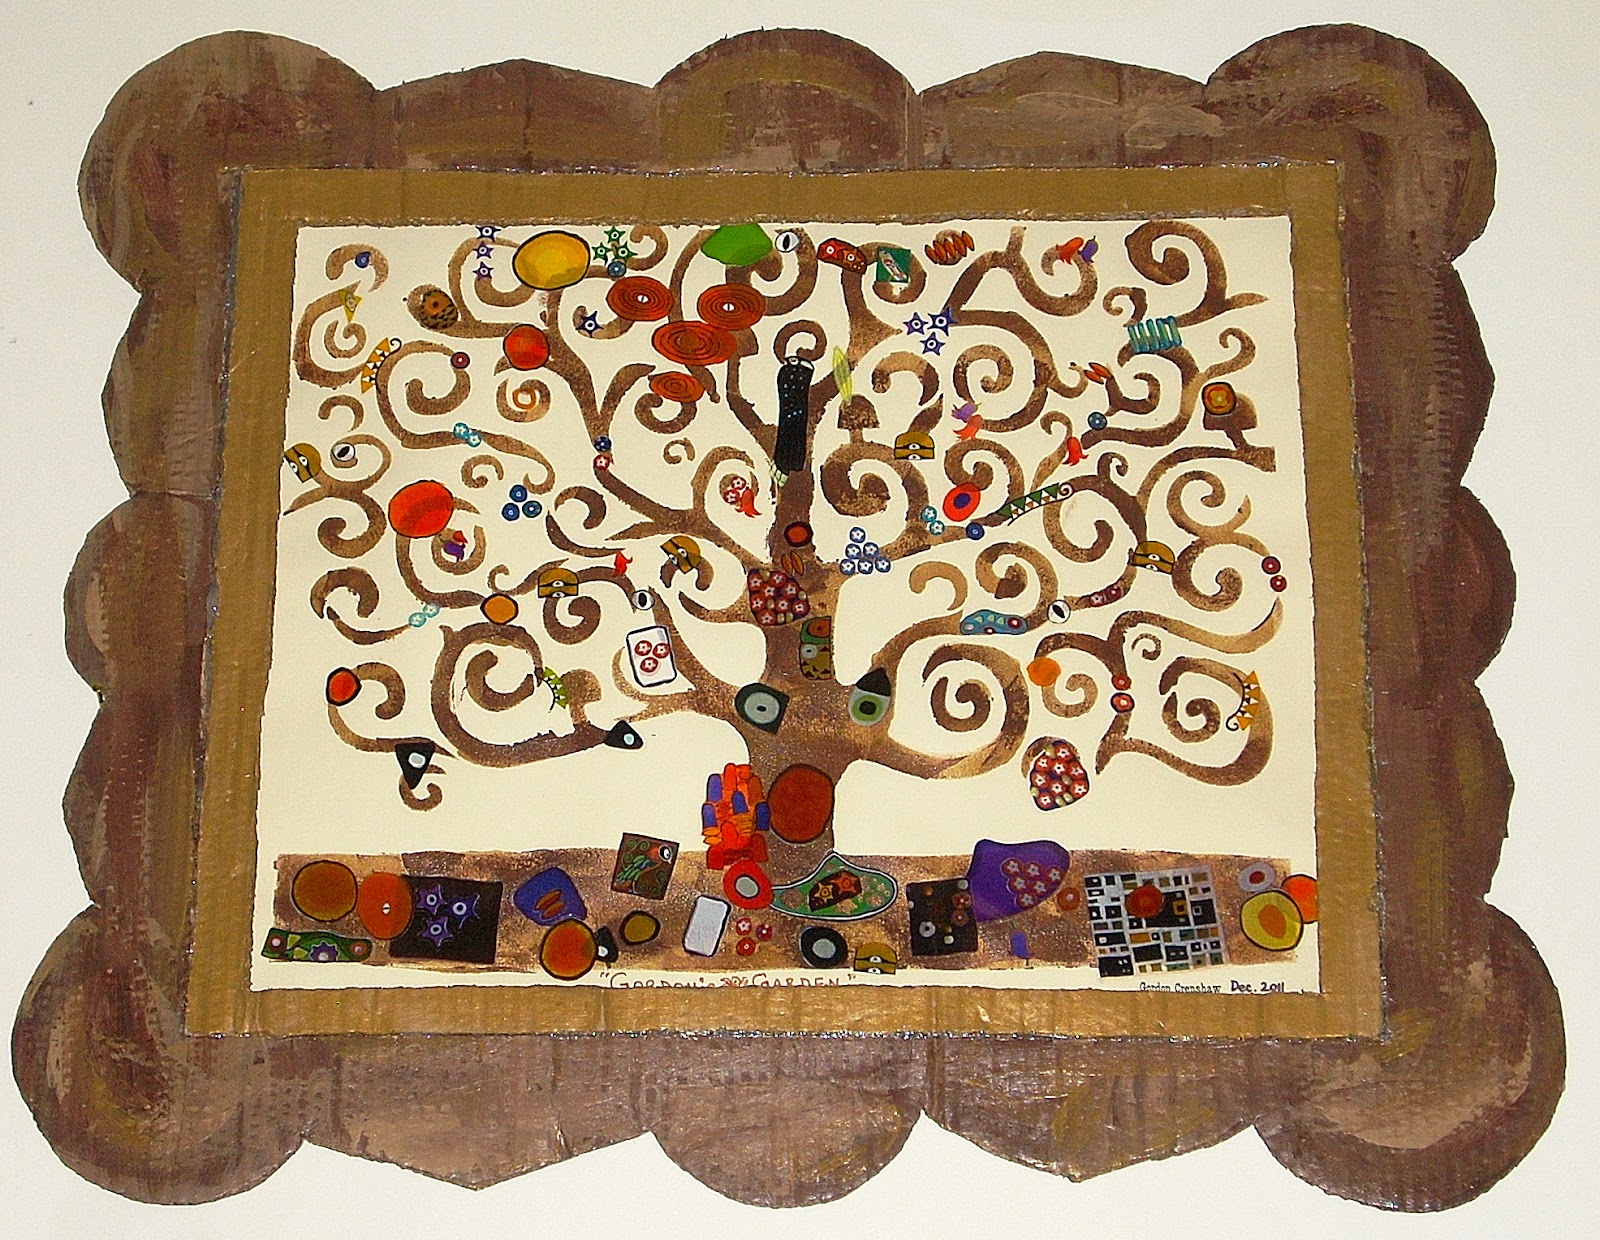
Created a work of art!
(Frame made with cardboard & a few paints. Fancy, huh?)
We received the Master Kitz Gustav Klimt Tree of Life painting kit from a giveaway sponsored by Kidzaw on 2 Boys + 1 Girl = 1 Crazy Mom. (Thank you!)
Monday, January 2, 2012
Mamatography - 366 Pictures in 2012
 I love taking photos, want to learn more about using my digital camera, and keep a journal in pictures for the year. That's why I've decided to join Luschka of Diary of a First Child in her Mamatography 2012 Challenge. I will take a photo each day that kind of reflects what our day was like, whether it's the pile of dirty dishes that I repeatedly walked past (feeling guilty) or a project that the kids and I worked on.
This is a creative challenge, so you can go anywhere with it! Maybe you want to take a photo of your kids next to the same wall every single day to show how they've grown, or perhaps you want to take some risks and attempt to take an artsy photo each day? Whatever floats your boat goes here. And, if you miss a week or two - no problem. Just pick up when you can. You can post just photos, captions, or even little explanatory paragraphs of each picture. (I think this will help me with my major UN-Wordless Wednesday problem!)
I've just learned of this challenge today, so I may not have all of the facts straight yet. But, from what I can understand, there will be a linky posted on Diary of a First Child on Wednesdays to link up. If you're interested in taking part, you can visit THIS POST to learn more and sign up.
Let me know if you plan to join and I'll try to make it to check out your progress every week!
Wednesday, December 21, 2011
Fizzy Bath Bombs {Last-Minute Homemade Gift}
I originally found the recipe for these on About.com - the place to find articles about anything by anyone! This recipe for the Bath Bombs is based on the one posted by David Fisher, so I'd like to thank him for showing me just how easy these are to make. Really, I've been wanting to try them out for a while now, but they always seemed so complicated and as if they needed a ton of ingredients that were expensive and hard to find. Not true on either!
 Now, I scented my bath bombs with lavender essential oil and dried rosemary from my garden, but you can use any number of scent combinations. Check out this tutorial on mixing essential oils to get the right scent on Easy Aromatherapy Recipes. Just remember: If you use herbs instead of the oils, you'll need to use more. Also, remember that once the herbs rehydrate in the tub, their scent will be stronger! I chose Rosemary and Lavender because I just love how the two blend. Also, I had to buy the essential oil for this and I wanted something that I'd use often. And, once again, don't go all out and buy some expensive and fancy rosemary - get the cheap bulk stuff.
There is one ingredient on the list that I was worried about finding: Citric Acid powder. I took a shot in the dark and visited our local health food store, Health Matters in Monroe, MI, and found that Maurine had it AND it wasn't expensive. I only got a 4 oz. bottle, so I had to halve the recipe on About.com and, of course, I changed it up a little. Here's what I ended up with:
Rosemary-Lavender Bath Bombs
Ingredients
Equipment
*Make sure that you either use all glass or metal equipment, or use plastics that you don't need for cooking. The essential oil will permeate the plastic and no amount of washing will help you!... Trust me - I found out the hard way!
I'm so sorry I didn't take pictures. Though, it would have been hard to do with my hands covered in bath bomb stuff! I made these on my own, without Little Guy's help, because I ended up making them at 2am. There are portions of this that he could have helped with, but it was rather powdery and I think I'm glad to have kept him out of this project - I wouldn't have wanted him, at his close level to the counter, to have breathed in all of that dust!
Make sure that you have all of your equipment at hand. This isn't a project where timing is everything, but it keeps things cleaner. I ended up trailing some of the mixture from one end of the kitchen to the other, collecting the things I needed as I went along.
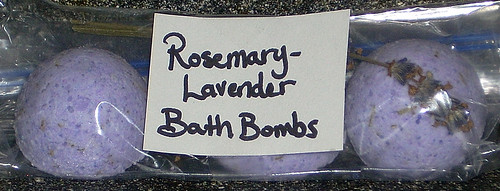
There is one ingredient on the list that I was worried about finding: Citric Acid powder. I took a shot in the dark and visited our local health food store, Health Matters in Monroe, MI, and found that Maurine had it AND it wasn't expensive. I only got a 4 oz. bottle, so I had to halve the recipe on About.com and, of course, I changed it up a little. Here's what I ended up with:
Rosemary-Lavender Bath Bombs
Ingredients
- 1/2 c. Corn starch
- 1/2 c. Citric Acid (4 oz.)
- 1 c. Baking Soda
- 1/2 c. Epsom Salt
- 1 tsp. Water
- 1/2 tsp. Borax
- 1/2 to 1 tsp Lavender Essential Oil
- 1 Tb. Dried Rosemary leaves, broken up into 1/4" or less pieces (I just pinched them in my hand to break them)
- 1 Tb. olive oil
- Colorant, if you want to use it (I used gel food coloring. If you have soap colorant you can use that, too)
Equipment
*Make sure that you either use all glass or metal equipment, or use plastics that you don't need for cooking. The essential oil will permeate the plastic and no amount of washing will help you!... Trust me - I found out the hard way!
- Large glass or metal mixing bowl
- Metal whisk
- Measuring spoons and cups
- Small squirt bottle (I picked up some ketchup and mustard bottles from the housewares section at the end of summer for $0.25. You could use anything that is small, squeezable, and has a top that allows you to control how much comes out.)
- Spoons
- Baking sheet lined with wax paper, foil, or paper towels
- A mold for your bombs. I used the rounded half of a plastic Easter egg. Look around the house - lids, scoops, measuring cups, even a sturdy cardboard tube from the tin foil will work! You just want to make sure the mold is sturdy enough to withstand the pressure you're going to be putting on it by packing the mixture into it and that it is shaped to release the bombs easily.
I'm so sorry I didn't take pictures. Though, it would have been hard to do with my hands covered in bath bomb stuff! I made these on my own, without Little Guy's help, because I ended up making them at 2am. There are portions of this that he could have helped with, but it was rather powdery and I think I'm glad to have kept him out of this project - I wouldn't have wanted him, at his close level to the counter, to have breathed in all of that dust!
Make sure that you have all of your equipment at hand. This isn't a project where timing is everything, but it keeps things cleaner. I ended up trailing some of the mixture from one end of the kitchen to the other, collecting the things I needed as I went along.
- Mix the dry ingredients (*except the Borax) together with the whisk, or use a sifter: Cornstarch, Citric acid, Baking soda, Salt, and dried herbs. This is where I made the dusty powder bomb in my kitchen. Make sure you have food and clean dishes put away!
- In the squirt bottle, mix the wet ingredients and Borax: Water, essential oil, olive oil. Just put them all in and shake it up! This is where I added my food coloring, too. Remember to not over-do the coloring! The bombs will darken as they dry.
- Put your whisk in one hand and the squirt bottle in the other and get ready - this is where you have to make sure you went potty, the kids are going to be quiet for at least five minutes, and the answering machine is on. Just FIVE MINUTES! Squirt a tiny drop of the oil concoction into the middle of the dry stuff and wait a couple of seconds. See how it fizzes up? You don't want that to happen as you're mixing the wet and dry ingredients together, so make sure you keep stirring with that whisk. I don't know the scientific explanation as to why the stirring prevents the fizzing, it just does. So, as you drizzle the wet ingredients into the bowl, whisk like crazy. You may want to stop drizzling once in a while to make sure that it's all mixed in before adding more.
- You want to check every once in a while to see if you have enough wet mixed in - depending on your ingredients, you may need less wet than you mixed up. Grab a small handful of the mixture and squeeze it hard. Open your hand and gently poke the mass. If it flakes up any, crumble it back into the bowl and keep adding the wet ingredients. If it doesn't - stop and go on to step 6. If you run out of wet stuff, go to step 5. (Check the picture that David Fisher was so kind to include in his instructions here.)
- If you need more wet, just put 1 TB of water into your squirt bottle. I added a little more food coloring here, too, because I wanted a darker color. Shake it up really well to get some of the leftover oils mixed in and keep squirting, mixing, and checking to see if you have enough wet in there. DO NOT USE TOO MUCH WET! I have no idea how to fix this!
- Now you're ready to mold your bath bombs! Get your mold and fill it up with the mixture. Press it in there as tightly as you possible can. This took everything I had to do - I have arthritis in my wrists and fingers. It's important to get it packed well, or they'll end up falling apart as they dry (if they do, just crumble them up, put it in a jar with a nice bow on top and call it Fizzy Bath Salts!)
- If you're using a tube to mold them, set it directly on top of the lined baking sheet. Put some of the mixture into the tube, then use something to batter it down. I used a spice jar lid that fit perfectly inside the tube. kind of like a piston, and then used a long wooden spoon handle to pound it down. It worked great, but I didn't care for the giant pill-shaped bombs, so I scraped them and used the 1/2 egg mold. Once you have it packed well, just slowly lift the tube straight up. If it sticks, you can tap the sides of the tube and use the lid/spoon to press it out as you lift.
- Unmolding can be tough. You must have patience because you can't just plop them out unless your mold will allow it.I just repeatedly tapped and shook the mold against my hand until the bomb came out. There were times when I'd nearly given up - it was getting really late! - but then the bomb would pop into my hand.
- Set the bombs on the baking sheet into your oven or other safe place to dry. Mine were dry in 12 hours, but I let them sit for about a day and a half just to make sure they were dry all the way through. When they were dry, they were rock hard and not at all fragile!
- I packed three bombs into each bag, added a sprig or two of dried lavender for pretties, and was done!
- Split the dry mixture into two separate bowls, mix the wet ingredients into two separate bottles, and add different colors. When molding, create stripes or swirls of the two colors.
- Wrap each bomb in plastic wrap and tie with a ribbon.
- Put the bombs into wide-mouthed Mason jars with a pretty ribbon tied around the top.
- Pack the bombs into a "spa gift basket" with herbal tea, raw honey, a pretty mug, handmade soap, a scrubby or pretty washcloth...
Monday, December 12, 2011
Transform Your Bread Dough into Something Gooey! {Recipe... Kinda}
Yesterday, I made beef stew in the crock pot. Once the smell of the stew drifted into the front room and into my nostrils, I started daydreaming about eating it. In this daydream, I wasn't just eating that stew. It was accompanied by some very gooey cheesy bread and followed up with even gooier apple cinnamon bread. So, I tried to figure out how to move this vision from my mind to my plate. I could have made a pizza dough for the cheesy bread and a sweet dough for the cinnamon apple bread, but that means LOTS of measuring and even more dishes. So, I decided to make one of my rather bland bread recipes, split it in half, and sweeten up one part and add salt and herbs to the other.
Here's the base dough recipe that I used:
From here to the end of this post, I don't have any real measurements. I just guessed. I know that I should have added a little more salt to the cheesy bread and apples to the apple cinnamon bread.
 Split risen dough in half. Set one half of the dough onto a lightly floured surface. Sprinkle about 1 tsp. oregano, 1 1/2 tsp. basil, 1/2 tsp. Kosher salt, 1/2 tsp. rosemary, and 1/4 to 1/2 tsp. powdered garlic on the dough. Fold the dough over the herbs and start kneading. Knead for about 5 minutes, until all of the ingredients are mixed in pretty evenly.
Roll dough to about 1/2" thick. I actually just rolled it to roughly the size of my baking sheet! Place the rolled dough onto a lightly greased baking sheet (I admit it: I use Pam.) You can also skip greasing the sheet by sprinkling some corn meal onto the baking sheet. Put the dough somewhere warm for about 45 minutes to rise.
Heat the oven to 375 degrees. As the oven's heating, sprinkle cheese and any toppings you'd like over the dough. For this one, I used sharp cheddar, a little more garlic powder, and some cut-up pieces of salami that I found in the refrigerator drawer. Then, I cut a few chunks of mozzarella cheese and distributed them all over. Drizzle the whole thing lightly with olive oil or a little melted butter. Bake for about 15 minutes, checking after 10 minutes. You'll know it's done when the top is all bubbly and gooey-looking! Let cool for about 10 minutes before attempting to cut or the cheese will just melt back together. This is really good dipped in beef stew, ranch dressing, and leftover spaghetti sauce!
 As with the cheesy bread, place the dough on a lightly floured surface. Sprinkle the dough with 1 - 2 Tbsp. sugar and 1 tsp. cinnamon. Knead until the ingredients are distributed. Roll to about 1/2" thick and transfer to a greased baking sheet (you can use corn meal for this one, too, if you prefer.) Let rise for 45 minutes.
Brush the dough with melted butter. Peel and cut 2-3 apples, depending on the size, (tart ones like Granny Smith or Rome are best) into 1/8" thick slices. Distribute apples onto dough evenly. Sprinkle with 1 - 2 tsp. cinnamon and 1/2 tsp. ground cloves. You can add any other spices you like, such as nutmeg or allspice. Sprinkle about 1/2c. UN-packed brown sugar (light or dark) over the apples. Then, drizzle a little honey over that. Finally, melt 2 Tb. unsalted butter and drizzle that over the apples. Bake in 375 degree F oven for 15 - 20 minutes, until brown and bubbly.
While the bread is cooling, mix 2 Tb. melted butter, 1/2 c. powdered sugar, and 1 - 2 Tb. milk, half-and-half, or heavy cream in a small bowl. Drizzle over apples, then let cool for about 15 minutes before cutting.
Here's the base dough recipe that I used:
- 3 Tb. Warm water
- 2 1/4 Tb. Yeast (one packet)
- 1 c. Milk
- 5 Tb. Unsalted butter (cut into small pieces)
- 3 Tb. Sugar
- 1 tsp. Kosher salt (if you don't have it, use just 1/2 tsp. table salt)
- 1 Lg. egg
- 2 c. + 1 1/2 c. All-purpose flour
- Measure warm water (105 degrees F) into your mixing bowl. Sprinkle yeast onto the water and set aside.
- Mix milk, butter, sugar, and salt in a small saucepan. Heat on medium low, stirring, just until butter has nearly melted. Let cool to warm (105 degrees F.) I have a kitchen thermometer that I just pop into the pan. Every couple of minutes, I'll stir the milk to help it cool and then check the temperature. It's not necessary, though. Just poke your finger into the milk once in a while. It should just barely feel warm. Do not try to rush this - yeast dies at high temperatures. In fact, it's better if you use it too cool than too hot. If it's cold, it'll just take a little longer for the dough to rise - no harm done!
- Once it's cooled, lightly beat the egg into the milk mixture.
- Add the milk to the yeast and mix.
- Add the first 2 c. of lour to the yeast/milk mixture and stir well. Slowly, about 1/2 c. at a time, add the remaining 1 1/2 c. flour, stirring after every addition.
- When the dough comes together, don't mess up your counter! I knead the dough right in the mixing bowl for about 5 minutes. You can stop kneading it when it no longer sticks to everything and is stretchy.
- Oil a second bowl with vegetable oil (about 1 - 2 Tbsp.), you can use just about any oil, just remember that the flavor may transfer to the bread! Place dough into bowl and flip it around until it's coated in oil. Put a piece of wax paper or plastic wrap over the bowl, then cover with a kitchen towel.
- Find a warm place and set the bowl there. Let the dough rise until double, about 1 - 1 1/2 hours. *You can also put the dough into the fridge overnight. It'll still rise, it'll just take much longer. You'll need to pull it out of the refrigerator about 1/2 hour or so before making the breads.
From here to the end of this post, I don't have any real measurements. I just guessed. I know that I should have added a little more salt to the cheesy bread and apples to the apple cinnamon bread.
Gooey Cheesy Bread

Roll dough to about 1/2" thick. I actually just rolled it to roughly the size of my baking sheet! Place the rolled dough onto a lightly greased baking sheet (I admit it: I use Pam.) You can also skip greasing the sheet by sprinkling some corn meal onto the baking sheet. Put the dough somewhere warm for about 45 minutes to rise.
Heat the oven to 375 degrees. As the oven's heating, sprinkle cheese and any toppings you'd like over the dough. For this one, I used sharp cheddar, a little more garlic powder, and some cut-up pieces of salami that I found in the refrigerator drawer. Then, I cut a few chunks of mozzarella cheese and distributed them all over. Drizzle the whole thing lightly with olive oil or a little melted butter. Bake for about 15 minutes, checking after 10 minutes. You'll know it's done when the top is all bubbly and gooey-looking! Let cool for about 10 minutes before attempting to cut or the cheese will just melt back together. This is really good dipped in beef stew, ranch dressing, and leftover spaghetti sauce!
Cinnamon Apple Bread

Brush the dough with melted butter. Peel and cut 2-3 apples, depending on the size, (tart ones like Granny Smith or Rome are best) into 1/8" thick slices. Distribute apples onto dough evenly. Sprinkle with 1 - 2 tsp. cinnamon and 1/2 tsp. ground cloves. You can add any other spices you like, such as nutmeg or allspice. Sprinkle about 1/2c. UN-packed brown sugar (light or dark) over the apples. Then, drizzle a little honey over that. Finally, melt 2 Tb. unsalted butter and drizzle that over the apples. Bake in 375 degree F oven for 15 - 20 minutes, until brown and bubbly.
While the bread is cooling, mix 2 Tb. melted butter, 1/2 c. powdered sugar, and 1 - 2 Tb. milk, half-and-half, or heavy cream in a small bowl. Drizzle over apples, then let cool for about 15 minutes before cutting.
Do you have any suggestions for toppings for these breads?
It was so easy to do and my family loved them so much that I know I'll be doing it again... often.
I'm thinking that a spinach/artichoke/Parmesan cheesy bread might be good.
And I'm trying to figure out how I'd do a pumpkin version of the sweet bread.
Sunday, December 11, 2011
Making Really Cool Paper Snowflakes {Craft}
 |
| Our "Christmas Tree" is slowly getting decorated! |

There are a few things that are important to know before you start making your snowflakes:
- Consider the thickness of your paper. I used construction and my hands have been angry with me ever since. If we do this again, I'll use newsprint or magazine pages!
- Have some very sharp scissors. I had to trim rough edges from my snowflakes. This took forever and made a huge mess.
- Cut the small bits first, then the bigger sections. This way, you have more paper to hold on to.
- If your kids want to help, but aren't really great at using scissors yet, do the cutting part on your own. Have the kids decorate the paper with crayons, paints, pr markers before you fold and cut and/or have them decorate the finished snowflakes with glitter.
- Try to line up the edges as you're folding as closely as possible to avoid lop-sided snowflakes. My Nutcracker one is completely missing a guy because of mis-folding. And make creases in the paper after each fold to keep it all together better.
 1) Start with a square of paper. If you only have rectangles, HERE is how to make squares.
2) Fold the square in half, corner-to-corner.
 3) Fold in half again.
  4) The tricky part! You need to fold the side that has two creases so that it looks like this:
 5) Then, fold the other side of the triangle over. The more lined up all of the edges are, the more perfect the snowflake will turn out.
 6) When I (finally) got the paper folded just right - construction paper is TOUGH! - I drew lines where the creases were and used that one as a template for folding the rest. It made life MUCH easier.
Time to Cut!
After I did a few of the book's patterns, I learned how the patterns were created. There were just a few rules to follow:
1) Make sure that there are plenty of places on both sides of the pattern that will keep the edges of the pattern intact.
2) Try as hard as you can NOT to make a pattern that has a space in the center that you must cut out. You'll see in the pattern that I created below that I made this mistake.
3) Try to keep the size of the shapes you're cutting large. Not only does it make cutting easier; it also makes sure that the cut will show if you happened to fold the paper a little off.
4) Use an iron set to the lowest heat to flatten out your snowflakes. I put a piece of construction paper over the snowflakes before ironing so I wouldn't accidentally catch an edge on the iron and tear the paper.
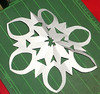

I made my own pattern!
My oldest is a collector of Nutcrackers, so I was thrilled to find a pattern in the book. But there wasn't anything for Little Guy, so I decided to try making my own. I think it turned out pretty well:

I had to use an Xacto knife to repeatedly cut, cut, cut through the paper (including the curve of the wheels!) because my scissors just couldn't get in there without tearing the paper up.
In addition to making snowflakes, we also talked about snowflakes. I checked out another book that was filled with close-ups of snowflakes. We learned that there are different shapes for different types of weather (the colder it is when it snows, the more perfect the flakes are.) We counted the points, talked about hexagons, and talked about how snow if just frozen rain.
Have you made snowflakes yet? Did you manage to come up with your own unique pattern? Any tips and tricks you'd like to share. I imagine that we'll be making more snowflakes. It's a quick and easy project we can do with very little prep!
Pin It
Subscribe to:
Posts (Atom)


